Order your hats HERE in time for Holiday delivery
We have wanted to do a hat project, or two, for well over a year now. The search for vendors, sample sourcing and all the fun that goes with is started a few months before last spring's Seattle bike expo. In fact the embroidered patch project was, in part, a baby step towards trucker hats. The reality is, that I am really picky about hats, let alone ones that will represent out company. More samples than I can count came out of the box, went on for a few minutes, and were on their way to Good Will.
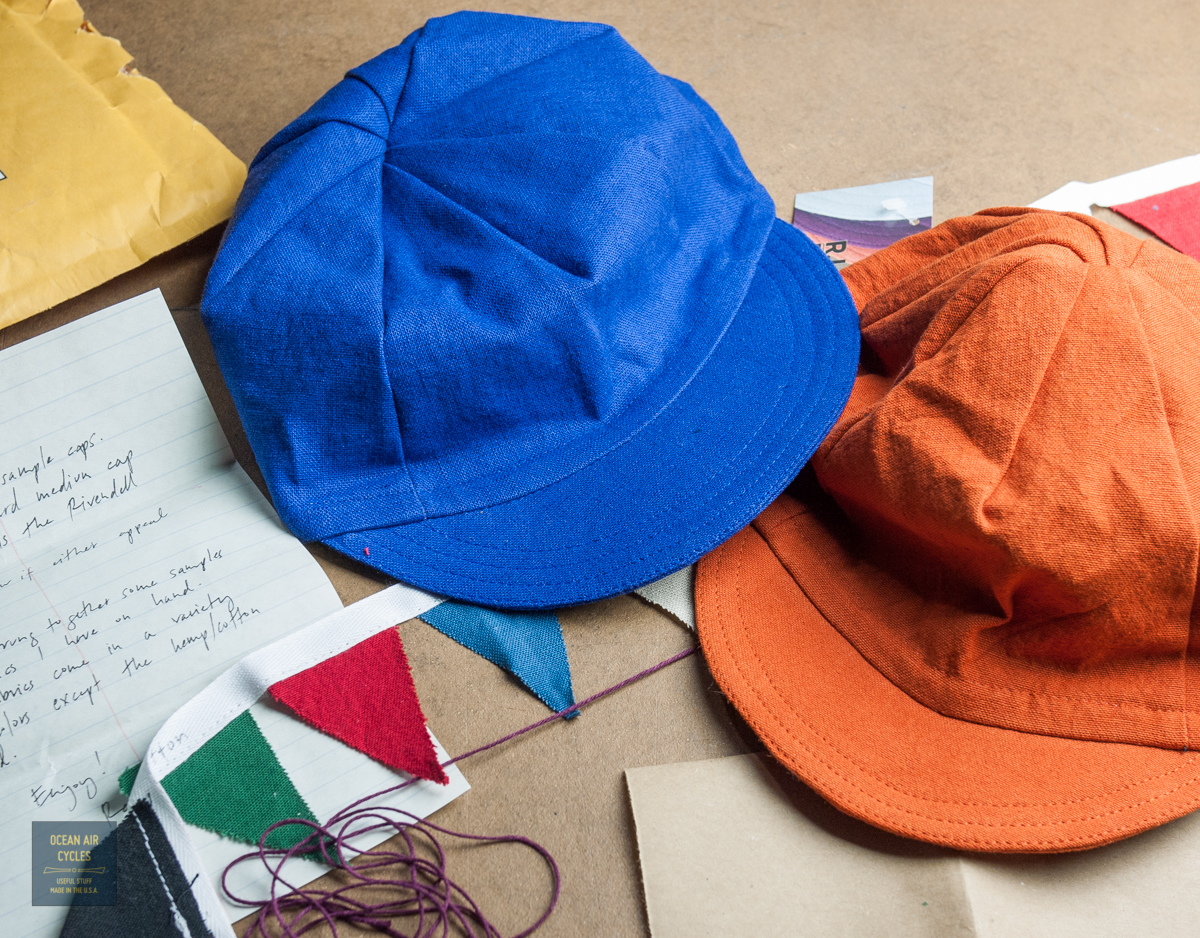
Then this package came in the mail a couple of months ago, THANK YOU
Randi Jo Fabrication:

Right out of the box I knew this was the direction we were heading. These instantly became my first choice every day. We washed them, beat them up, crushed them, and soaked them in sweat.

They never let me down, the only catch, I liked the material on the orange and the cut of the blue. That was the only trouble picking a hat each day. The Blue hat, and final choice on cut, is slightly different from a traditional "cycling cap". it is cut a bit full run the crown and the brim is slightly wider and deeper to give bit more protection from the elements, but not so big that it requires a stiffener. In plain english, a perfect cap.
The next step was working up the mock-up for custom embroidery


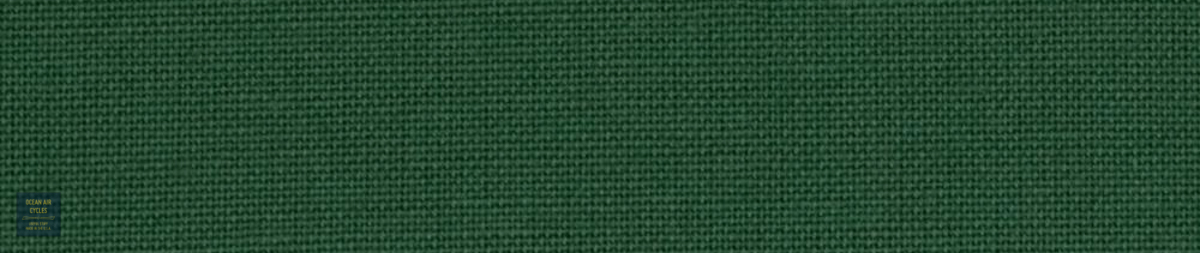
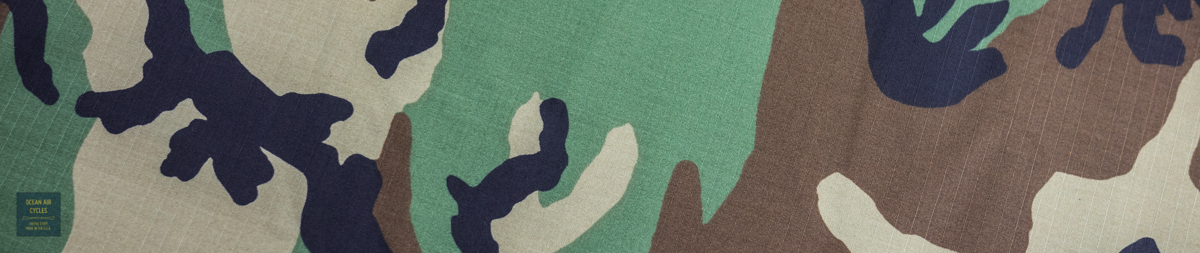
With final art resolved, it was time for material selection. I wanted to go with organic cotton for ease of care, long-term durability, environmental impact and sustainability of the material. I liked the hand (feel) of the material and how it was holding up to the abuse of repeated trips through the washer and dryer. Working with a relatively LEAN supply chain model we are able to offer color options with a decent lead time. The final choices:


The fifth choice while not organic, makes up for the footprint in terms of durability and fun. The NYCO ripstop multi cam fabric is produced in the USA and commonly used in Military uniforms. It has proven to be the most durable option for soldiers in the field while retaining the hand and feel of cotton.... And camo is fun.
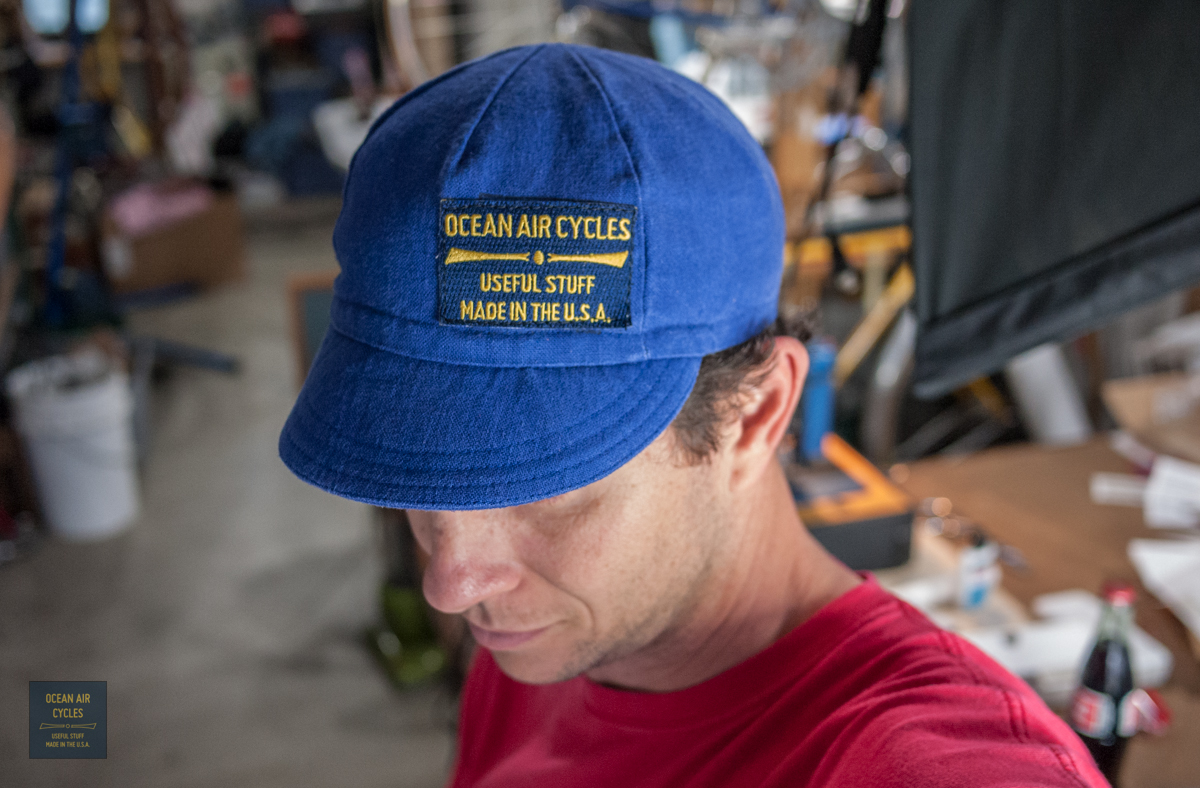
 All of the hats will have our logo embroidered on the front to the left of center in dark Yellow, similar to the mockup I made with a hacked patch above.

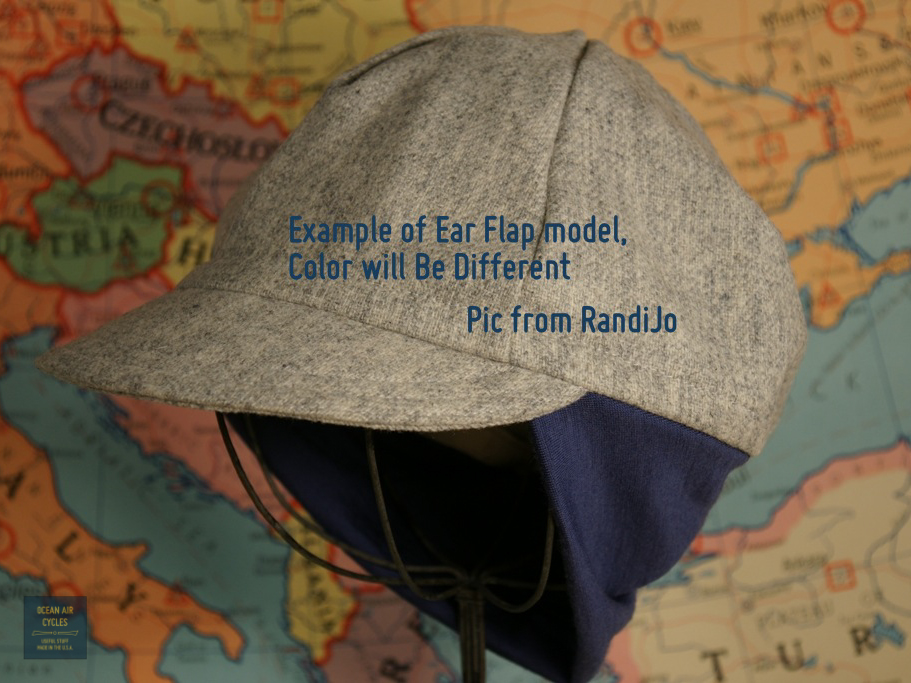
The third and final option for winterizing your hat is the option of a stretchy merino wool, flip up, flip down ear cover. Even as spoiled as we are here in SoCal with weather it still gets cold enough that I will be adding one of these to my rotation.
 All of this adds of to what I consider to be a perfect hat. Priced at $32 ($35 with ear flaps) it is a screaming deal for a truly cottage industry, HandMade in the USA product produced with organic materials.
The initial order is going in this week. Projections for the quantities and size distributions are going to be strongly influenced by pre orders HERE. All hats in this order will be made and shipped in time for the holidays. If you want a hat or three in time for Christmas order now, really.
Order your hats HERE in time for Holiday delivery
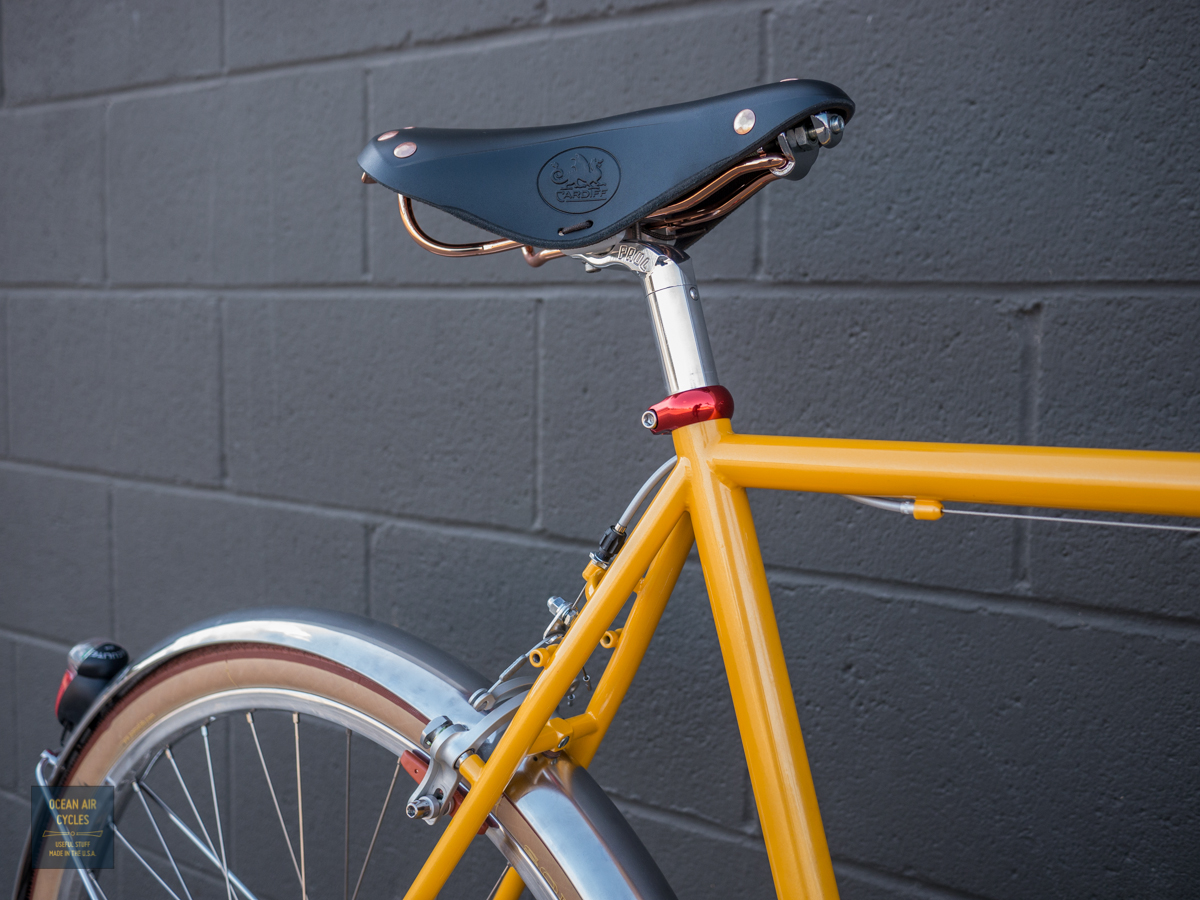
Update: I have been asked where these fall relative to Randi's standard sizing. Her medium is snug on my 23" head with winter afro filling in. Our L fits me perfectly and stays on in a 20mph headwind, the small is similarly offset from the medium in the opposite direction.
If you have interest in a Child's or New Born version, hit me with an email, there will be one of each heading towards our expanding team, and more can be added to the upcoming order
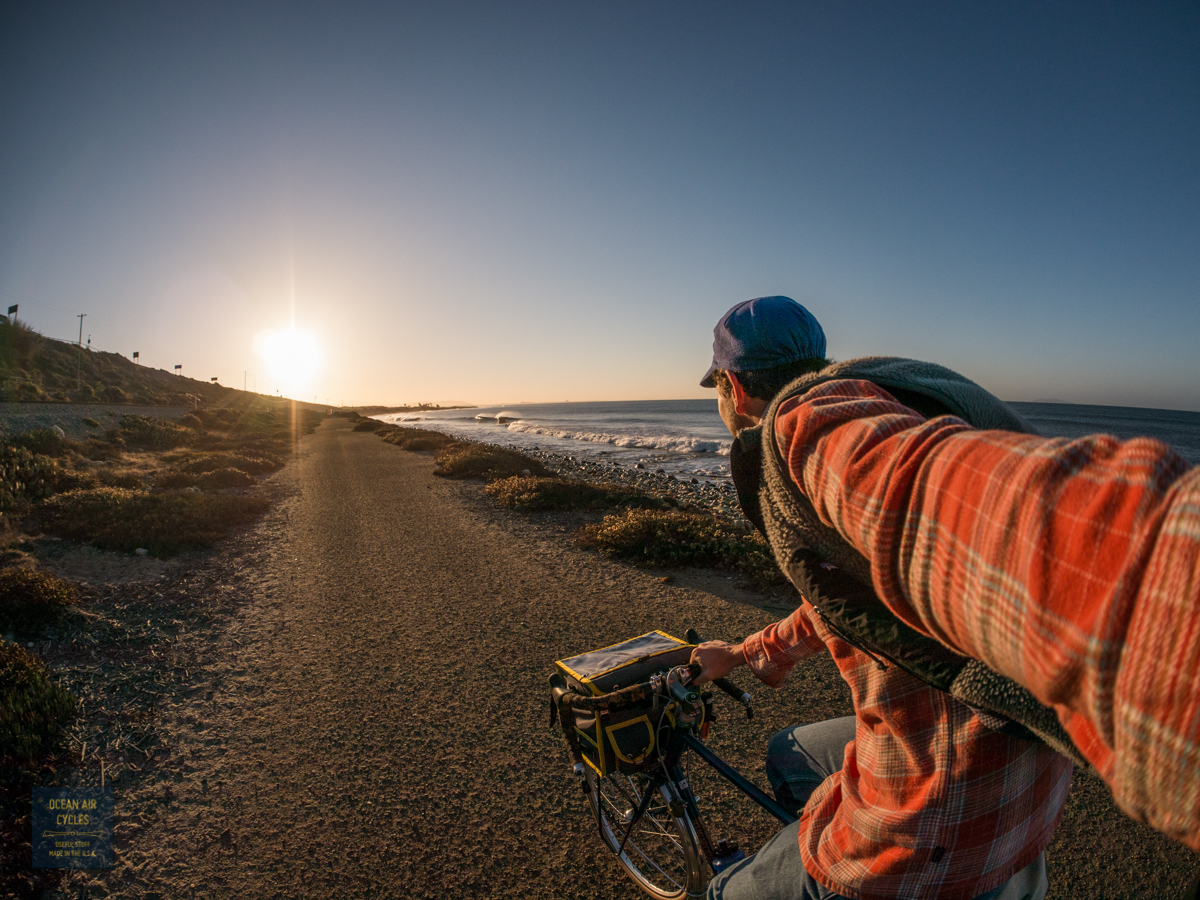
As I am typing this baby No.2 has yet to make her appearance, it could be any day now, and we are planning on bringing three Ramblers down to Orange this Sunday November 17, 2013 for a bit of show and tell.

"Plan A" is to be there a bit early, helps on our end with traffic, and be able to facilitate some test rides. If you have interest in meeting up send me an email and we can set something up. We intend to be there for the whole day. That said it is a full moon, and just such a full moon brought out our munchikin No1. If you are really hoping to see the Ramblers please plan on earlier than later, one never really knows with these sorts of things, but if I get the call I will be heading back north ASAP.
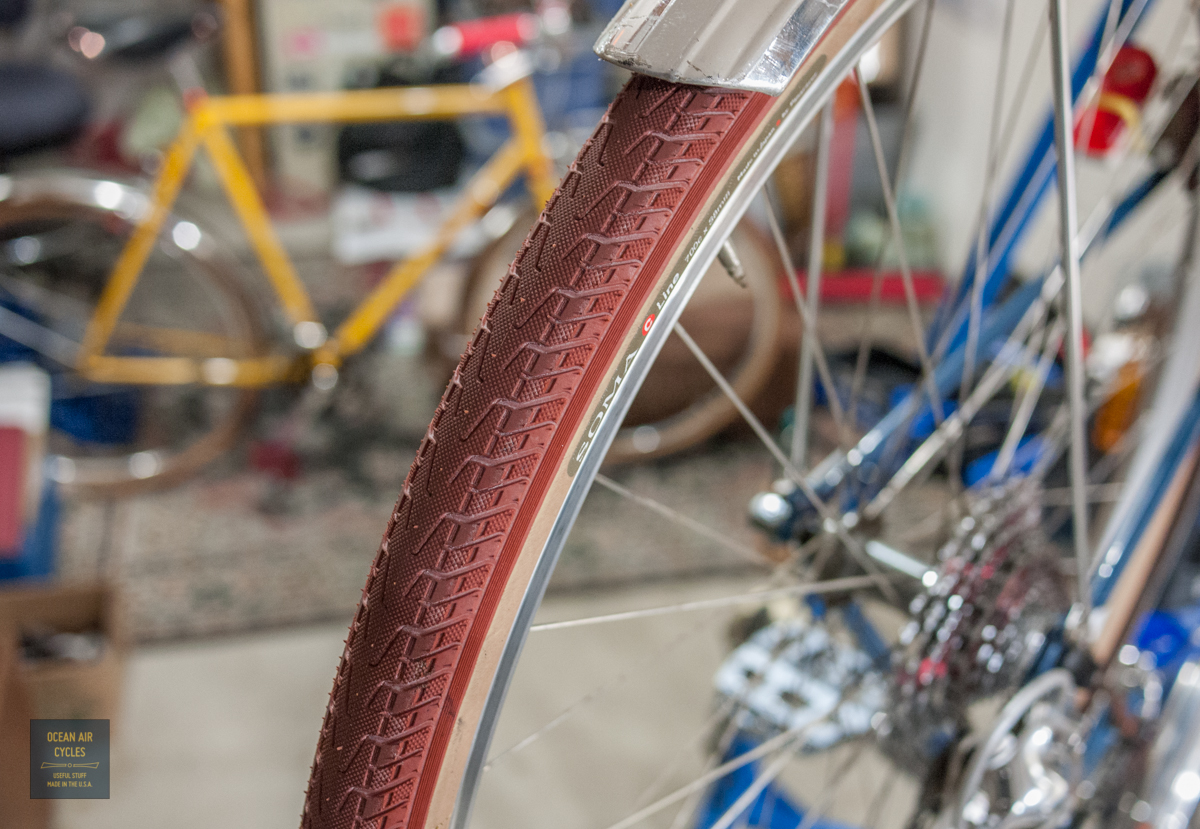
Also, the sponsors of the event will be having a raffle to offset the costs of the event. We will be donating a set of the new
Terra Cotta Soma C-line Tires to help them along.
I know we will see some old friends, and will make lots of new ones, it is going to be a good day. We hope to see you there.
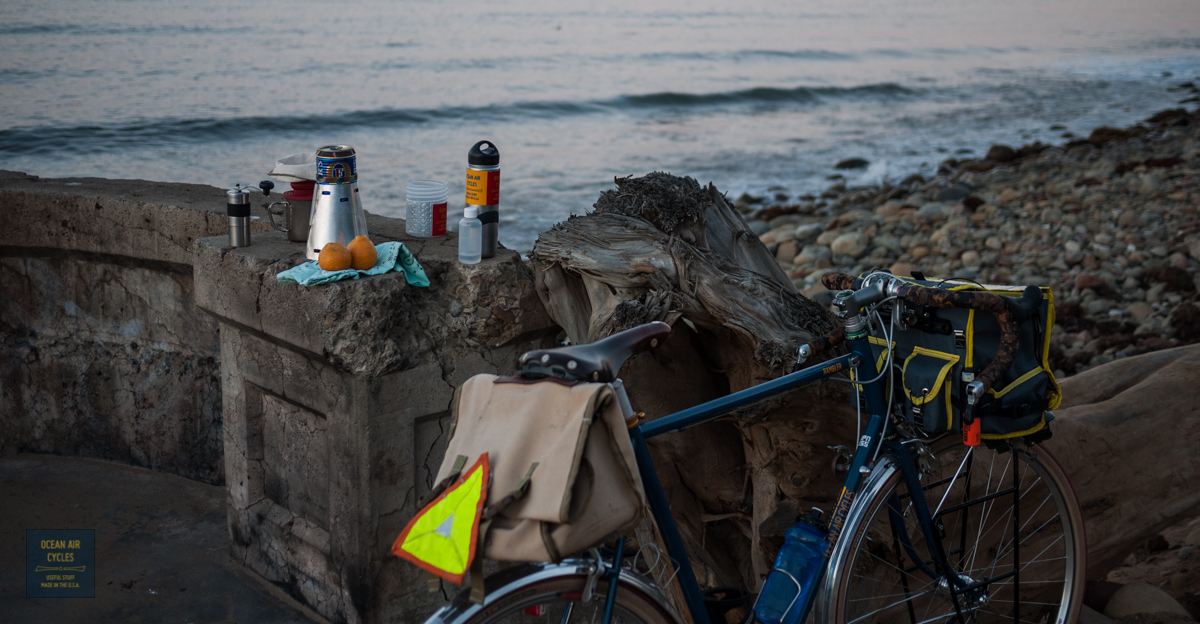
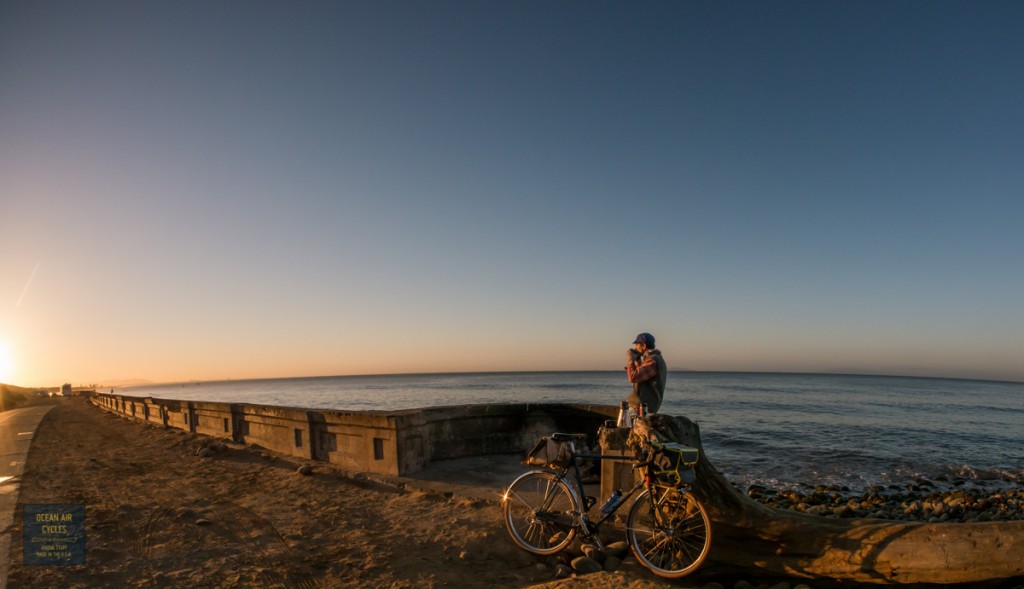
First I need to thank each and every person who has supported us through readership, spreading the word and purchases. Without all of you, Ocean Air Cycles would be a crazy guy making pictures and stockpiling esoteric bicycle widgets on the California coast.
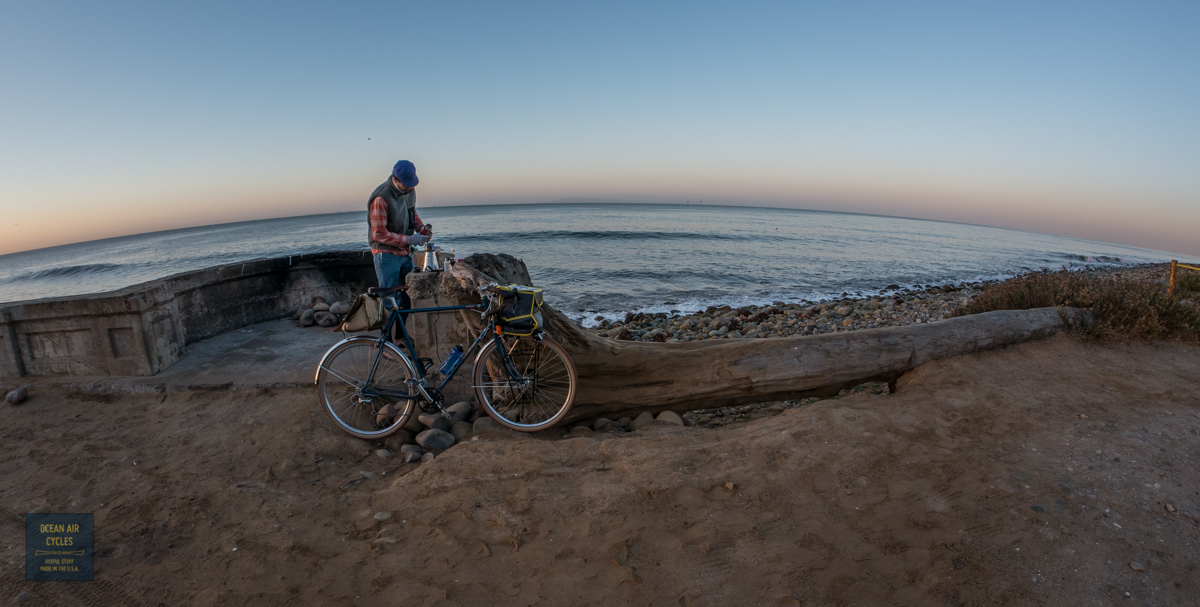
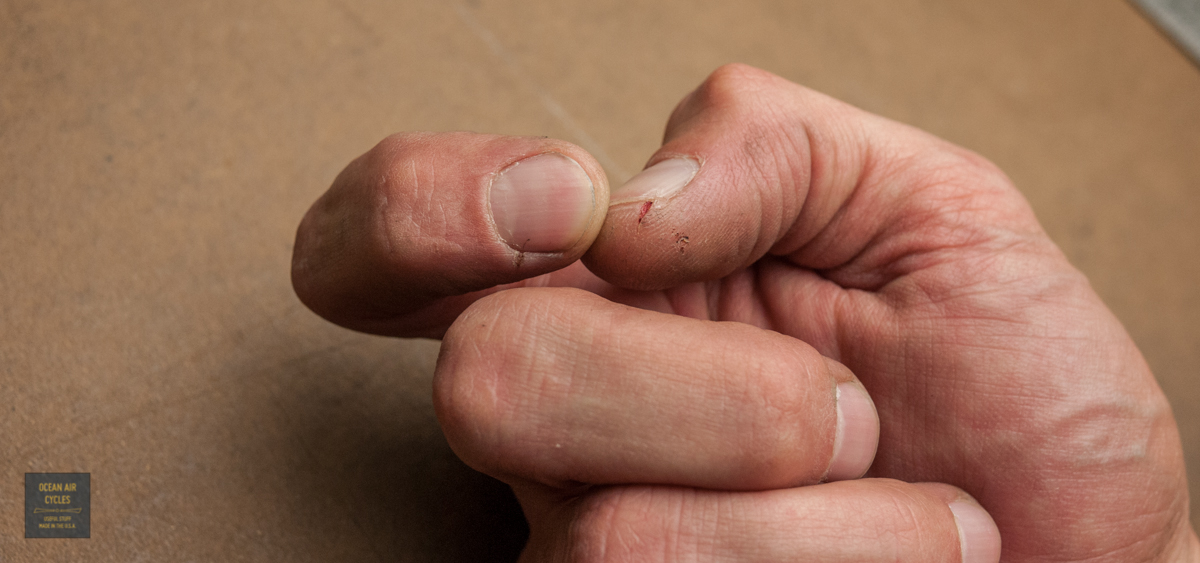
This whole venture has been a process in learning and growing as a business offering products and services I believe in. Aside from customers I never could have made it this far without the love and support of my family and friends as well. Some aspects of the venture have exceeded hopes and expectations, while others like actual sales vs. projected are more of an element of stress. Stress can be a good thing, pushing for better solutions and systems, but it can also wear you down. The last three months have been a roller coaster and twice the stress outran my health. Once around the time that the first Ramblers of the Summer were heading to new homes, and again in the last three weeks. Having a three-year old in child care, fighting off germs is nothing new. Generally I just push through, and I did for the last two weeks, was getting on top of it Sunday, and then while processing pictures to promote the kerchiefs, I realized I looked about as good as I was feeling
That night the fever ramped up to 101 and today I am getting back to the computer.
Even with all of the above mentioned support, OAC is primarily a one man show, and when the man is down things screech to a halt, no sick days or things stop. With the impending birth of our next daughter (any time in the next two weeks) I had to stop, lay down and focus on getting better, fast. I can see the light at the end of the tunnel on this one. My voice and throat are still shot, phone calls will have to wait until next week. But I am catching up on emails, direct apologies to those waiting for Ramblers, and all that. If you have been waiting for a reply, I may have missed something, please do not take it personally and do not hesitate to ask again, your patience is appreciated.
Things should be back to normal by next week. Projects like hats, shirts, neck buffs, kerchiefs, wallets, scarves and some other surprises will all get back under way so we have things in time for the holidays. Like wise, there are a few bought Ramblers that need to get to their new homes and another 35 or so that still are looking for their future owners.
The presale C Lines started shipping out to customers last week and initial impressions and feedback have all been great.
Here it has been a week of true satisfaction on the New C Lines tires. With time constraints being pretty tight I was able to total up just over 60 miles so far, and the
C Lines are perceptibly smoother rolling then the previous New Express Tires.

I have pushed them both on and off the pavement to see just how much abuse they would tolerate. The sidewalls have faired ok riding through the rocky side trails that parallel sections of our local railroad lines.

I did manage to get one flat from a significantly large goat head thorn, but is should be considered that I have paired these initially with a set of super light Q Tubes, again for the sole purpose of establishing the boundaries for these will do in terms of flat resistance. Also, of note are the numerous patches of broken glass and other thorny areas I have ridden through on purpose, and no other issues. Thus, even with one flat this week, the ride quality makes the risk of flats well worth it IMO, and if thorns prove to be a problem there are ways to work around that without giving up much on the performance front. I will follow up on these in a month, but these are going to be my primary tires this winter.
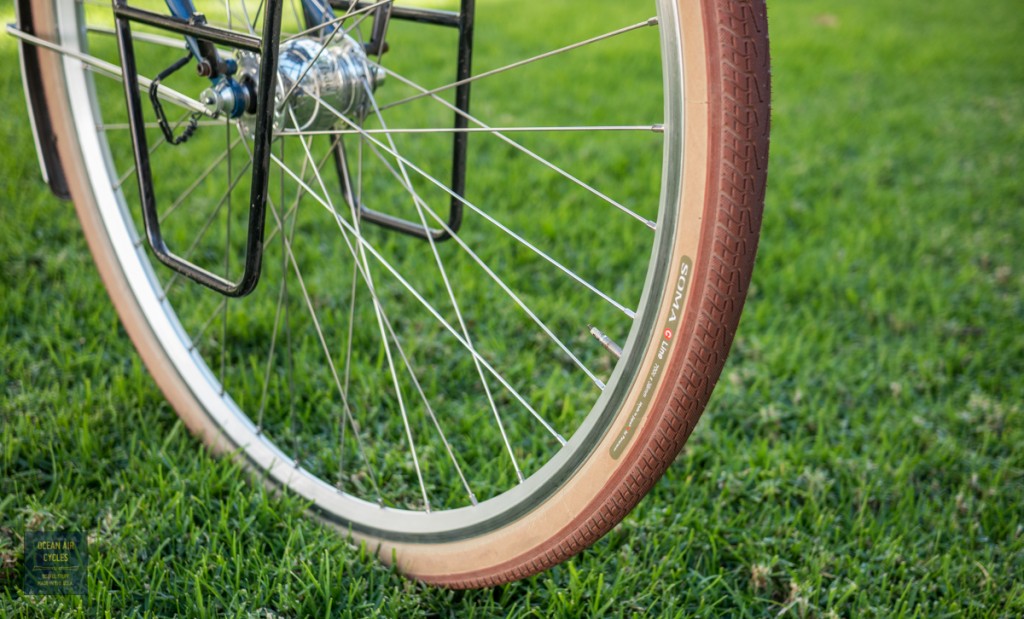
The presale volume has been good, thank you to everybody who has made a purchase. As of today all tires ordered prior the start of distribution have been shipped. The initial sales volume has helped to establish better projections on where we need to price these tires to keep the project sustainable. The price of $49 a tire is really a bargain for the level of quality and performance for a tire this unique in the market. To keep things sustainable we will be bumping the price to $55 a tire this weekend, Saturday November 9.
We have a good stock of both colors on hand and ready to ship. The presale price will hold on all orders placed through Friday November 8 by midnight. As always shipping will still be free for two or more tires as all sales through out storefront over $75 ship free.
Click Here to Purchase

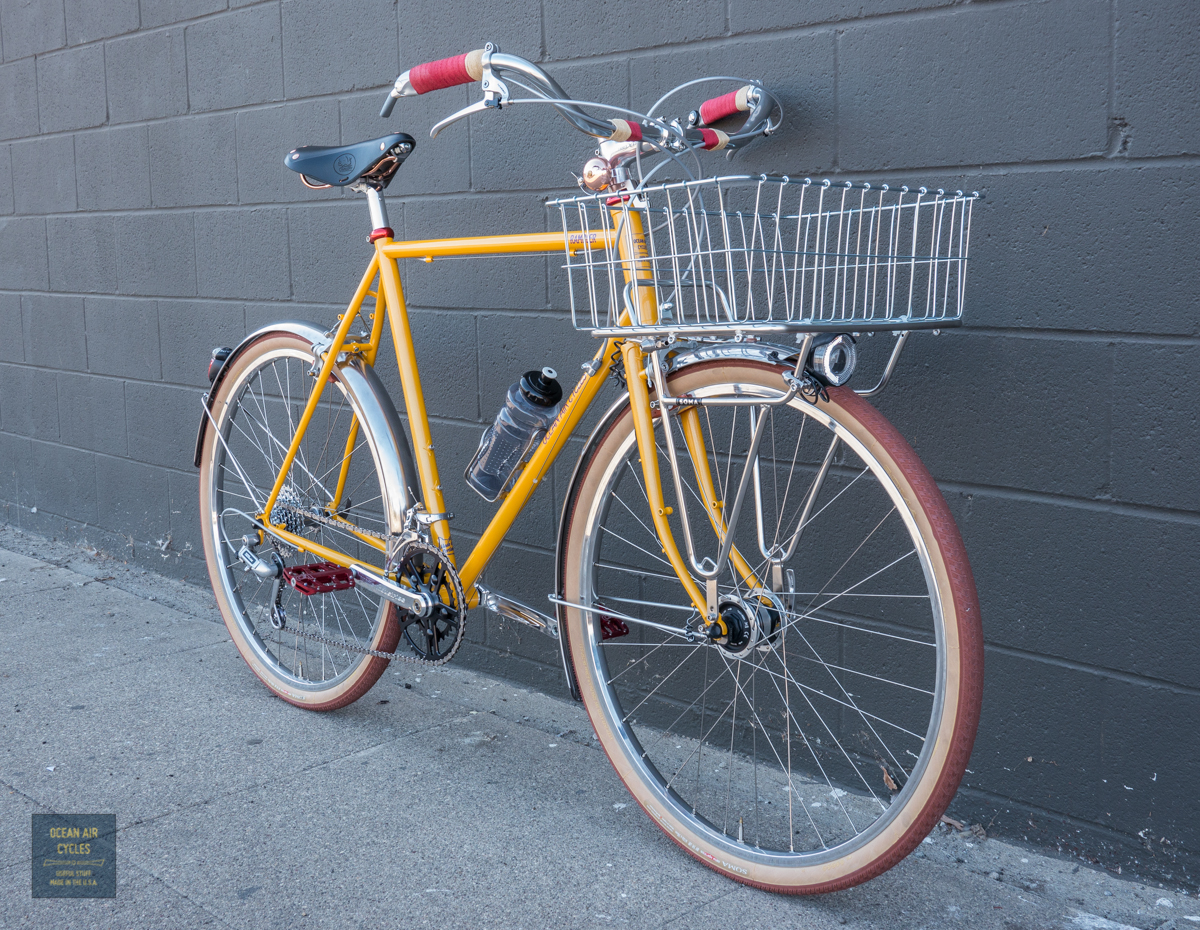
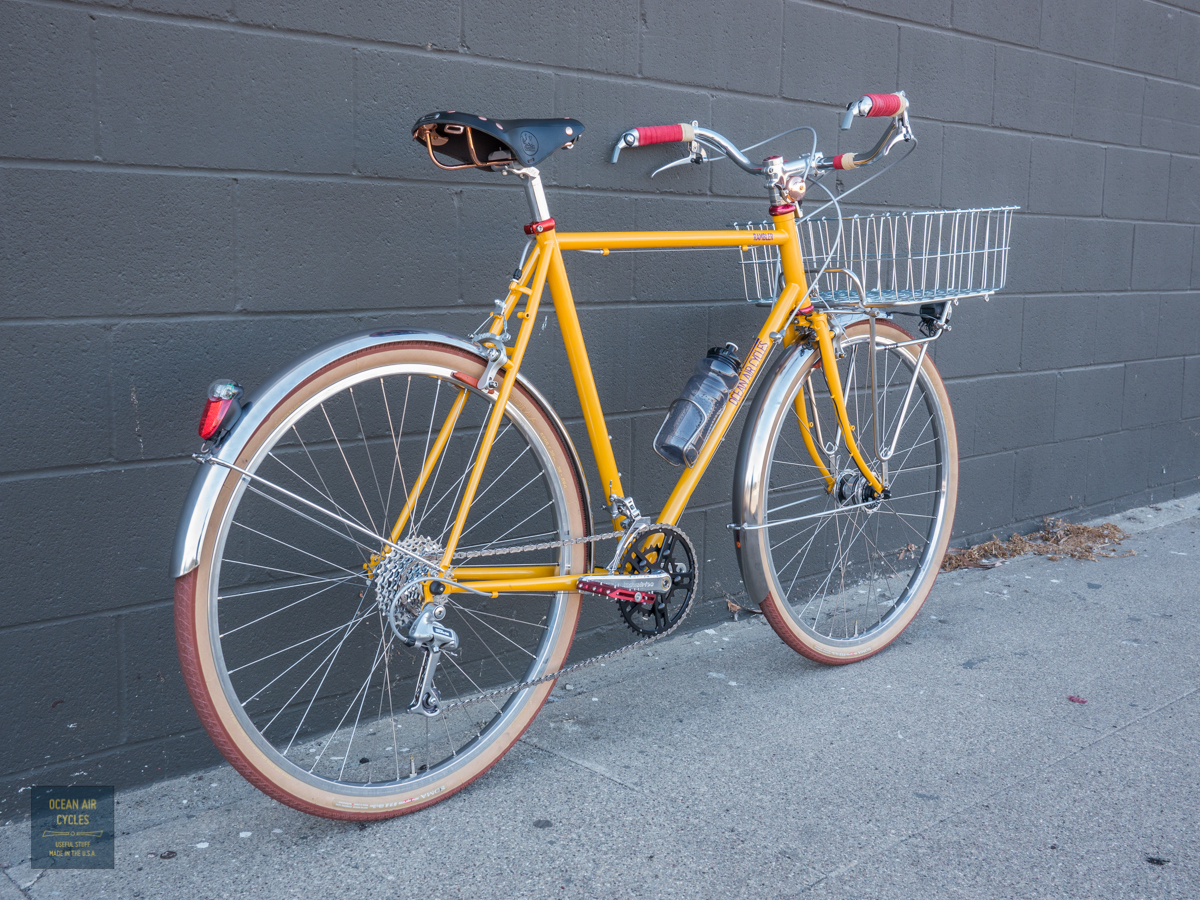
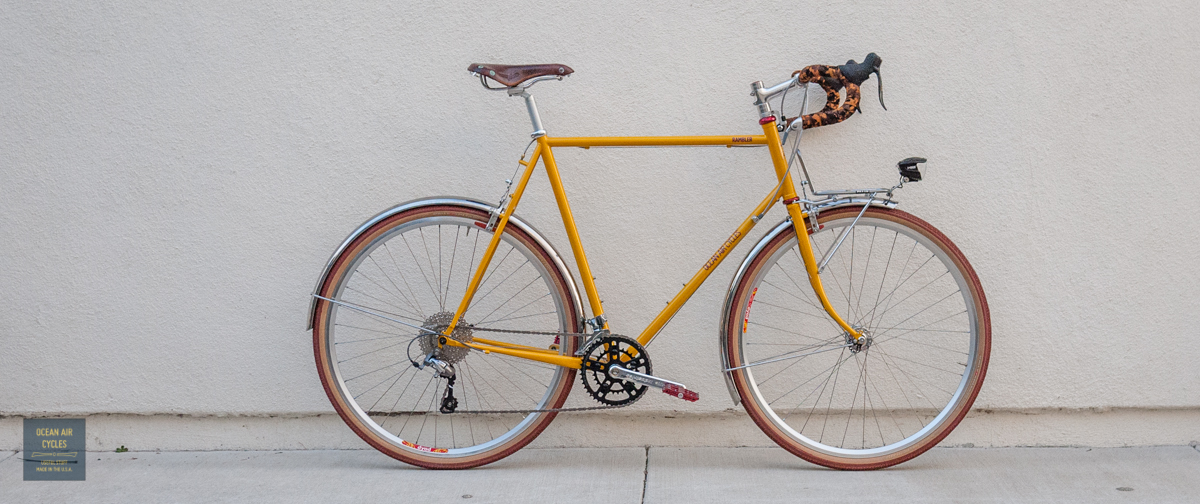
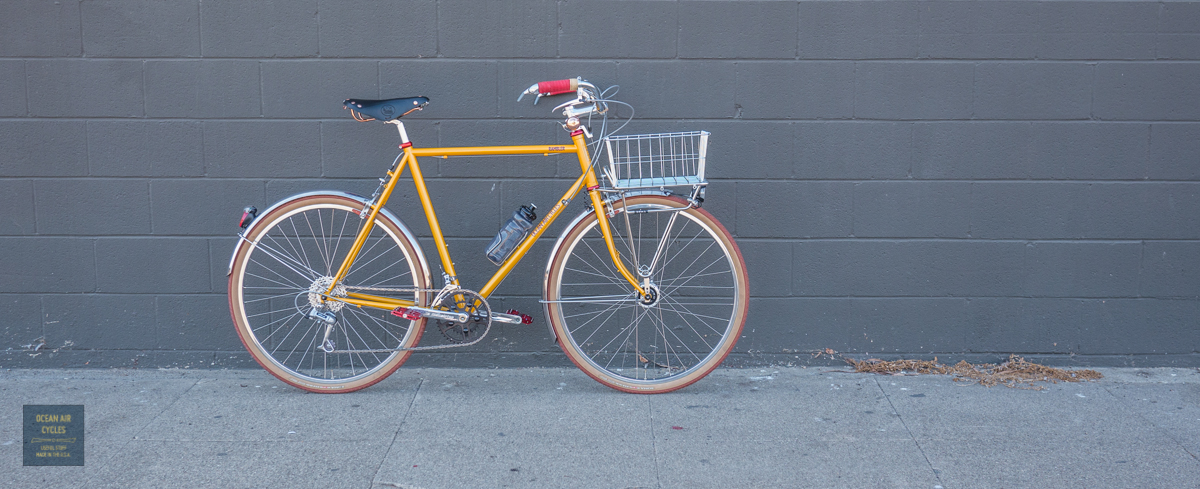
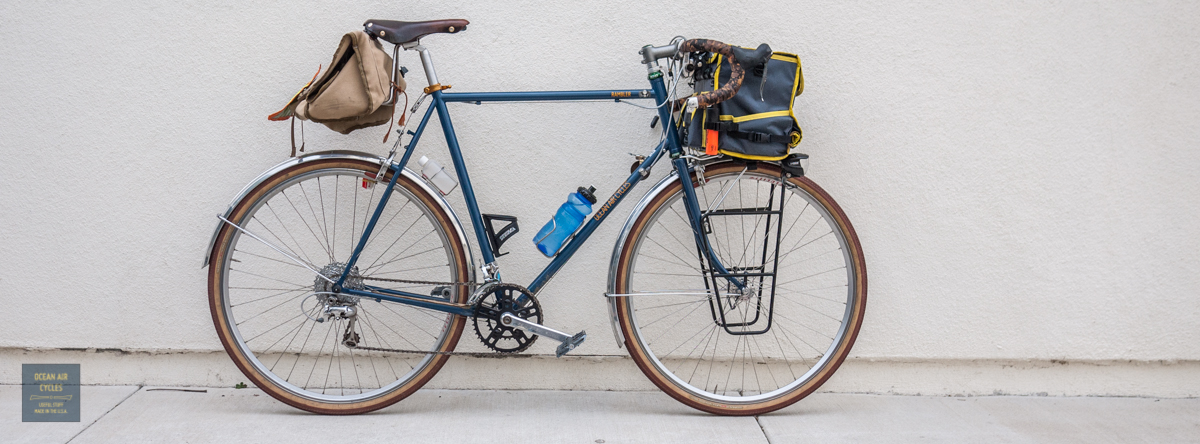
One of the most heard questions around here is "how do I get a complete Rambler, as in ready to roll?". There are a few ways to answer that….

The easiest way is to have your local Bike shop contact us, and you can buy the frame through them, or you can purchase the frame set directly through us, and have it drop shipped to your local bike shop. If they have any questions on assembly or specifying the component choices we are more than happy to help them out. Our stocking dealers are Free Range Cycles in Seattle, Blue Lug in Tokyo and Velo Cult in Portland has had at least two Ramblers pass through their work stands already. Likewise if you are, or know a local shop, that would like to become a dealer do not hesitate to contact us for a dealer agreement.
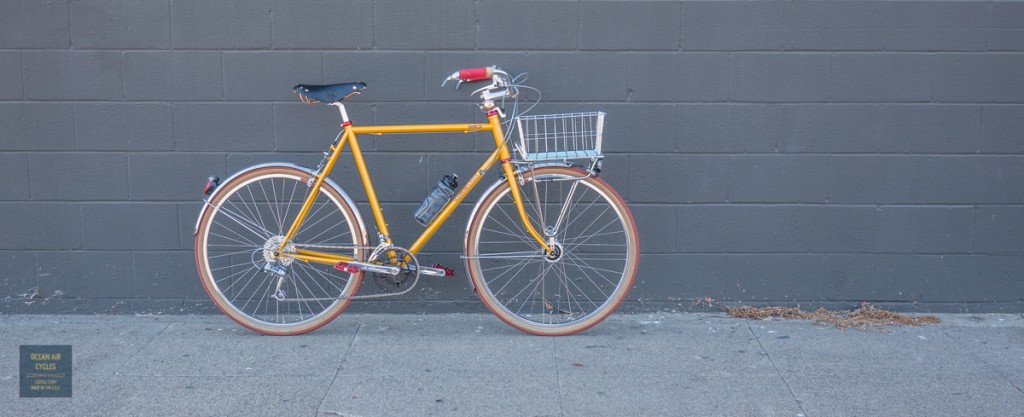
The other way to get a complete build is directly through us. We will work with you do get the perfect fit, for both you and your budget, to ensure that you are rolling on the Rambler of your dreams. Once we get through the size and color aspects, the component specification is next. Do you know if you would prefer the "Porteur" or "Rando" build? We can help. Likewise, many of the details like lighting systems, racks and bags will depend on how you most likely will be using the bike. Complete builds average between $4000-$5000 but can go higher or lower depending on what you need and want.
We are still working on the details of our house brand of luggage, but in the interim we can also facilitate custom luggage through Swift Industries, our fabrication partner and craft builder in Seattle.
Thanks for your continued interest in the Ramblers, and we look foreword to getting more people rolling soon.
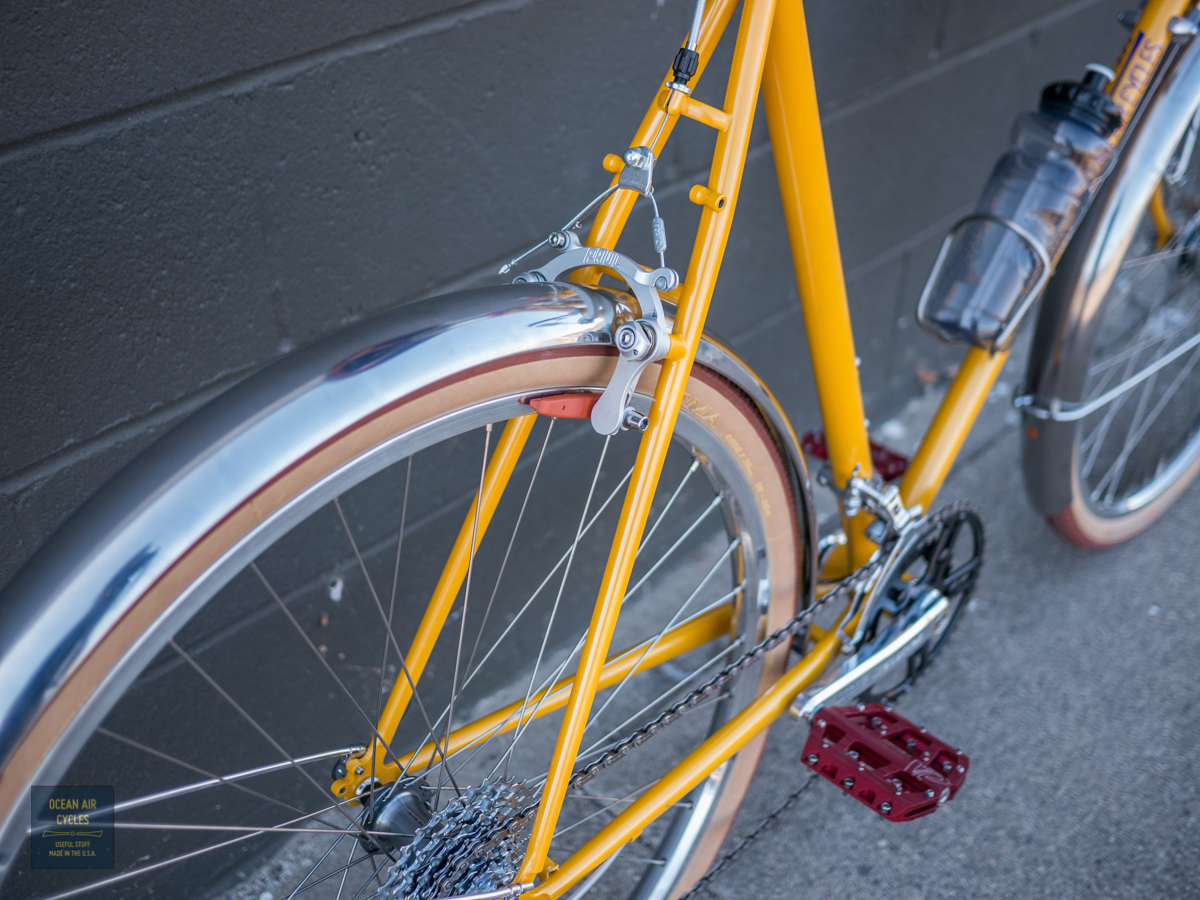
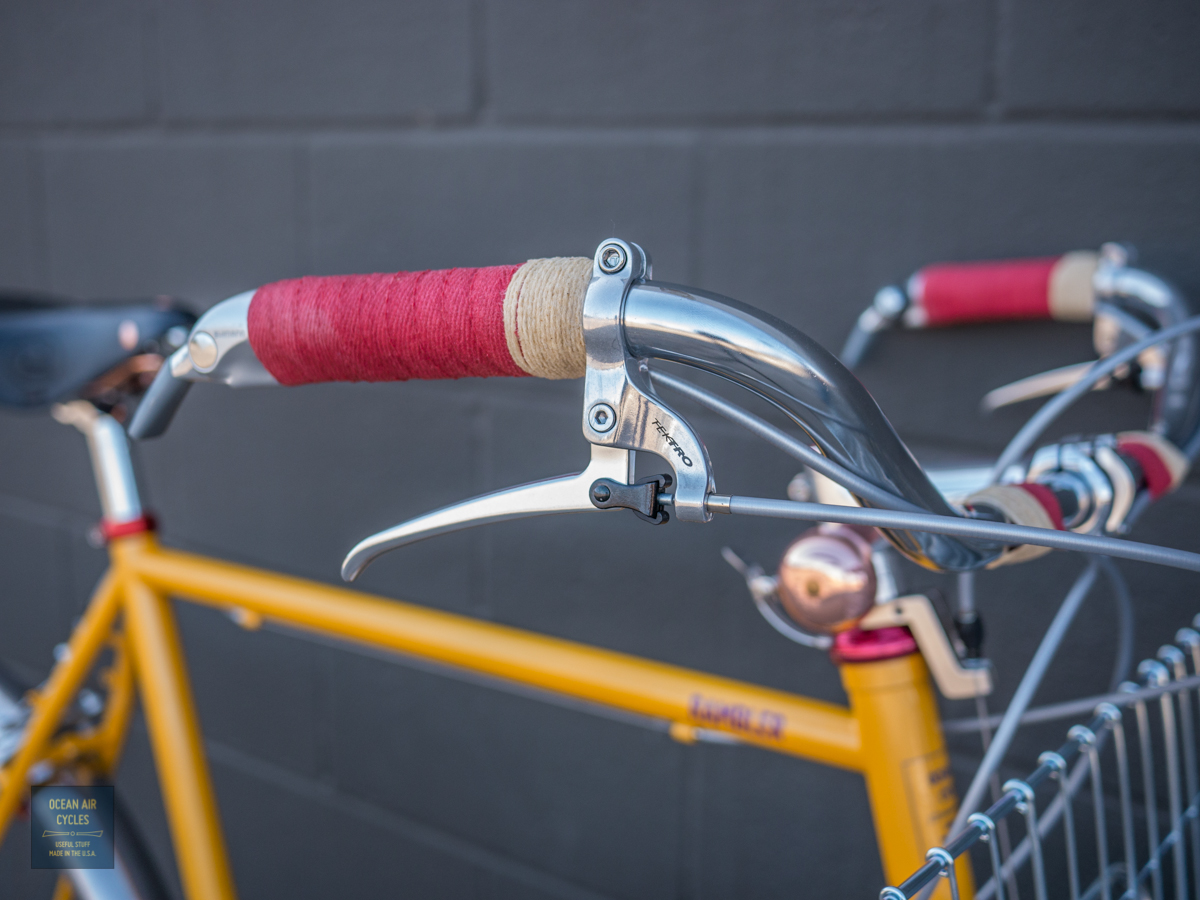
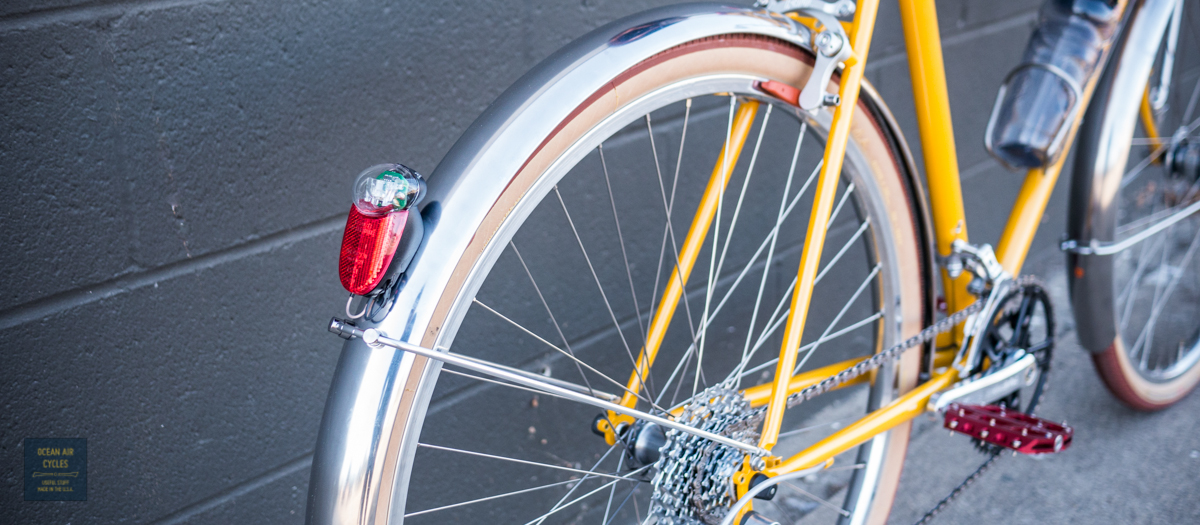
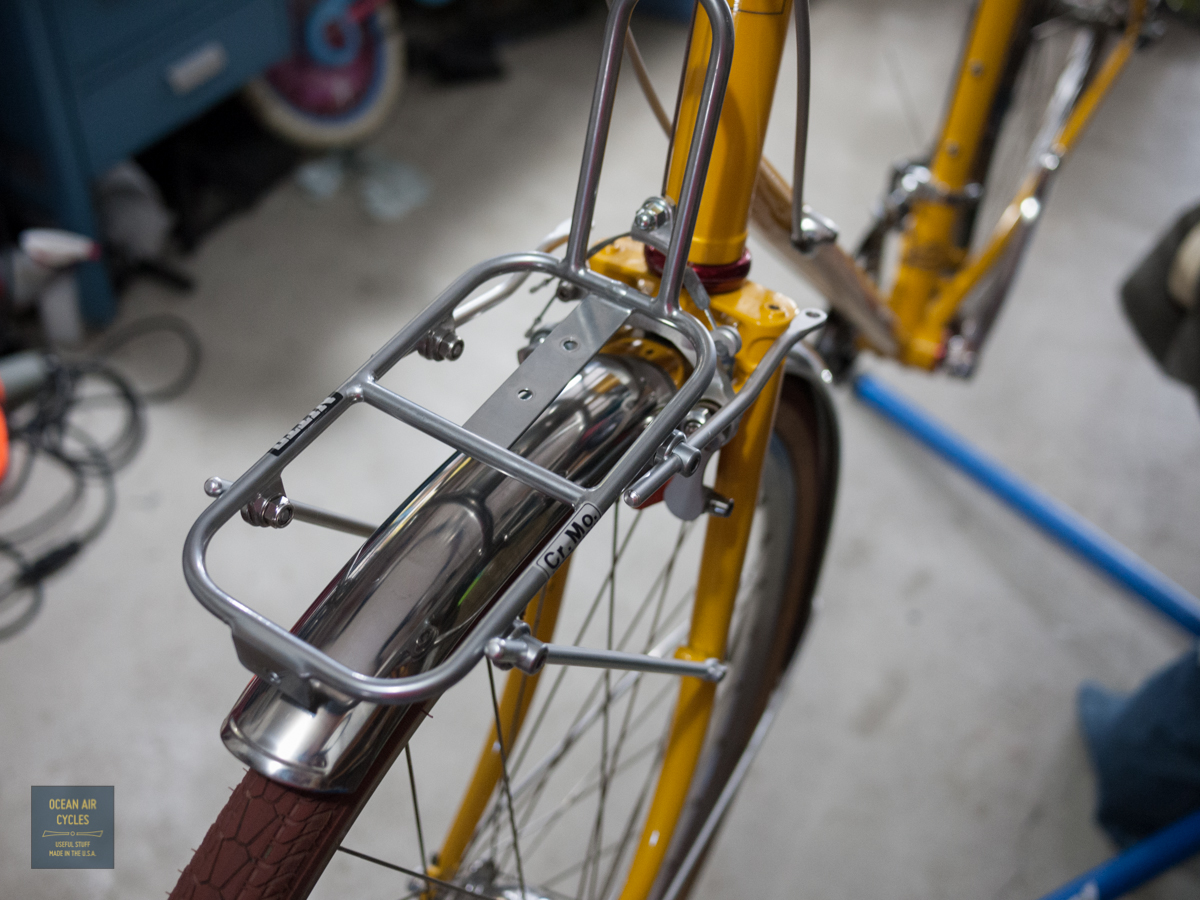
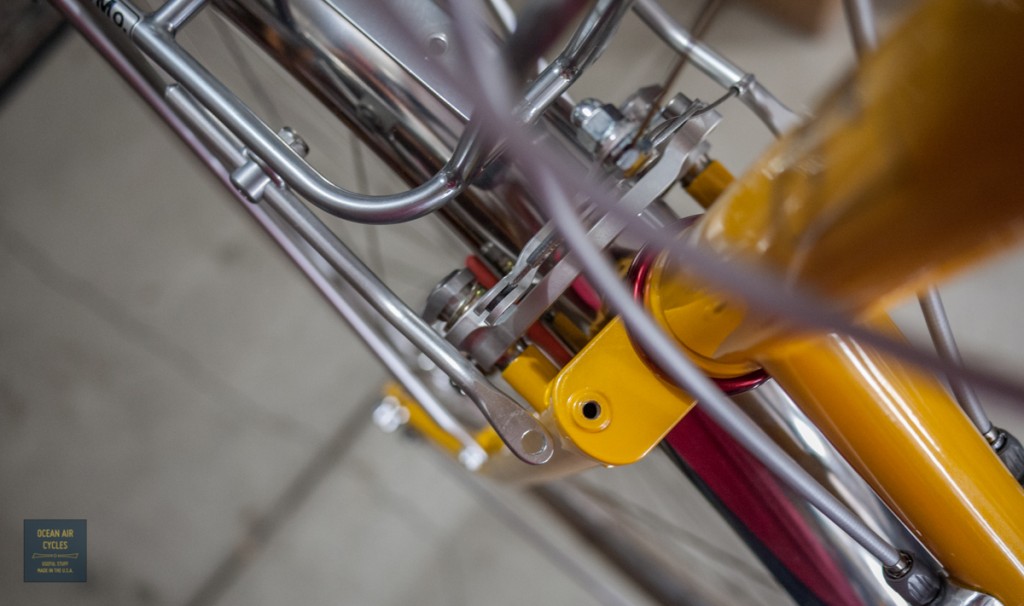
There are more than a few ways to mount the front fender to the crown of the fork, ranging from the modern angle bracket to the vintage daruma bolt. Most of the common solutions involve a joining piece of some sort that holds the fender to a bolt running through the fork crown. All of these work well with Ramblers and are safe and good when properly employed.
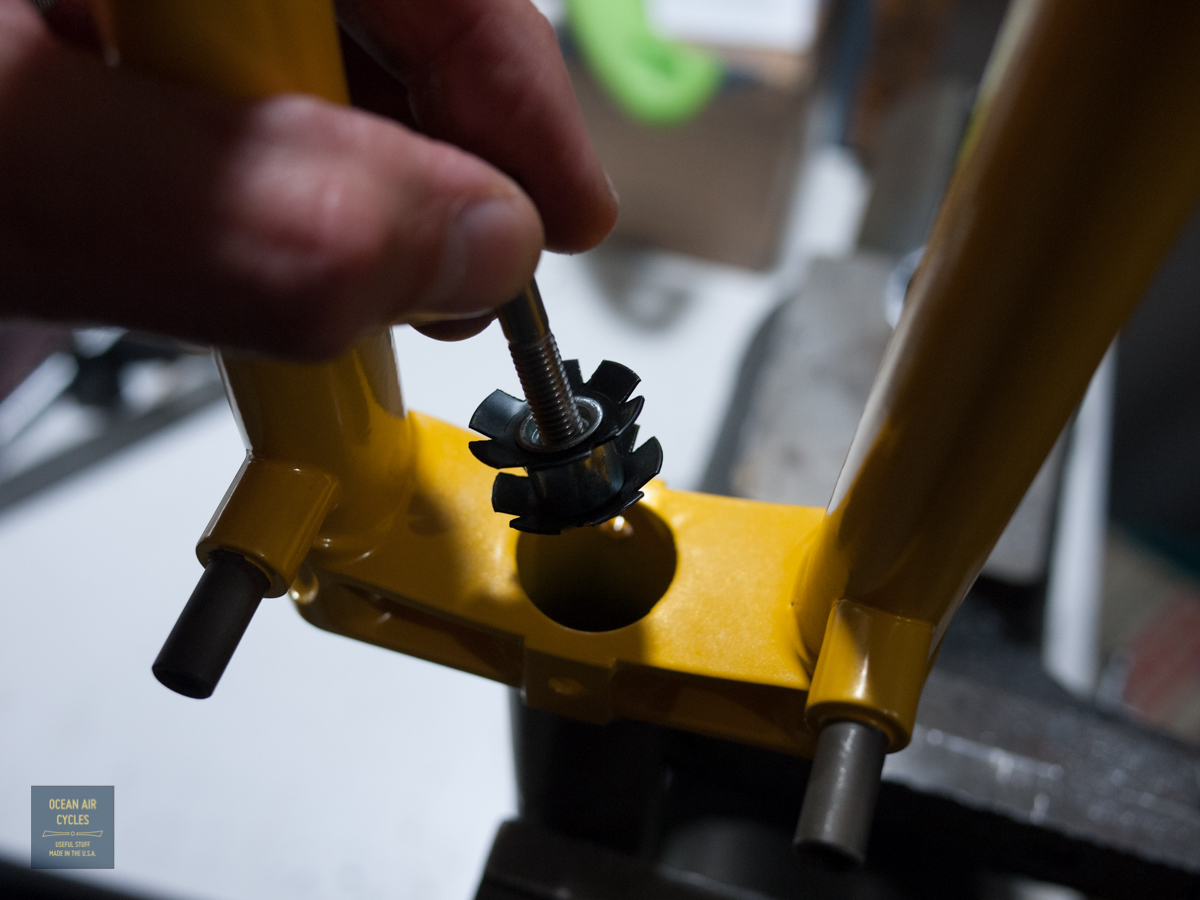
I have been using an alternate method for a while now with great success. Common star fangled nut is mostly used to preload the headset in threadless steerer assemblies. This same nut can be inserted into the bottom end of the steerer and used as a fender attachment point as well. The bottom end of the steerer has a smaller inner diameter than the to for added strength in this highly stressed area. The standard 9/8" star nut may be tight and the 1" star nut a little loose. I prefer to adjust the blades of a 1" slightly outward, but the 9/8" gets the job done with a bit more insertion force as well. The standard star nut insertion tool is designed to slip over the top of the steerer tube, and will not work in this application. I thread in a M6x60 bolt and use it to steer the nut in with careful hammer taps. I set the nut in about 5-8mm deep and remove the bolt/insertion tool.


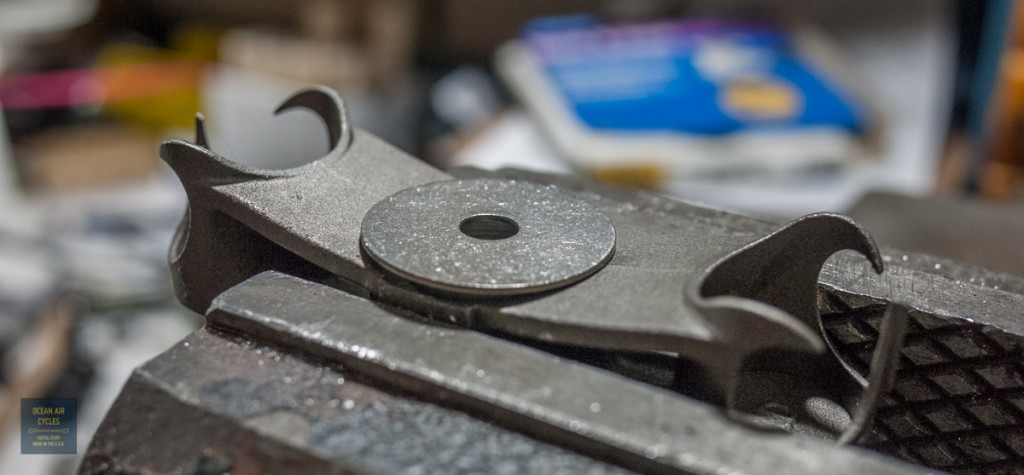
The next hurdle is the washer stack between the crown and the fender. May fender mounting kits are designed around a 1" steerer, and the included top washer may be to small to seat well against the 9/8" steerer bottom on a Rambler fork.

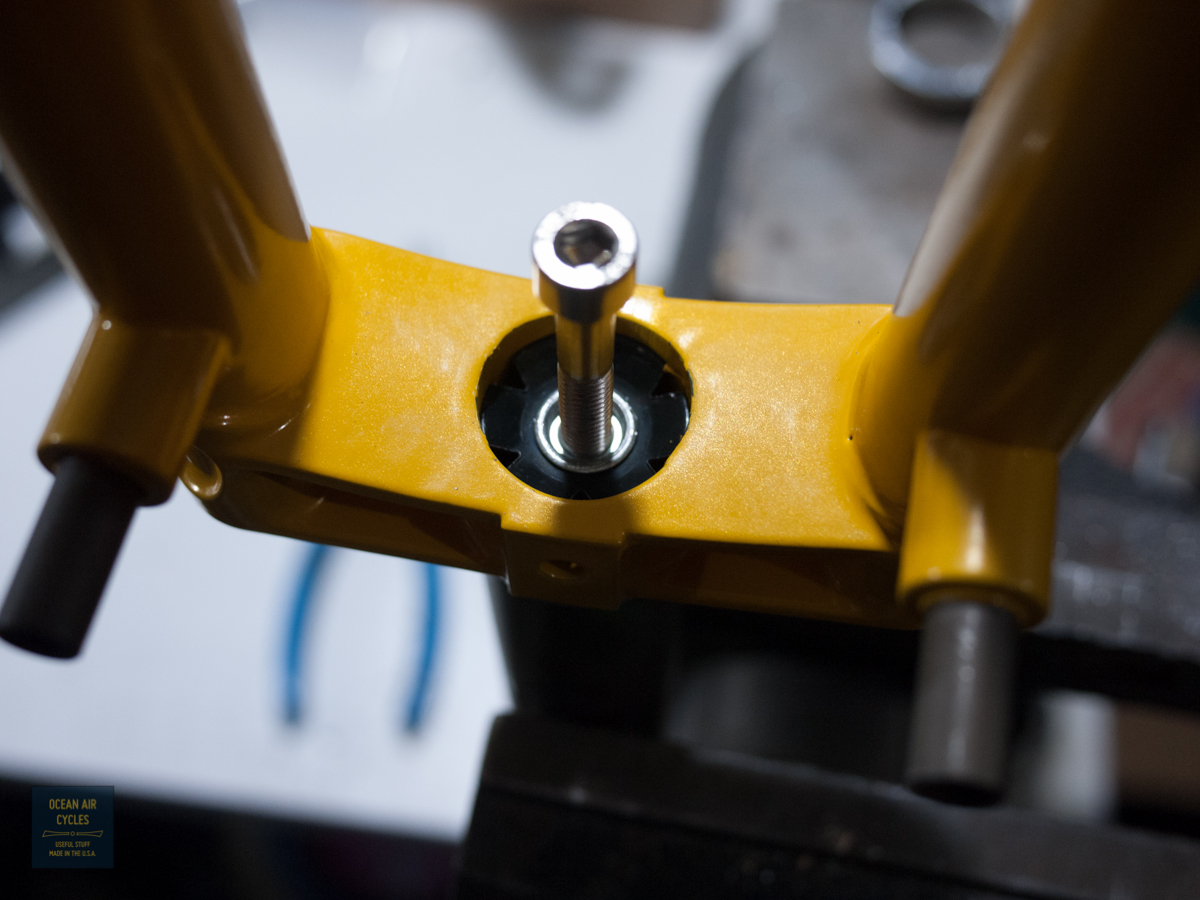
I replace this washer with a 1 1/4" fender washer. A gentle tap or two with a hammer against the crown will shape the washer to the curvature of the crown for a nice even fit.

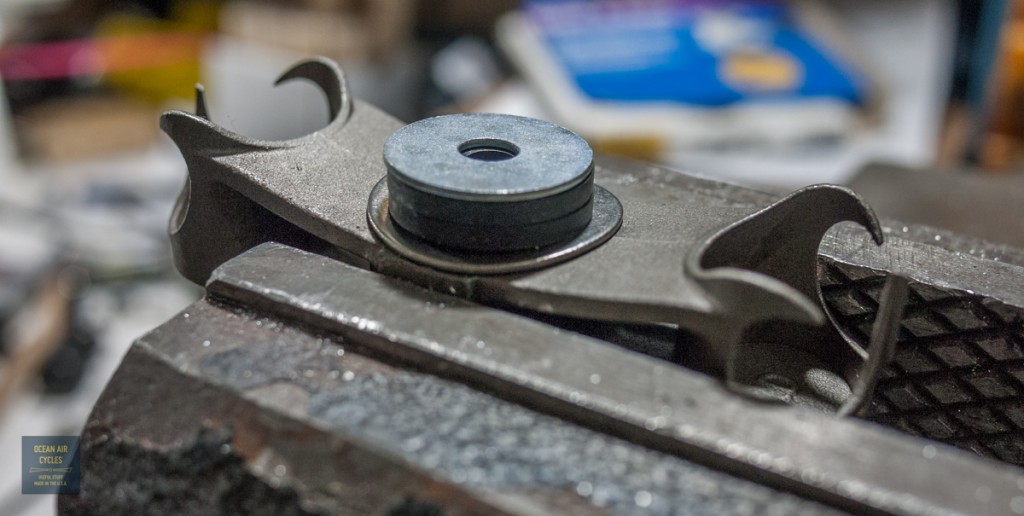
The gap at between the crown and fender is a few mm on the generous side to ensure maximum clearance between tires and fender. This is easy to adjust with an extra rubber washer or two. For 38mm tires I generally use two 1/8" rubber washers.

Last in the stack is a 1" fender washer between the rubber and the metal fender.
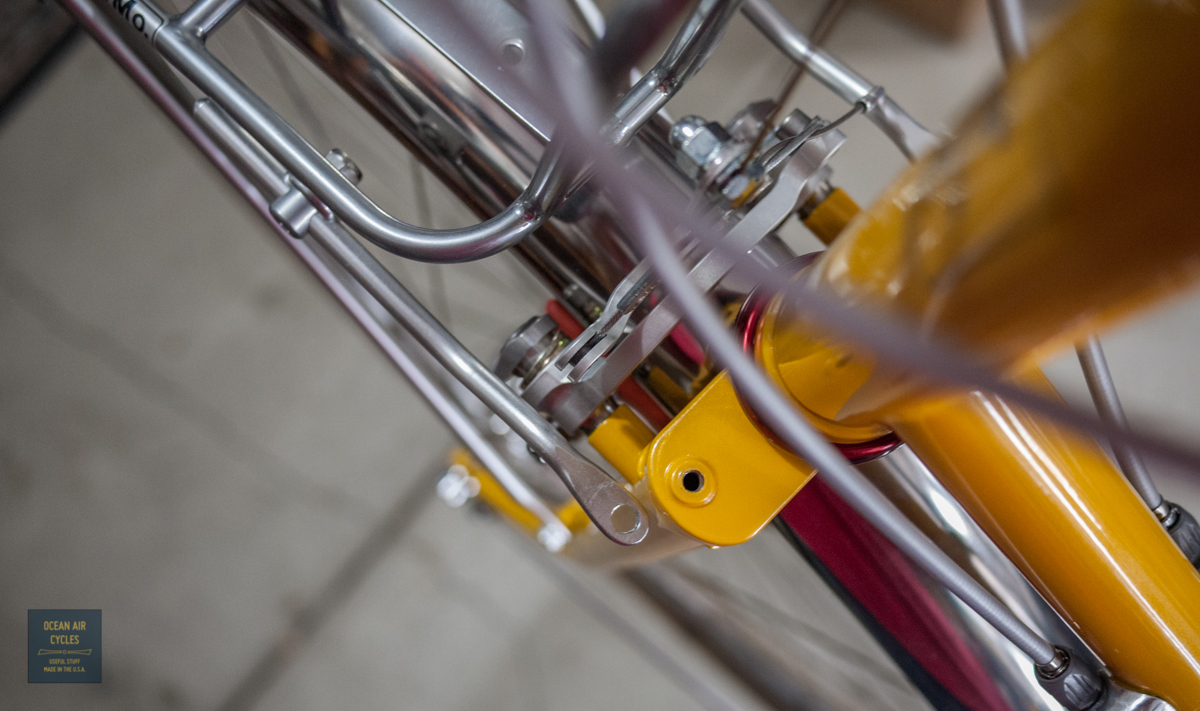
The entire sandwich is then held in place from the bottom with a M6 bolt and a 1" fender washer on the inside.
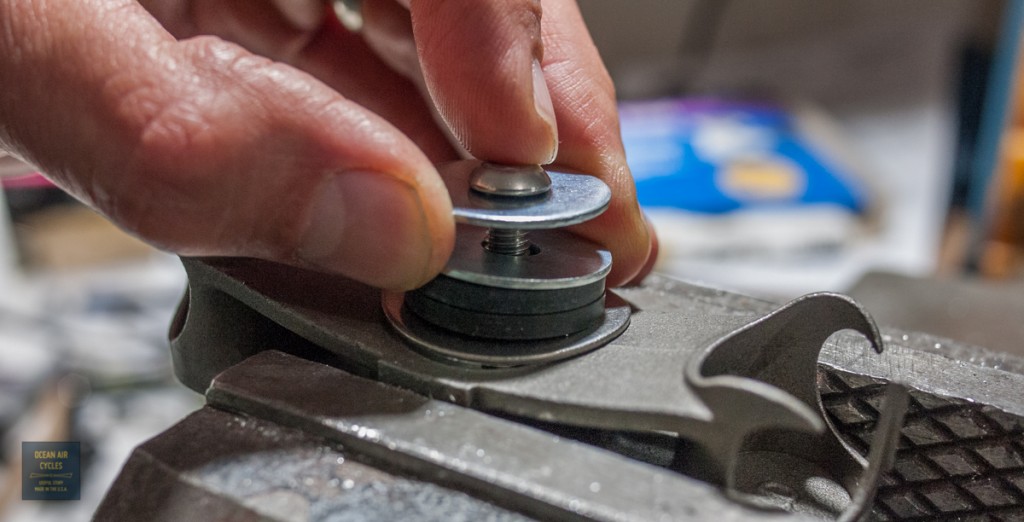
This assembly has held fast on both older builds and recent Ramblers in the past year. As added insurance one could add locktite to the treads of the bolt. Also, as with all fastener based mounting systems, e.g. nuts and bolts, it is a good idea to check them regularly for any hardware that may be loosening in use.
The above washer stack will work with most daruma bolts included in fender hardware kits as well. The fender lower strut mounting is straight forward and will go together per the manufacturer's instructions.
If you are riding rough road or dread the occasional rattle, you can add a third fender mounting point at the front rack. This will greatly improve fender stability, and is good insurance should one of the other mounting points come loose. There is no straight forward way to do this, short of a custom rack, and most if not all solutions will require a bit of ingenuity and a trip to the hardware store. Here is my combo of an unused fender mounting bracket and the Mark's rack front tab.

All of the above hardware can be found at your local hardware store, preferably the small sort with a well stocked hardware selection. I have been thinking about adding the above listed small parts to the storefront as a "kit", let me know if there is sufficient demand, and I will make it happen
The New C Line Tires are available
CLICK HERE to purchase
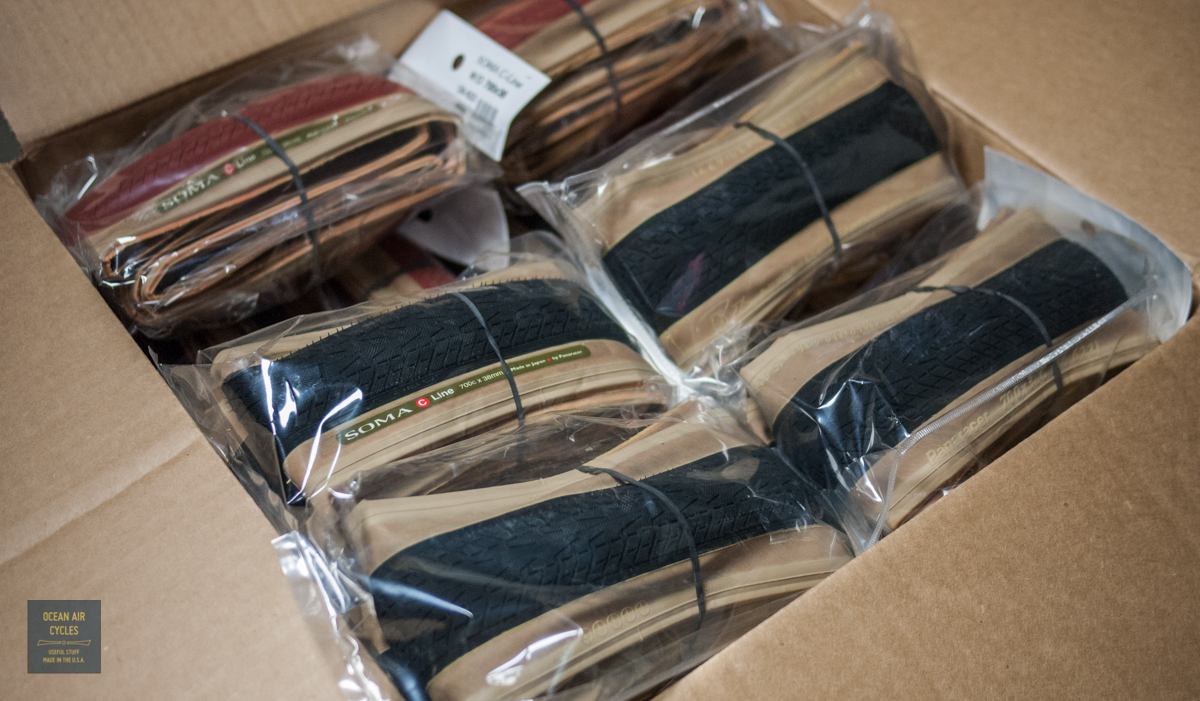
We have been working with
soma since last Spring to bring some wide, supple, high quality tires to market. The results are in and the new
C-Line tires are looking great out of the box, and on initial test rides.
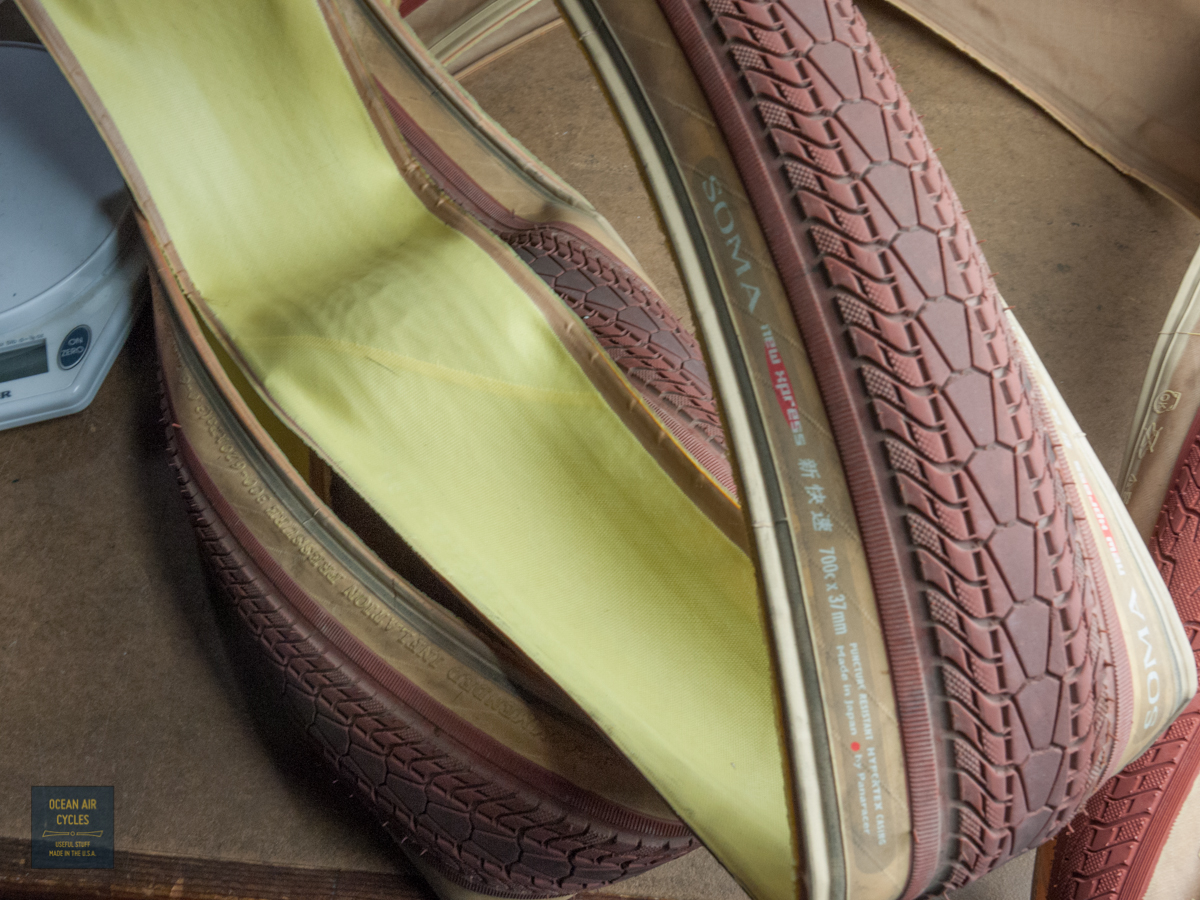
Background: There has been a bit of a hole in the market for a well made, light weight and wide 700c tire. I have been happy with their New Express 700×37, but having ridden both the NE and B-Line versions of this tire in the 650b size I knew that there could be more. Starting with everything good about the well-regarded Panaracer Pasela and New Express tires, the inquiry was made about the status of their 700x3xxmm molds. Apparently it had worn beyond use, they were in the process of making new molds and we were given a bit of a clean slate. Taking notes from the B-Line we asked for the tread width and pattern of the 35mm Pasela, the casing of the 37mm, No extra protective lining, a folding bead, and since we were going this far we asked for color options on such a relatively small run of tires. Panaracer said yes, and the wheels were rolling.
The first batch made its way from Japan to Soma and now us. Testing and distribution began yesterday. Using aspects of a proven design and partnering with a high quality producer like Panaracer we are confident that the tires will meet and exceed expectations. This batch has two color options, Terra Cotta with tan skin walls and Black with Tan skin walls. The color does not influence performance, and is only aesthetic. I will be riding a set of the Terra Cotta tires over the next few months.

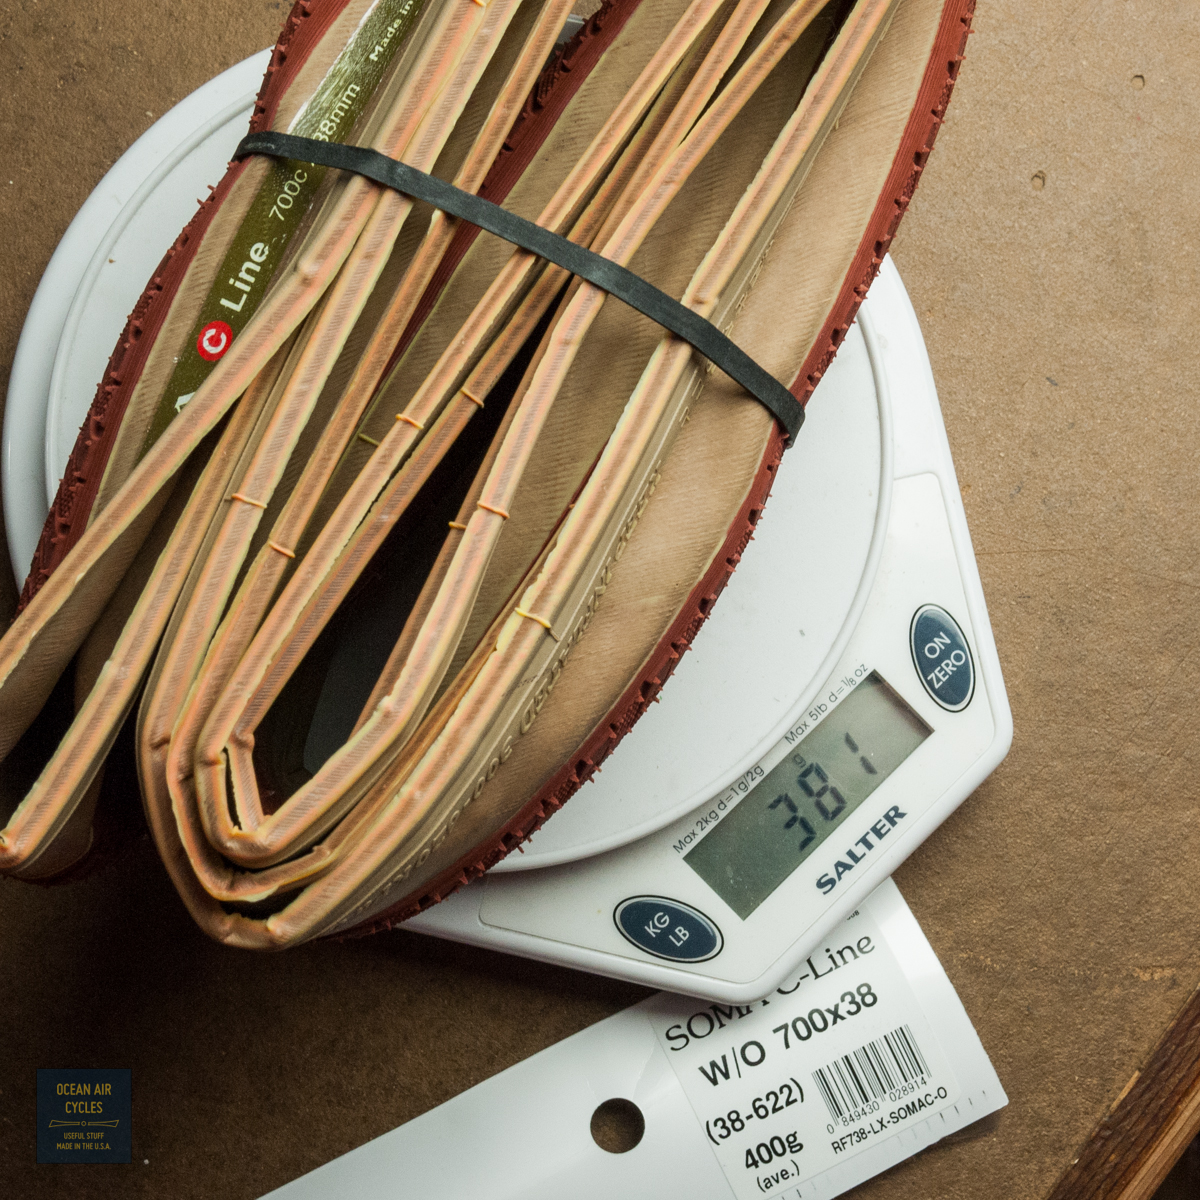
Knowing that the question will be asked the first thing i did after opening them up was take them to the scale and compare the weight to an existing 700x37 New Express.

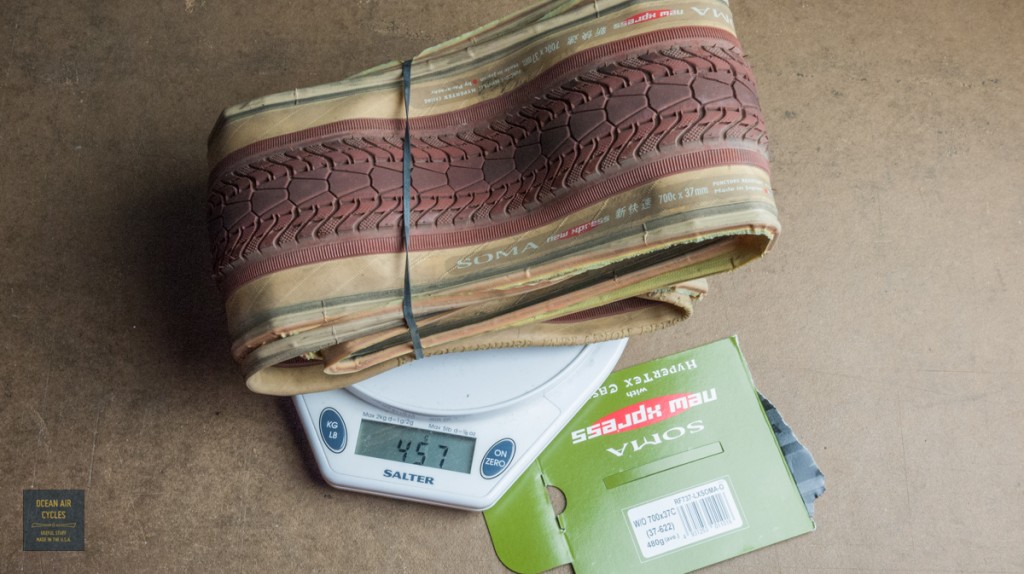
The 76g drop per tire totals up to a savings of over a 1/4 pound of rotating mass. Paired with a lighter wheel set like the Velocity A23 rims and some light weight tubes the weight savings can add up fast. The weight saving in the tire comes from two places. The C-Line has a different, slightly narrower tread pattern, as well as no hypertext protective casing.


Both of these characteristics not only shave weight but decrease rolling resistance. This translated into a tire that is easier to accelerate to speed, keeps rolling longer, and delivers the silk pillow like ride that only fat tires can give. The days of wide tires being perceived as heavy and slow are quickly coming to an end.
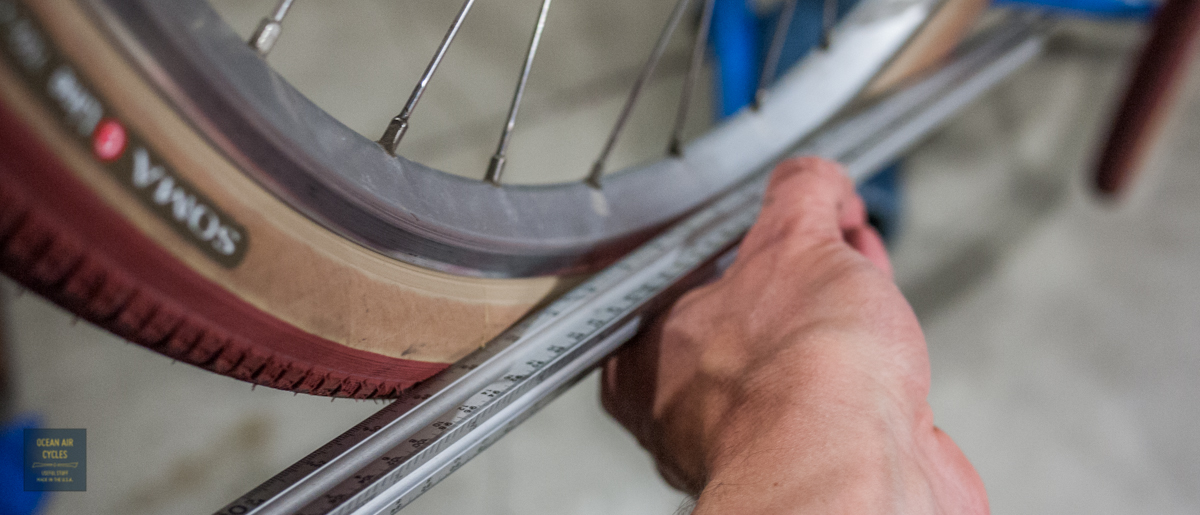
Next up was getting them mounted up on My Velocity A23 rims, which are known to have a tight fit, particularly when tires are new. I am happy to say that both front and rear went on with my hands only, no tire levers needed. They inflated round and evenly along the bead without talc on the tube or any of the other tricks like soapy water at the bead.

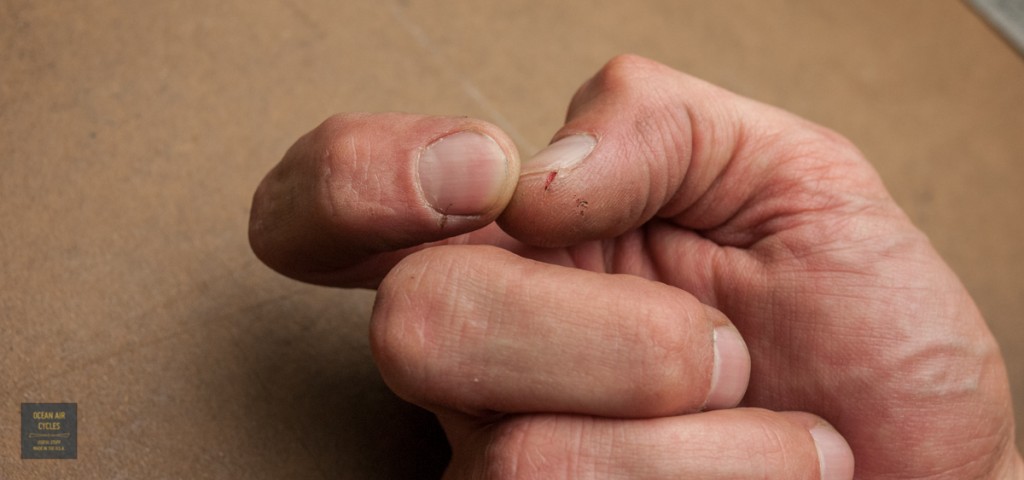
Even with a week of my left hand attacking my right, there was new undue struggle or pain.
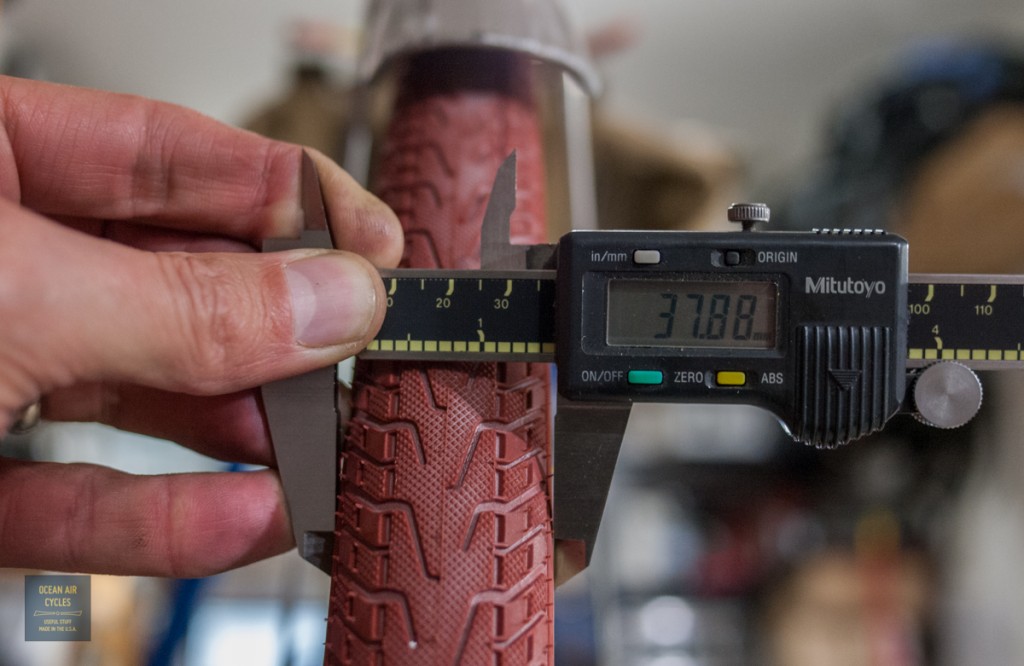
the tires slid on, the bead popped into place around 60psi. I took them up to 110psi to give a bit of initial stretch and confirm evenness than backed them off to 60psi for a starting point to wide. Initial width on the 23mm rims is 37.8mm, and I am sure they will stretch a bit in the first weeks of riding.
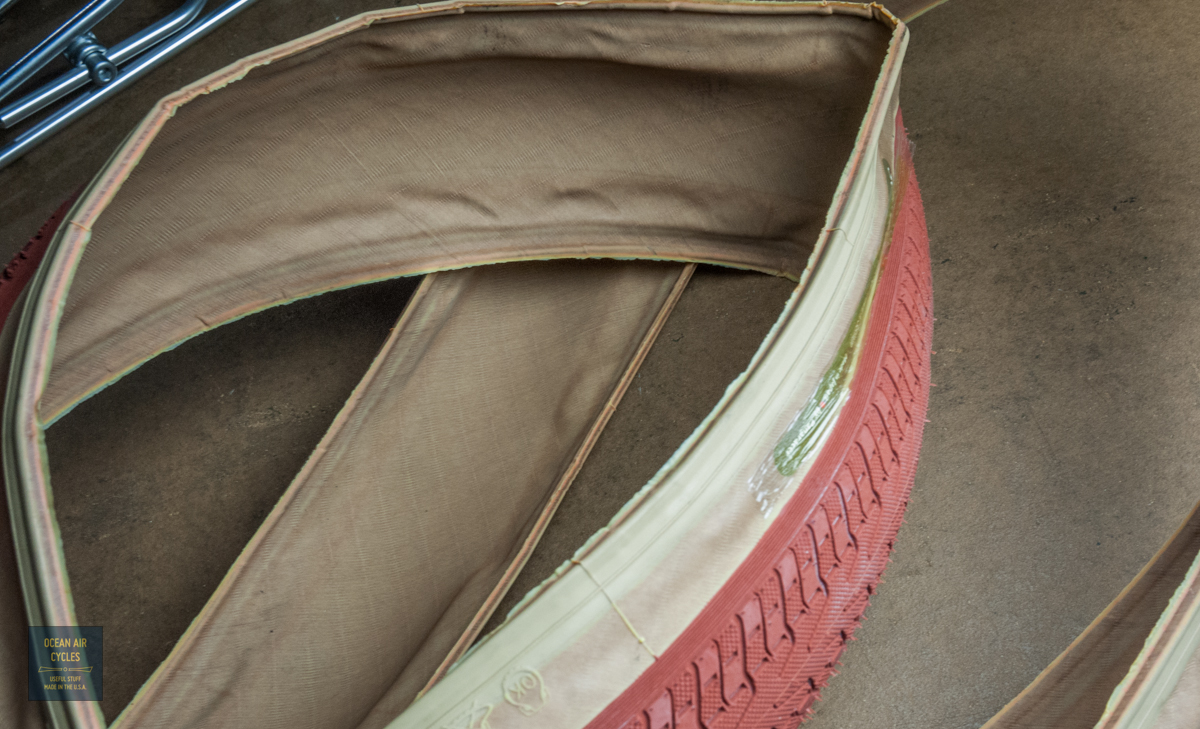
The only downside I can see to these tires is the lack of sidewall protection. This is not a surprise and is part of the design. Only putting the tread rubber where you really need it. The thickened tread section wraps just to the road side of the tires apex or bulge. The price of improved performance on the road means that these may not be the best choice for dirt roads with sharp or tall rocks. Like all things in life there are tradeoffs, performance often coming at the cost of durability.

I have been able to get out for a quick 8 miles or so, and am very happy with the ride quality. They feel in many ways just like the B-Line, as they should, but with the subtly different handling that the larger diameter brings to the equation. Like new "component" day often does I am excited to get out there and put some miles on these. Follow up impressions will come in a couple of weeks.
The
C-Line tires are available through out storefront
HERE at $98 a set
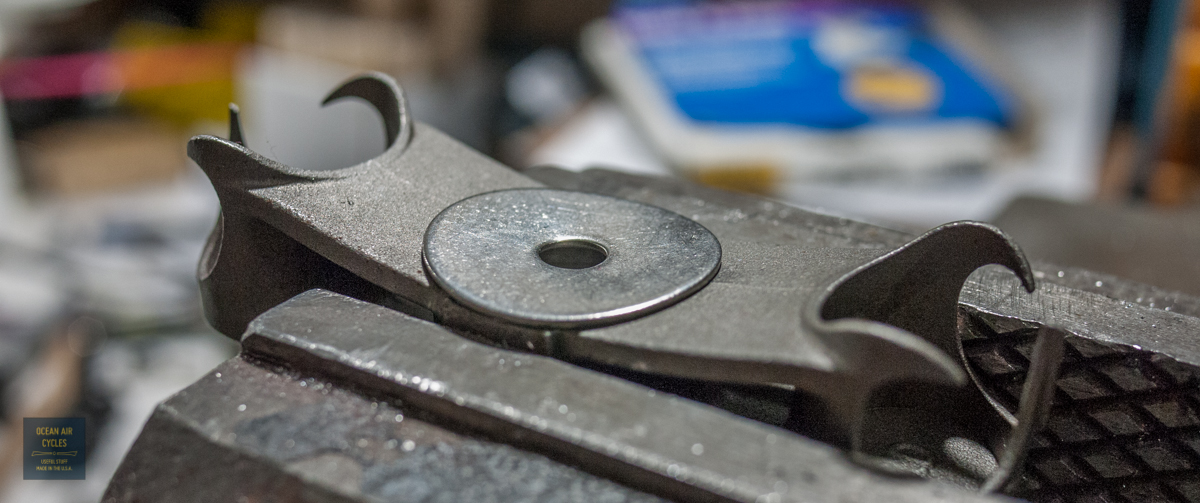
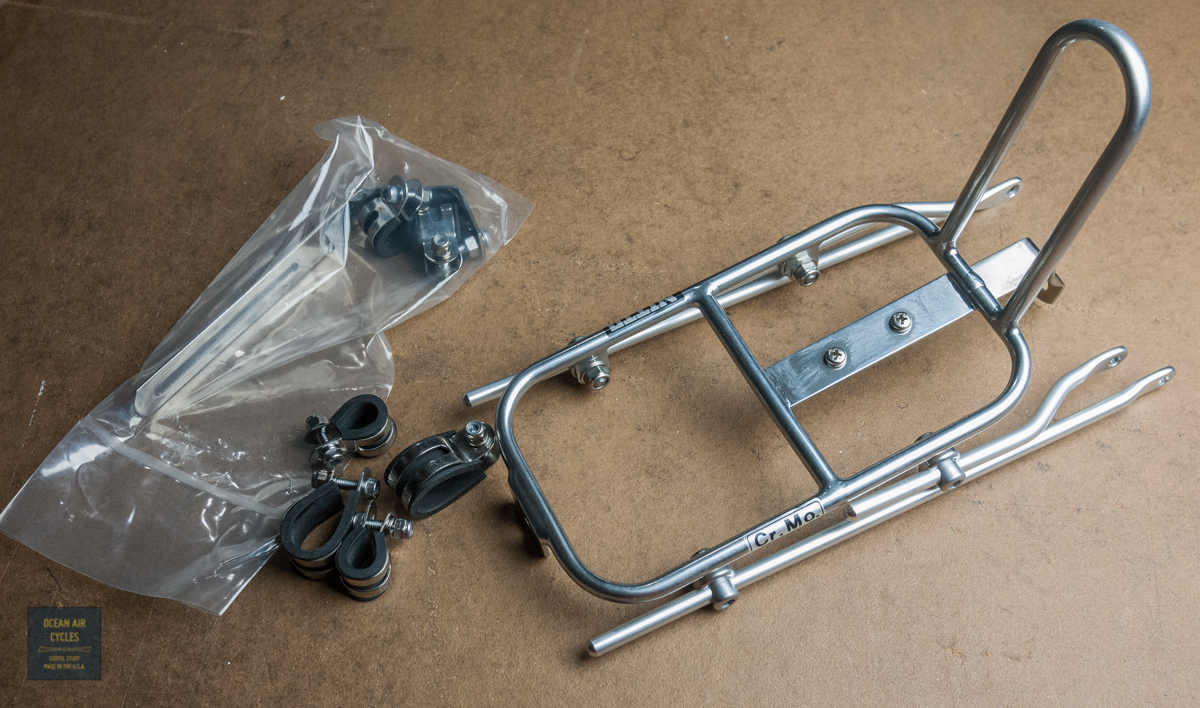
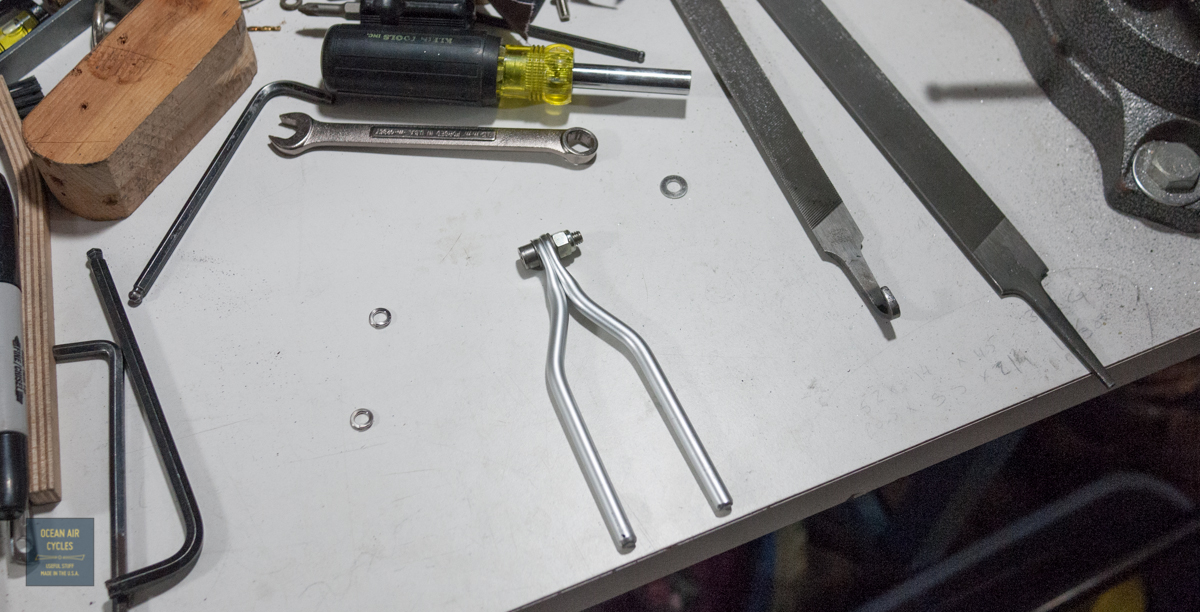
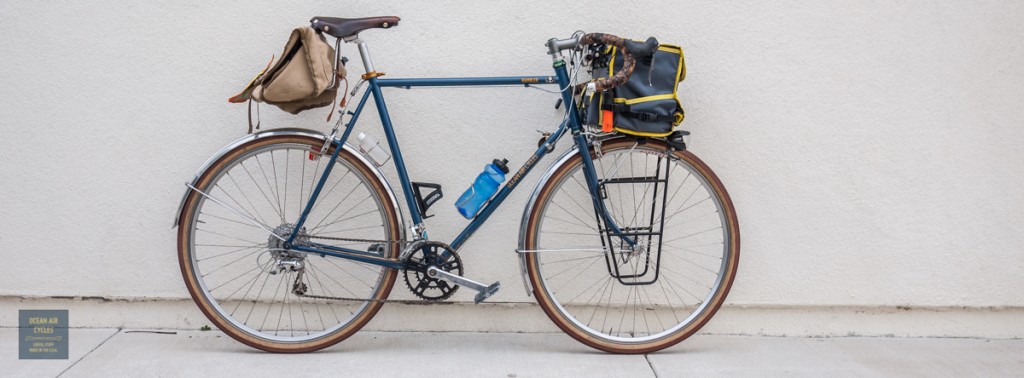
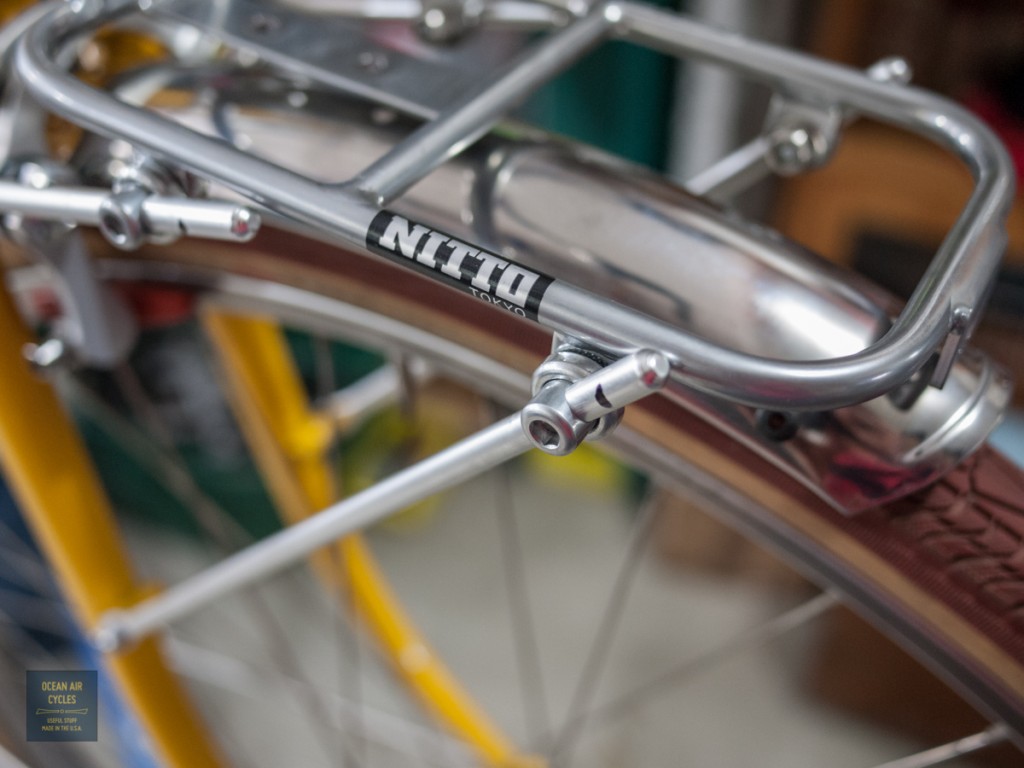
At the current time the Mark's Rack made by Nitto is the best option available for fitting a small front rack to your Rambler as a bag or basket support. It has all of the hardware needed to mount and only needs the struts trimmed and slightly adjusted (bent) to fit the four point mounting system perfectly. The Mark's rack is really a supreme value in quality and strength, yet versatile. Having one in your parts bin is always a good thing, they can be adapted to front or rear mounting on most bikes. When you buy one, this is what the standard kit looks like.
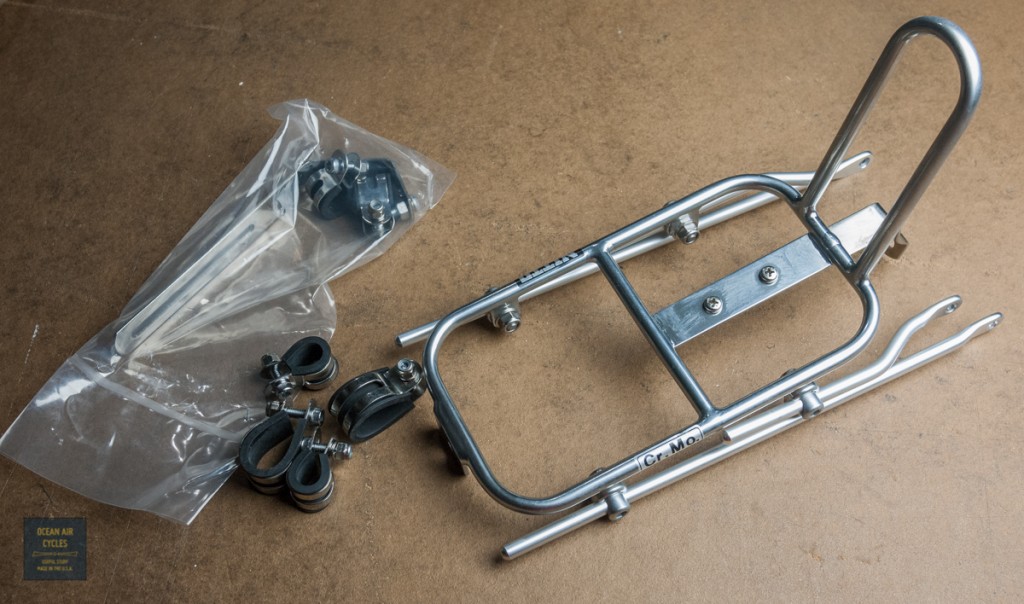
Step one is stripping off everything but the four round mounting struts. Save all of this hardware for future projects as it is some of the nicest you can get your hands on. Next loosen the strut draw bolts, 10mm wrench, a bit so that you can move the struts without everything falling apart. Mount the two front struts to you mid fork rack mounts with M5 bolts while holding the rack in its approximate final position above the front fender.

Gently tighten things into place so that approximate trimming needs can be determined. At this point you can also see about how much bending will be needed for the rear struts. Note the orientation of the struts. It can help to mark the inside, or direction of future bend. Once bent the struts are not the same, but mirror images of each other.
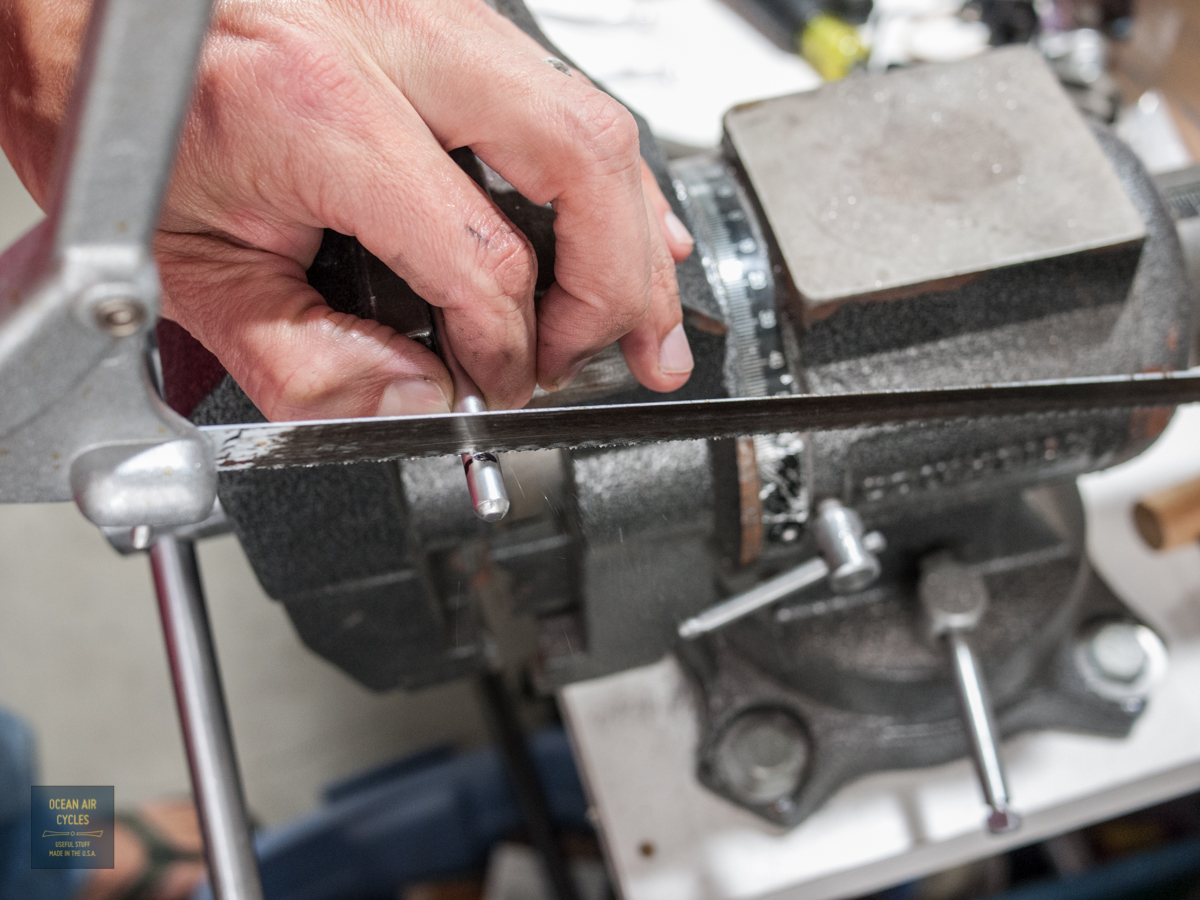
Mark each of the struts for trimming. Remember you can always cut or file a little more off, but never put the metal back. In general I leave about 1cm of strut beyond the draw bolt for fine tuning fit.
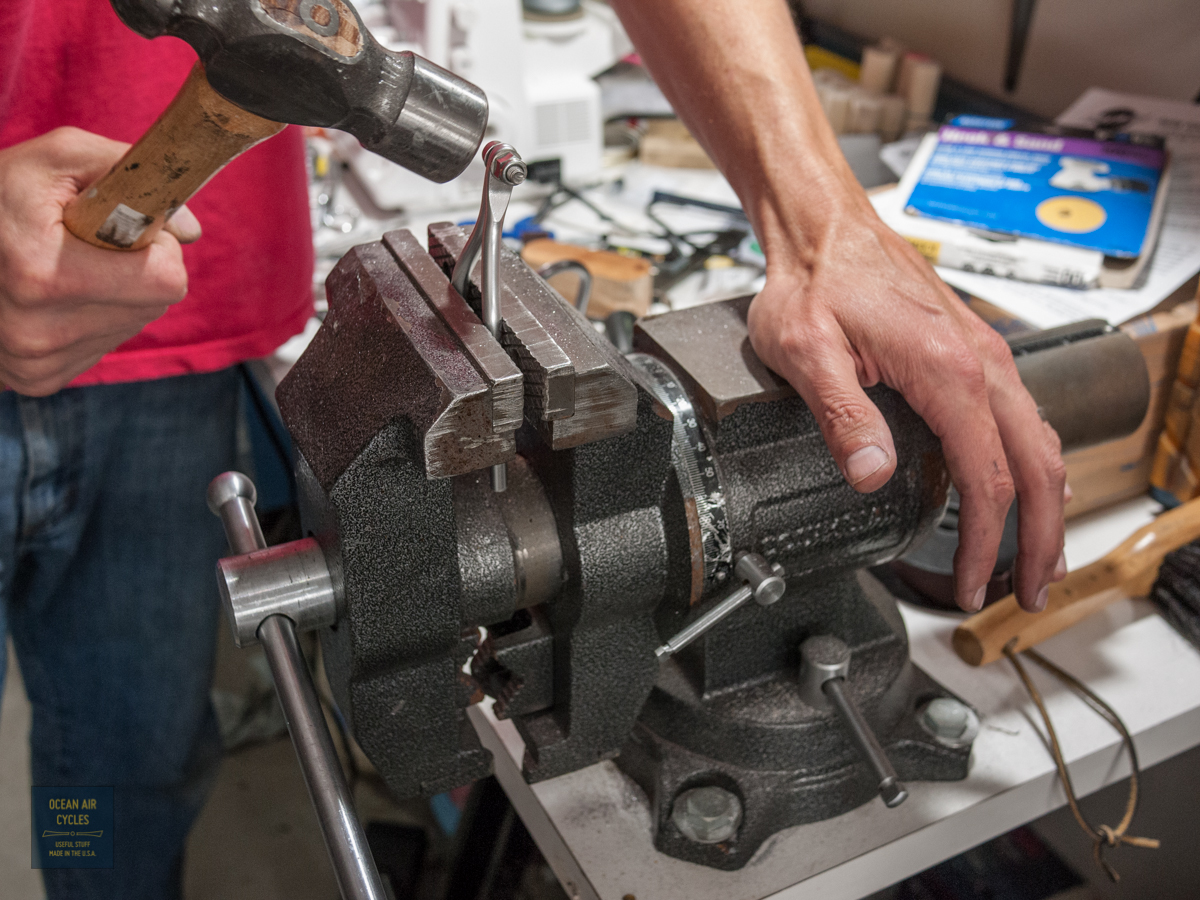
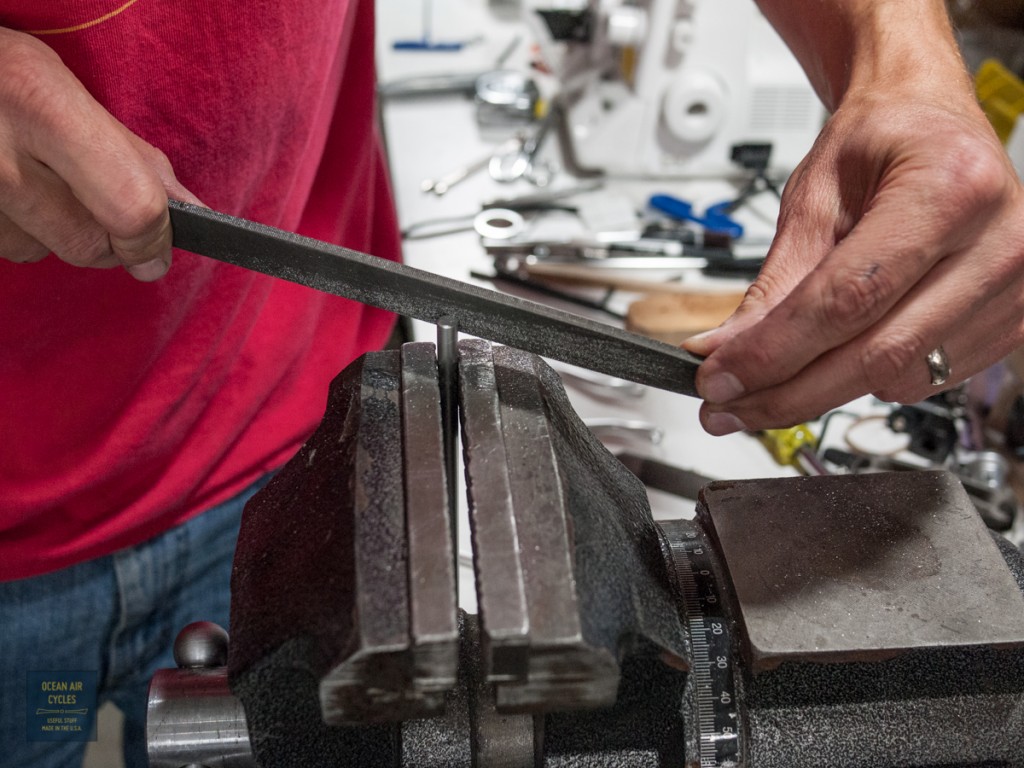
Now dis assemble everything, careful not to lose any of the small parts. The draw bolt washers and struts will likely have you proving that gravity is indeed still working at least once during the install. Carefully clamp the strut in your vice. Soft jaws or a rag wrapped around the strut are optimum, but judicious clamping force will get the job done without marring the struts. I use a hacksaw to make the cut. Again, it is always easier to take more metal off than put it back.

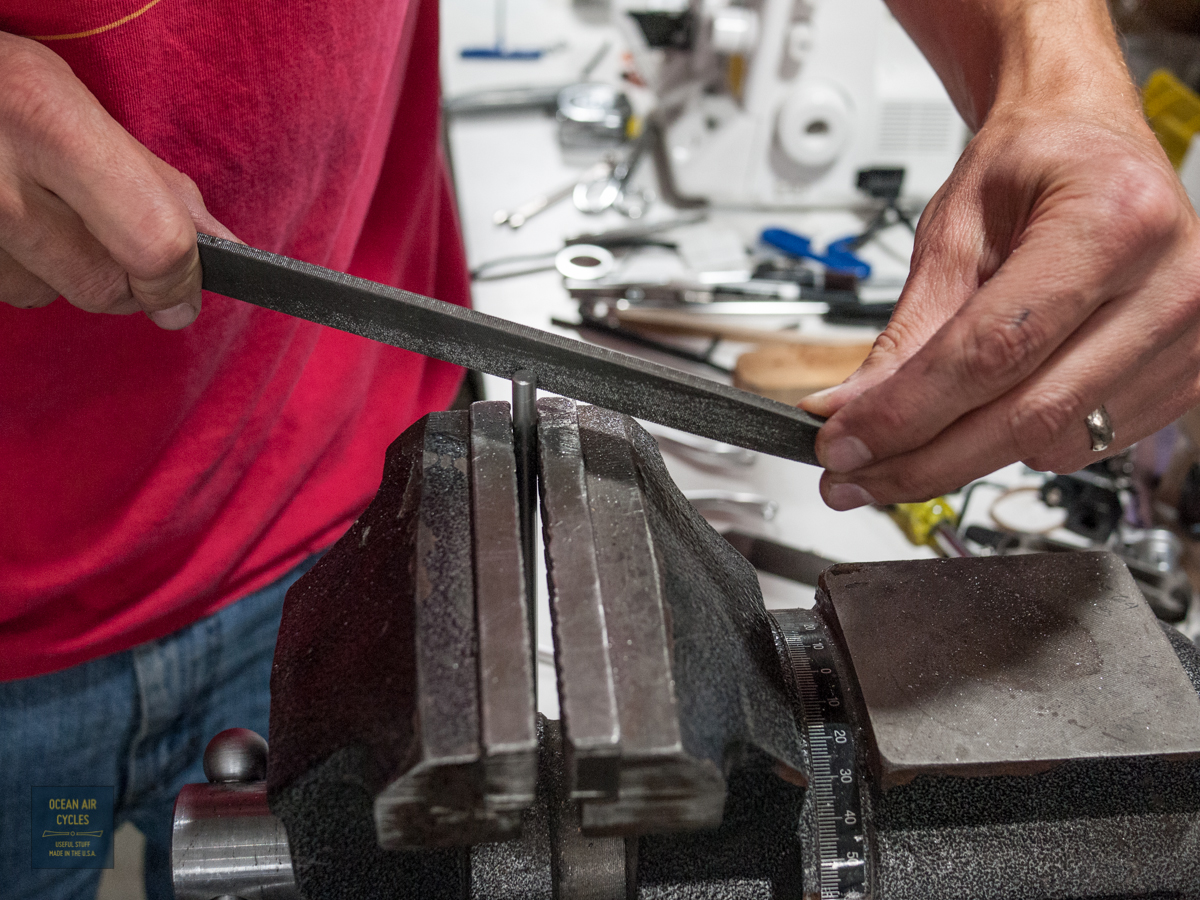
Next file the rough cut end flat, the file a bevel on the edge. For added detail it is nice to sand the end with fine grit and the matte finnish will be uniform.
Once all four have been trimmed, it is time to bend the rear struts. Bolt them together at the end with a M6 bolt, nut and two washers. This will keep them in alignment during the bending process.

Back into the vice, clamped just below the factory s-bend, with intended bending direction noted, it is time to move some metal. The force needed to cold set is less than you probably think. Work up to it, while you can bent them back the other direction a bit during final tuning, too much back and forth will wreck the strut.

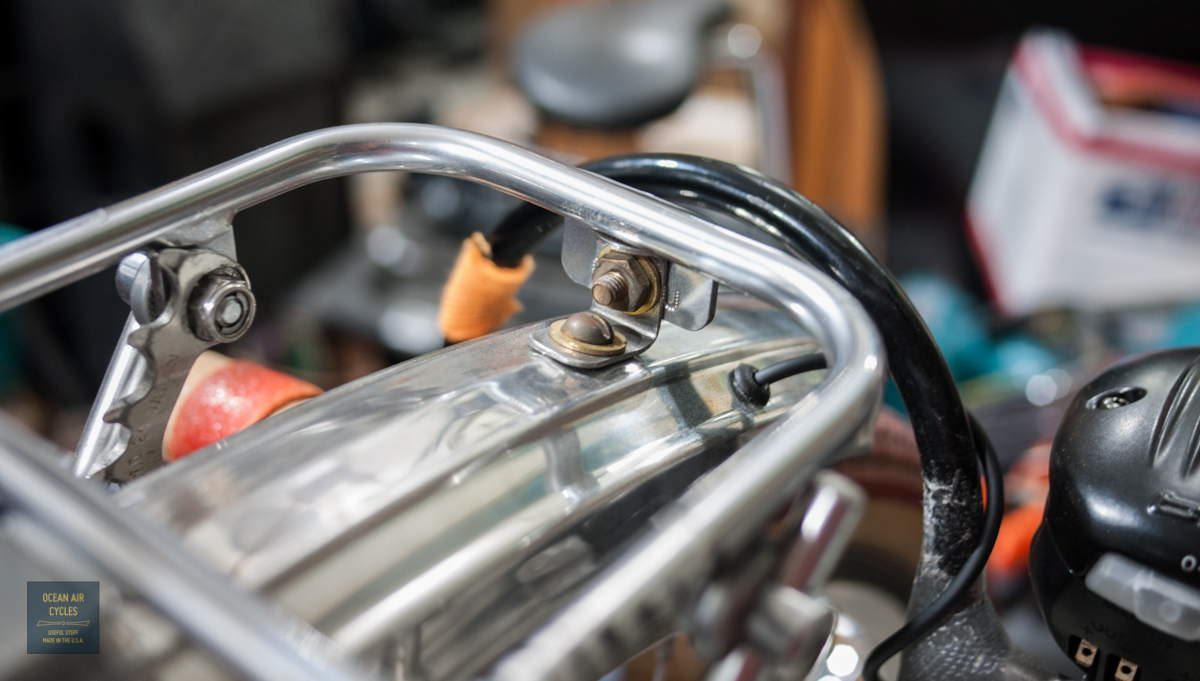
If things go fantastic you will get it all perfect on the first pass. Chances are that you will start back at the top and go through the process at least one more time to get the fit dialed in. That is why we leave a bit of extra metal on the struts. his is what it should look like as things come together. There is a sweet spot between tight and loose with the draw bolts and mounting bolts where you can adjust the position of the rack in 3d space with out everything coming apart. The goal is to have the struts cold set such that there are no spring forces in the mounted struts. This will help to extent the fatigue life of the system.


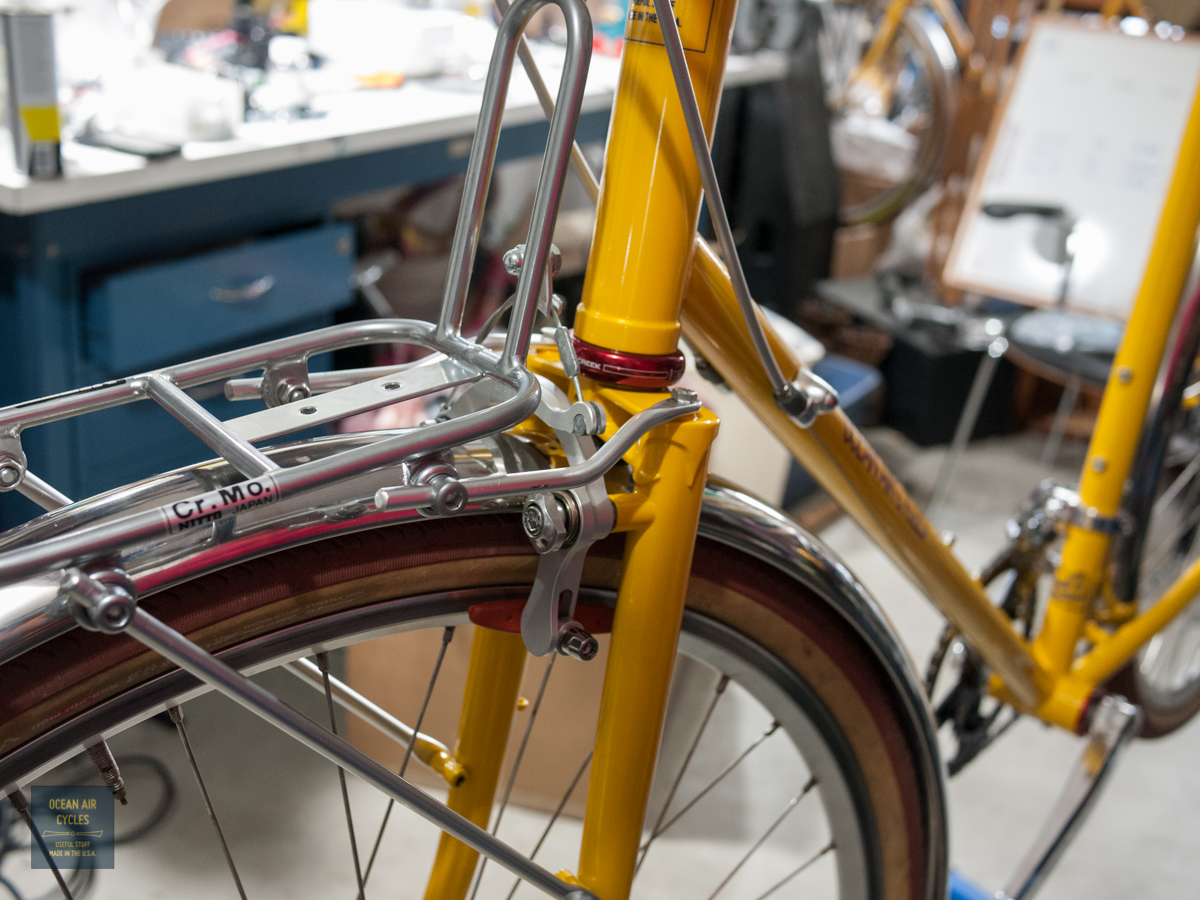
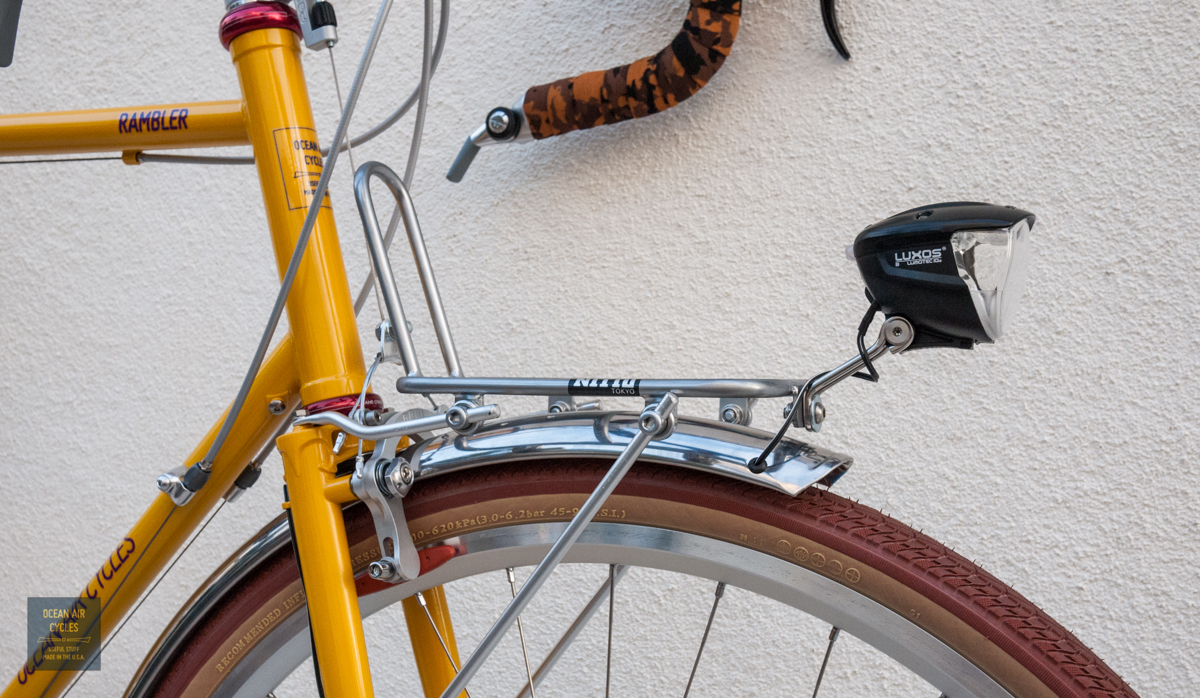
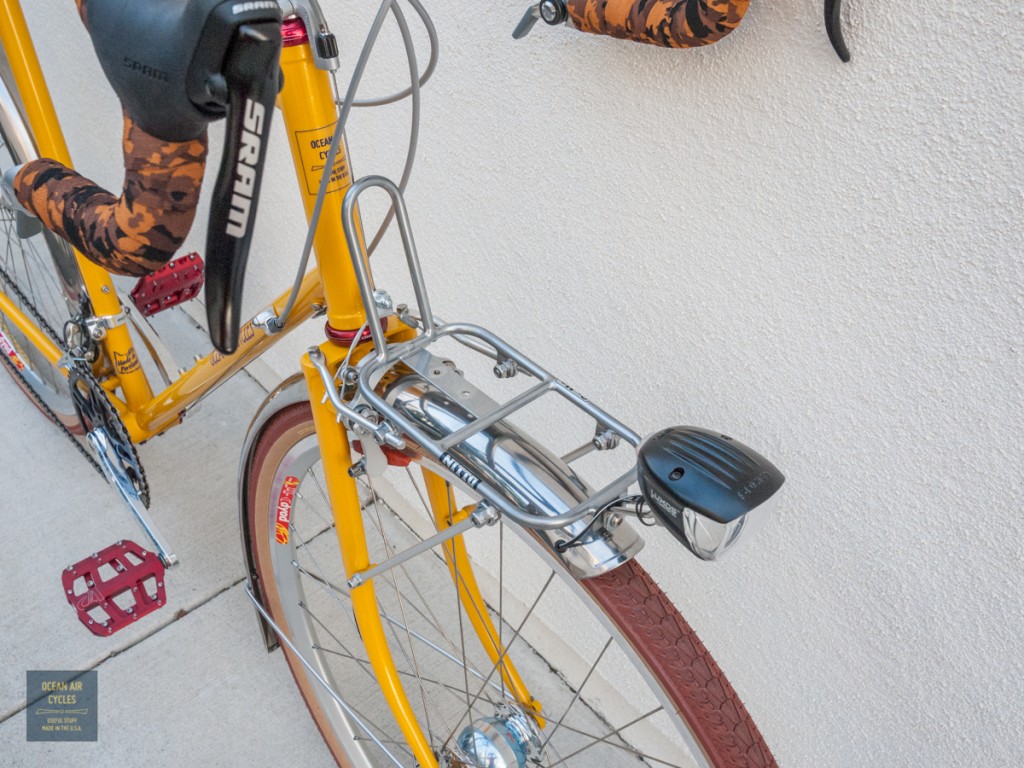
For the final tightening, use one of the included split washers between the bolt head and strut. Clearance above the fender should be close, but not so close that movement of the fender results in a rattle. If desired one can make an angle bracket to connect the fender tip to the rack for added fender support. Here it is all together with a headlight mounted.

This will work equally well on 700c and 650b Ramblers. The distance between the upper and lower fork mounting points is consistent and thus the rack position follows the same.
In the near future we will be offering the mark's rack through our store front with the above adjustments made to the struts.
 Right out of the box I knew this was the direction we were heading. These instantly became my first choice every day. We washed them, beat them up, crushed them, and soaked them in sweat.
 They never let me down, the only catch, I liked the material on the orange and the cut of the blue. That was the only trouble picking a hat each day. The Blue hat, and final choice on cut, is slightly different from a traditional "cycling cap". it is cut a bit full run the crown and the brim is slightly wider and deeper to give bit more protection from the elements, but not so big that it requires a stiffener. In plain english, a perfect cap.
The next step was working up the mock-up for custom embroidery
They never let me down, the only catch, I liked the material on the orange and the cut of the blue. That was the only trouble picking a hat each day. The Blue hat, and final choice on cut, is slightly different from a traditional "cycling cap". it is cut a bit full run the crown and the brim is slightly wider and deeper to give bit more protection from the elements, but not so big that it requires a stiffener. In plain english, a perfect cap.
The next step was working up the mock-up for custom embroidery

 With final art resolved, it was time for material selection. I wanted to go with organic cotton for ease of care, long-term durability, environmental impact and sustainability of the material. I liked the hand (feel) of the material and how it was holding up to the abuse of repeated trips through the washer and dryer. Working with a relatively LEAN supply chain model we are able to offer color options with a decent lead time. The final choices:
 All of the hats will have our logo embroidered on the front to the left of center in dark Yellow, similar to the mockup I made with a hacked patch above.