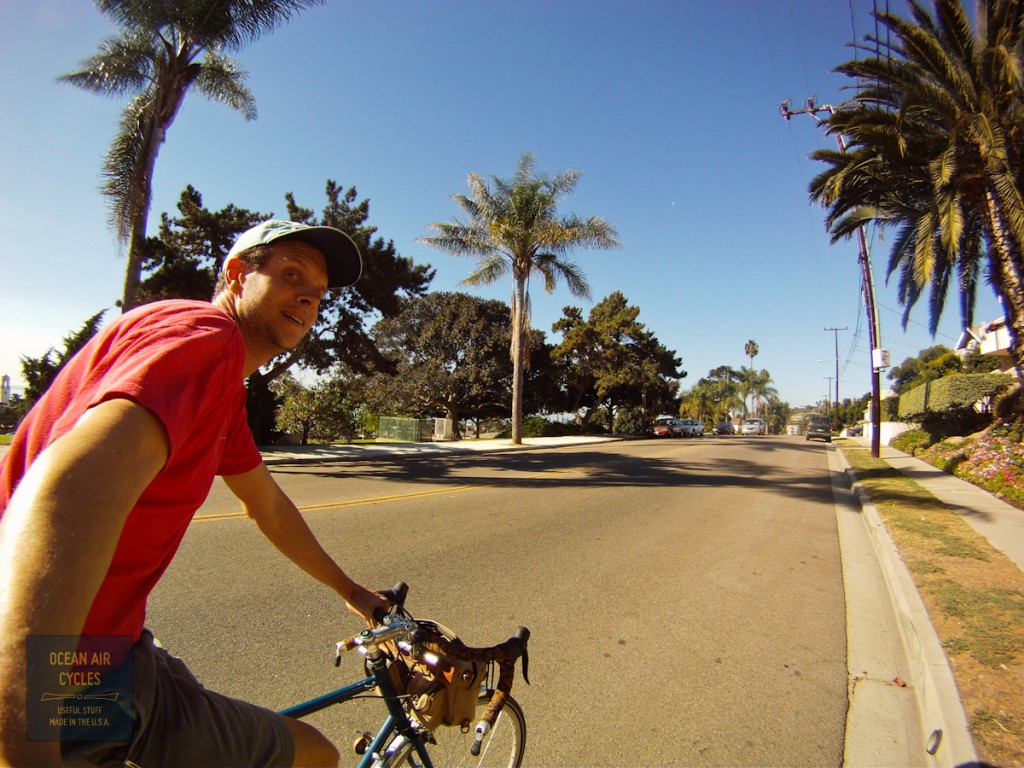
Even with the kickstarter project submitted for review things have not backed off a bit, but I took a 30 minute break to ride over to the local polling place and drop off the votes.

You voted, right? I am sure you did.
Then the hustle home to keep the prep for the SF Expo under way. I have had my idea and materials for the back drop on hand for a month now, but figured it would be a good thing to do a dry run before SF.
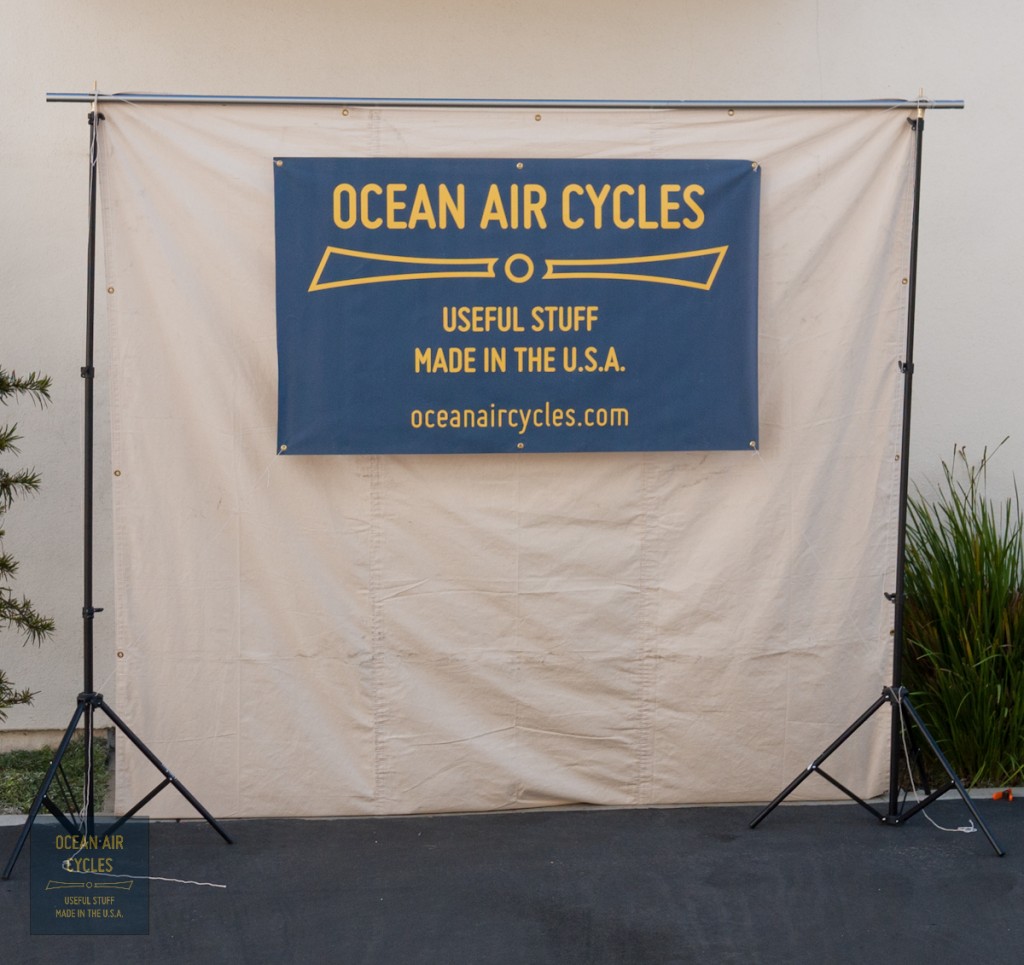
I am pretty stoked with how it came out. The banner hangs ahead of the backdrop for a slight shadow box effect. the string disappears on the canvas. I need to make a couple of adjustments to keep it all tight, but I am happy with the plan.
Next up is cleaning up and re-cabling my blue Rambler. Decals will be coming in overnight, thursday is going to be a busy morning.
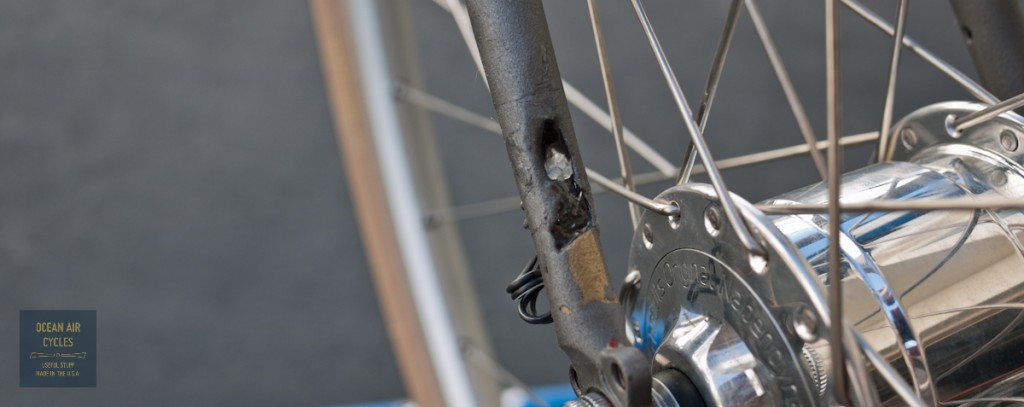
Rambler No.2 (Red) was going to be a cornerstone in the three bike heard that I am bringing to the SF expo in just a few days. At 57cm it is square in the middle if medium and most likely to be getting test rides, that is until the fork was blasted instead of chemical stripped, and it is not really clear how much steel is still there. After an assessment it was pretty clear that the fork is never going to be supporting a rider again, but it will hold up the front end of the bike for the expo, that is better than no bike and I decided to make lemonade with what I had.
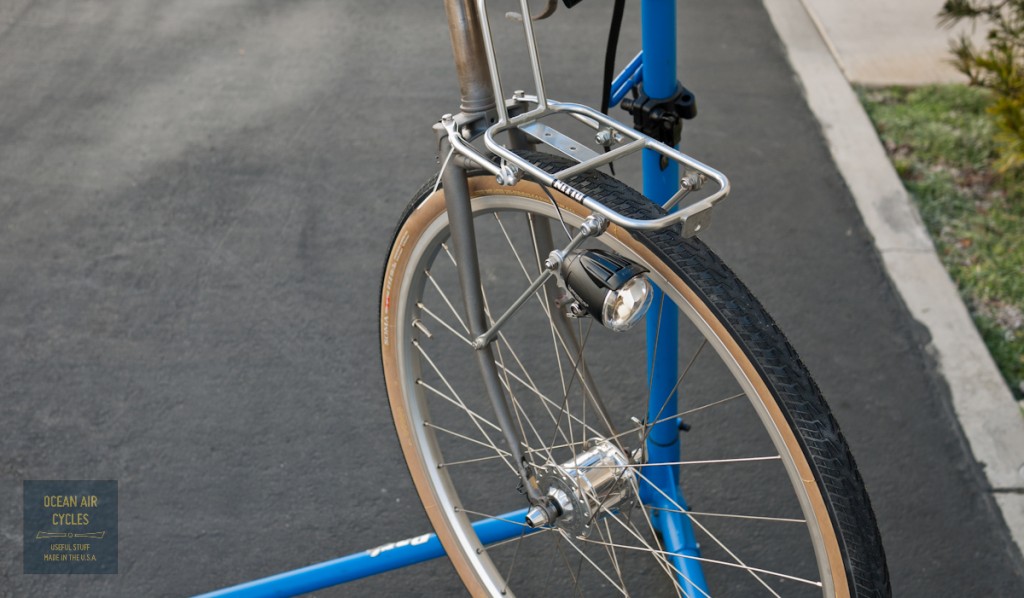
The bottom of the right fork leg is pretty much gone just above the fork leg. I thought about some ways to stabilize it, headed up the street to FCD surfboards, and the guys let me have some resin. A tape mold, injection of epoxy through the vent hole and a few hours later I a confident that it will hold up to transport and display.
There is not enough left of the dropouts to mount a rack or fender, but I was able to make a Mark's rack work to hold up the light. That is when I went full in, and wired up the whole bike front and rear. This bike is the first one of the batch to get the full dynamo lighting system. That is front and rear lighting powered by the rotation of the front hub.
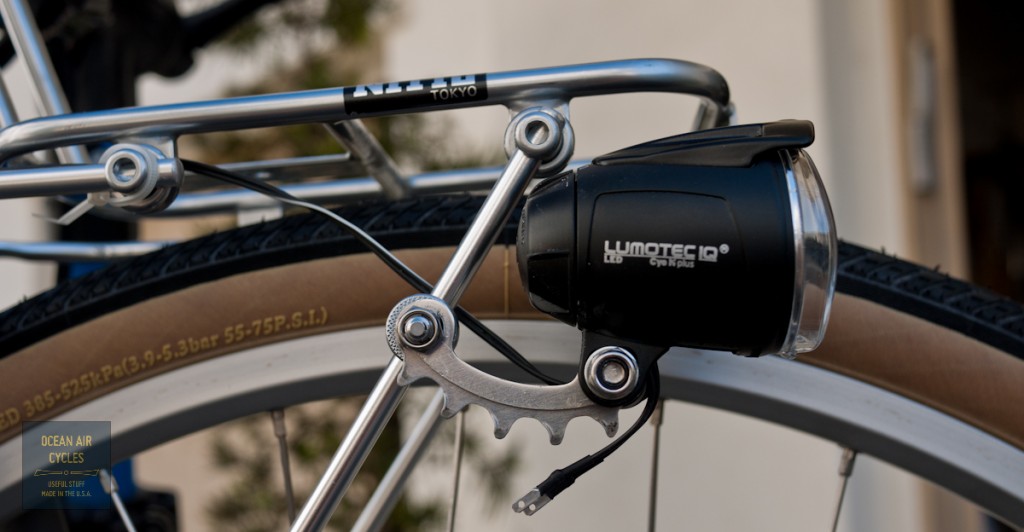
The chain ring bracket is perfect. The wire from the hub to the headlight runs through the guides on the right fork leg.

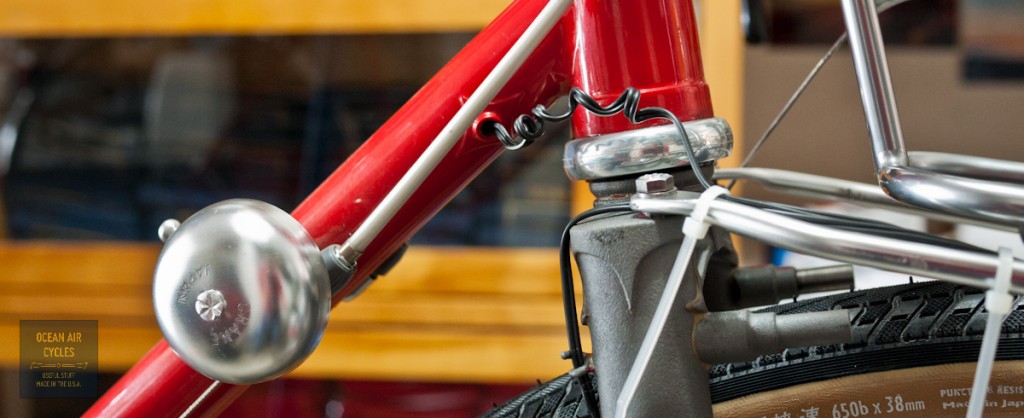
The curly q wire allows the lighting wire to be installed or removed with the connectors intact on the wire ends. I first saw this either on Alex Wetmore's blog or on Flicker someplace. It works better than solid loops that will not pass the connectors in the event that you need to strip the lights with intentions of putting them back on.

In an ideal world the wires would be tucked under the fender for the run from the crown to the headlight and the returning tail light wire. This being what it is, they are tied off to the rack. The tail light wire enters into the frame through the port at the top of the down tube.
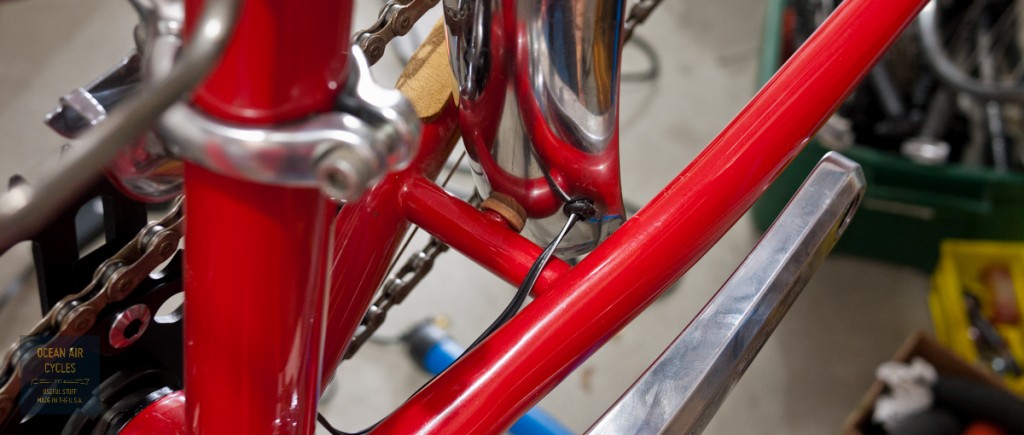
It passes along, protected from snagging, inside the down tube, around the bottom bracket and up the seat tube just a bit to the exit port.

There is a short exposed run along the left chain stay before it tucks into the rear fender. To protect the wire from being cut by the sharp fender edge I used a commonly available rubber stress relief grommet.

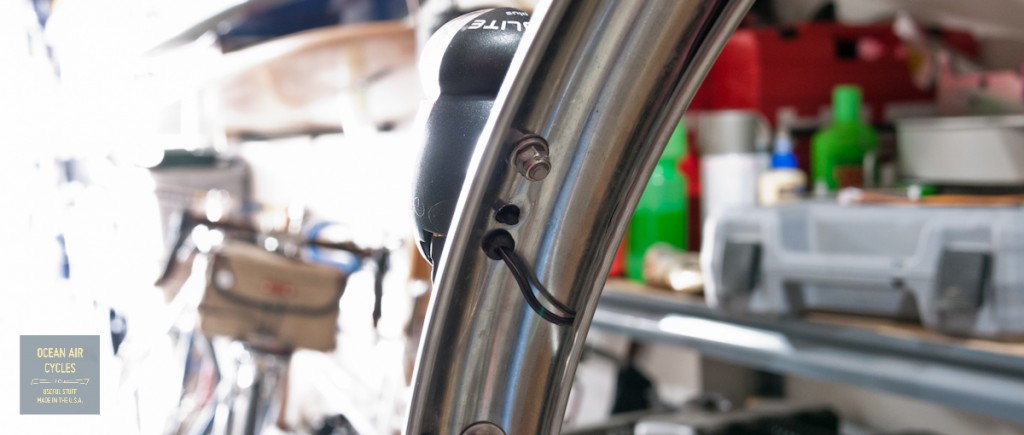
the wire then runs along the inside edge of the fender. The Berthoud fenders are quite nice for this as the edge is rolled, but not crimped completely shut as it is on some other brands of metal fenders.

Once fully tucked in, you can crimp the channel shut just a bit, or use a few short beads of silicone to hold it in place. The wire exits the rear of the fender through, another stress relief grommet, and then connects up to the tail light.
A quick spin of the front wheel to confirm that everything is still working and it is almost time to clean up. I decided to secure the short run of wire between the seat tube ans the fender with a piece od red reflective tape that was a close enough color match.
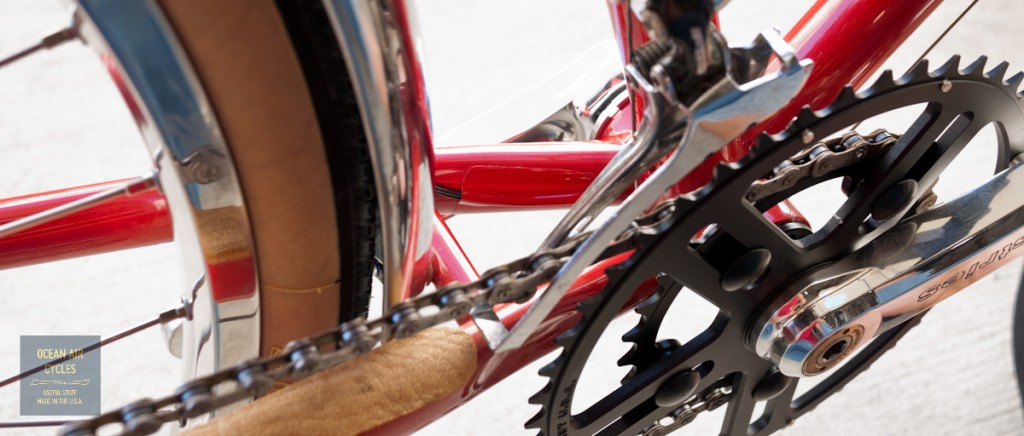
While not everything I had dreamed for a complete bike, I am still pretty happy with the results, and when the replacement fork gets here it should go together pretty quickly.

With everything in the right places on the 51 porter conversion it was time to put the cherry on top. There is something just right about the feel of cotton tape with just a few coats of shellac. I have found that the orange tape, particularly Newbams, when paired with garnet shellac is not only a near perfect match for brooks leather saddles, but has a warm tone that you can not replicate any other way. It is just one of those things that takes time, patience, and is a process you can not cheat on. This project has a layer of Soma thick and zesty under the orange cotton, finished off with cotton twine and then three coats of garnet shellac, the pictures tell the rest of the story.


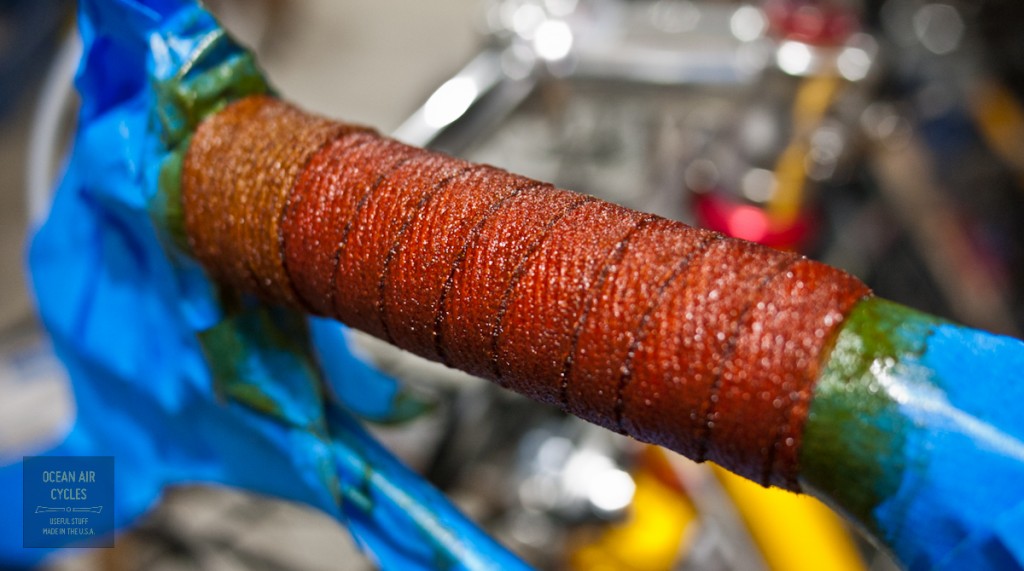

The amazing thing is the feel, grippy, but soft, with just a touch of cush. It will soften with time, last for years with an occasional re-coat, and only look and feel better with usage.
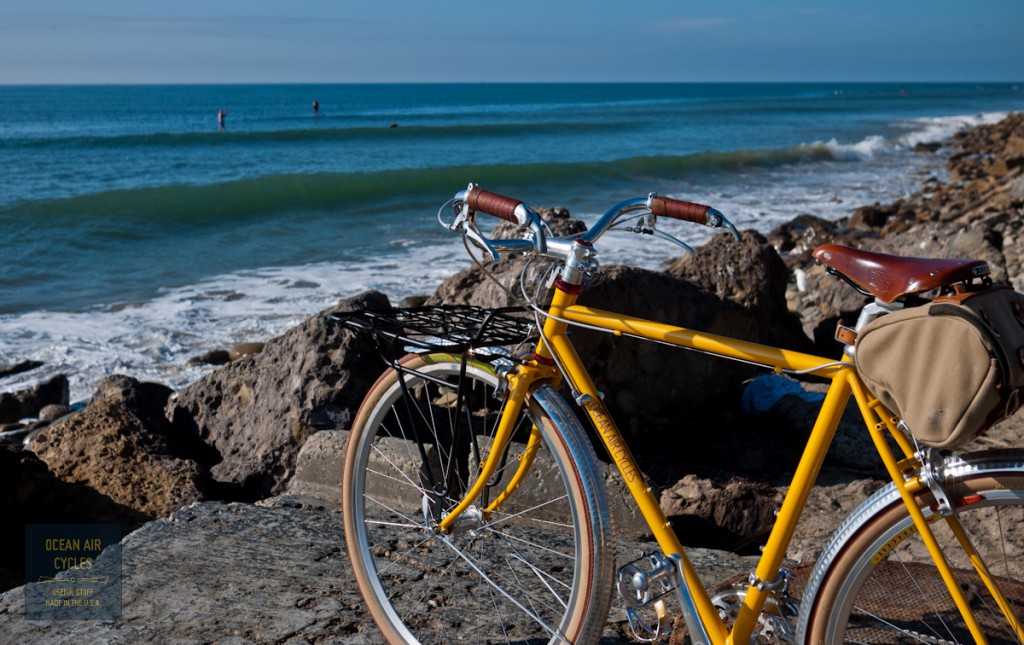
And for the color, most would not know it isn't leather unless you told them, a perfect match for a worn in Brooks.
Getting everything ready for the SF expo, a week from now, has been nuts. That said the 51 porteur build on the sunflower Rambler is done. I finished off the grips this morning, headed out for a test ride around the neighborhood and then back to the computer.
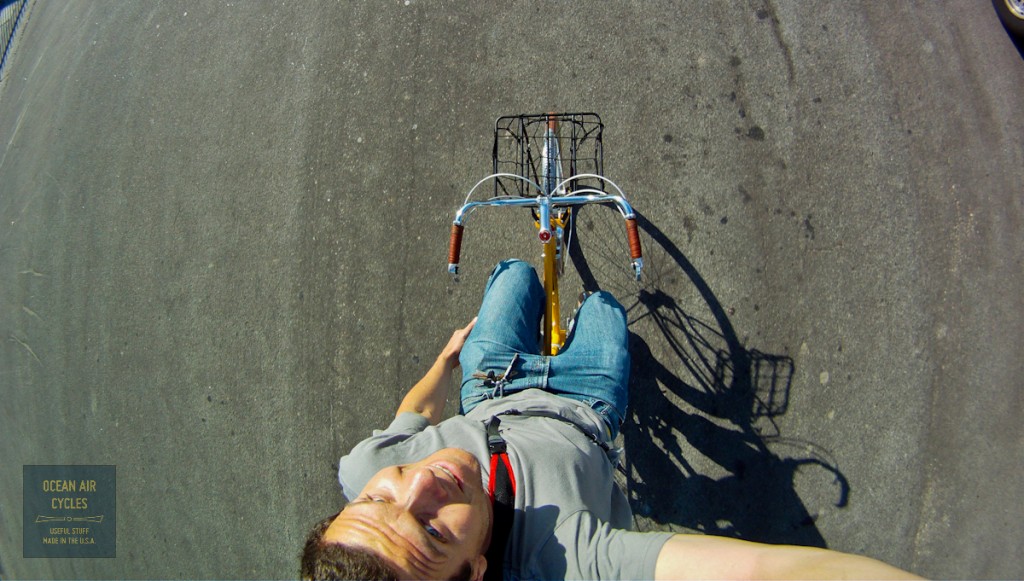
Now to wrap up the Kickstarter video, get the posters ready, finish detailing out the blur 63 Rambler and what I can of the red 57.
Never a dull moment, but still squeezing in rides where I can, just short ones.
I am one of those sorts of people who learns by doing. Sometimes by book or example first, but usually but jumping in and doing it. Todays lesson? Never audition a new coater on bike or part that you need, particularly soon. The call came last evening, the blaster had shot a hole in the fork ?!?!? The fork was in for a chemical strip, light blast only if touch-up was needed and then a new single coat of red. The goal being a complete red 57cm Rambler for the SF Expo. The first attempt at red had gone on too thick and yellow, and it was in for a re-do with a local. He was not happy with how thick it came out and was going to do it a third time. I figured the fork would be a good audition for having a local option to do custom color requests.
I went by the shop this morning to see the "hole":
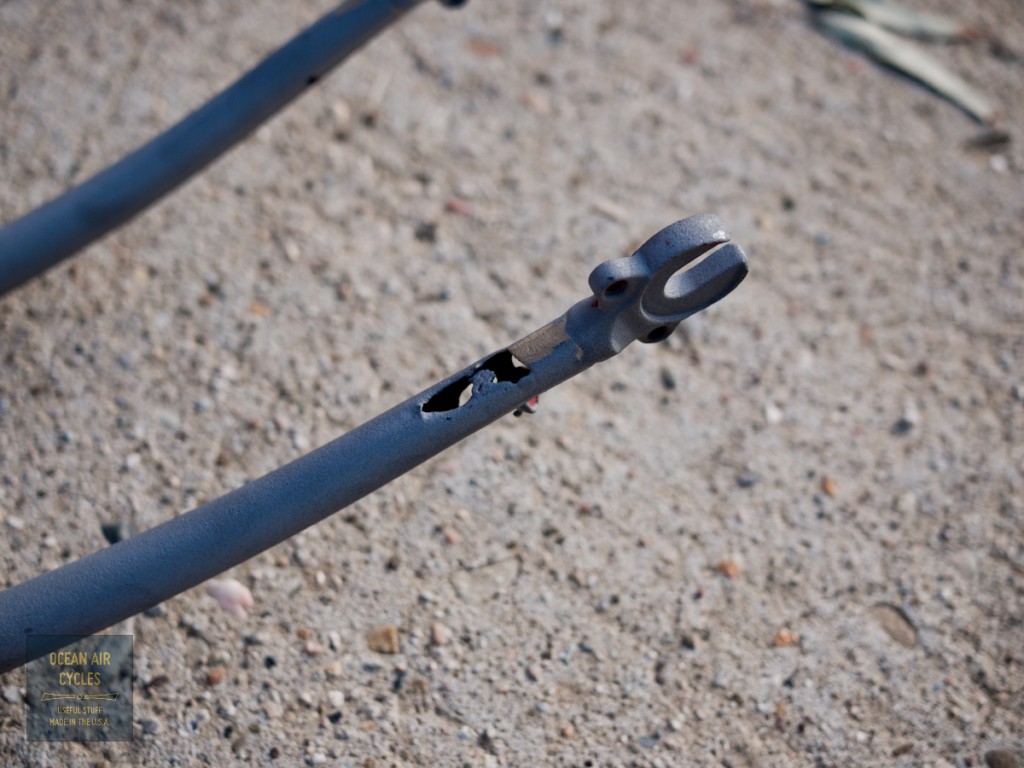
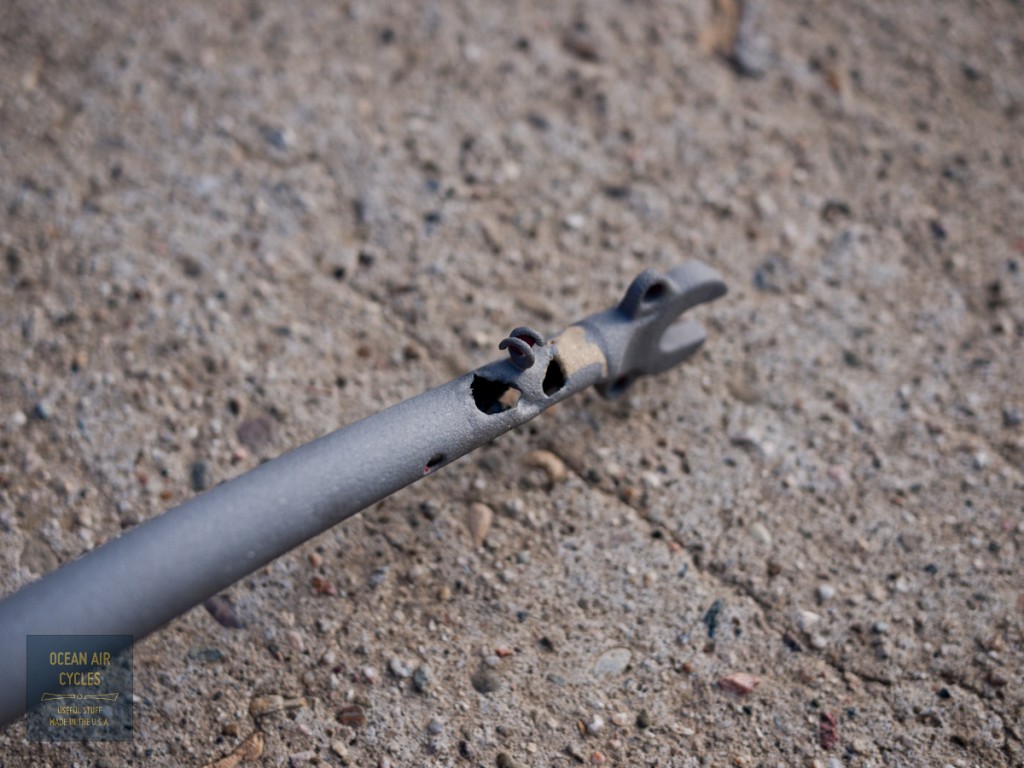
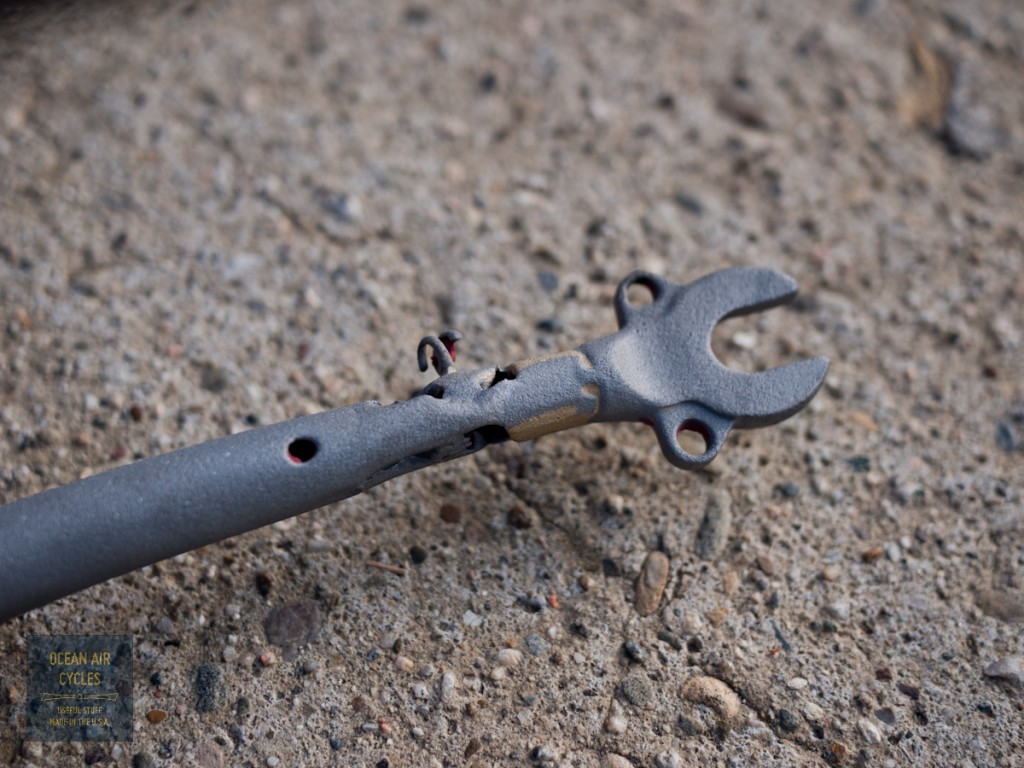
I am still not really sure how a blaster could do this exactly. Obviously this fork will be retired. We are currently working on a resolution, and I am sure between the blaster and the coater this will be made right.
With the cup being half full, I am in shock and awe that the wire guides are intact. Also, it is clear that my guys in Portland are getting good brass penetration into the dropouts. And last but not least, one less bike to transport to SF.
Trick or Treat? I am hoping for the treats, this was not how I planned for the day to start.
This last week I was able to get the 51 Rambler switched over from its original drop bar build:

There was nothing really wrong with the way the bike was built up, and it fit my wife well. The thing is, it just was not how she wanted to use the bike. She prefers to sit upright, be able to put our minpin in a front basket of sorts, but still have the bike preform at a high level. I sourced some new parts, others were already on hand, and set to work on the conversion.
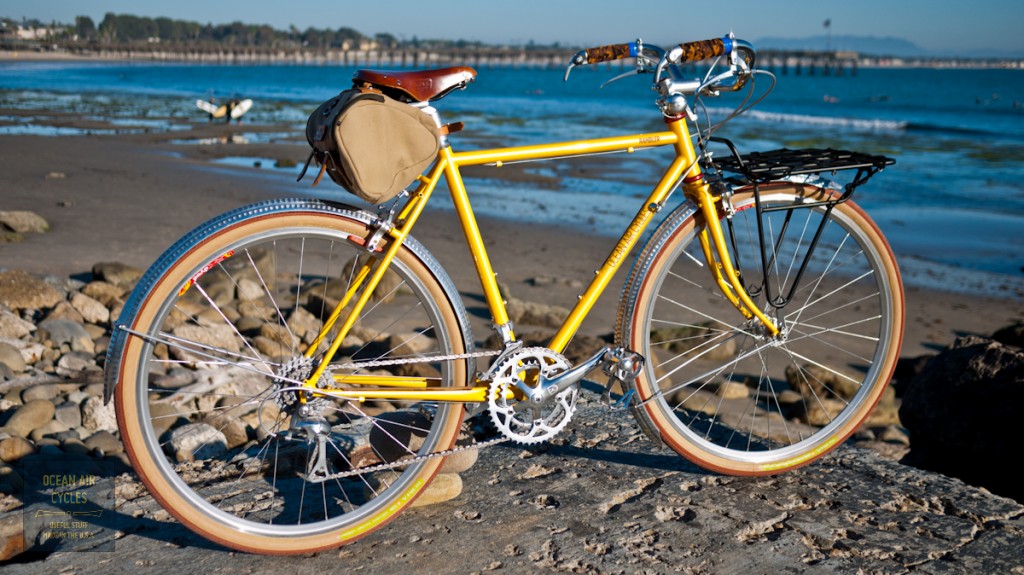
It came out fantastic. Some details worth note. The Wald bars work just fine with bar end shifters. The newish Tektro city levers are stylish and work great with the Paul Racers. The Pari Moto tires were swapped for a set of Soma B-lines to add a bit more durability as well as the look of the red tires. The Porteur rack is a Soma Fab offering as well. I modified it slightly so that it worked more gracefully with the front dropouts as well as having a couple of struts welded on for mounting the top end to the crown bosses. The whole thing is rock solid. The cherry on top is the new Crane mini hammer strike bell.

Only a few test ride miles in so far, but all smiles. I still need to do a final wrap on the grips and work out a basket or box for the dog, but it is pretty close to her dream bike at this point.
The process has started on the next round of t shirt art (read Kickstarter Reward). It is going to be a silhouette of sorts of the Rambler size extremes, somewhere between the simple outline and a Rebour drawing, with a heavy tilt towards the silhouette side. Updates as things progress, but the process is part of the fun.
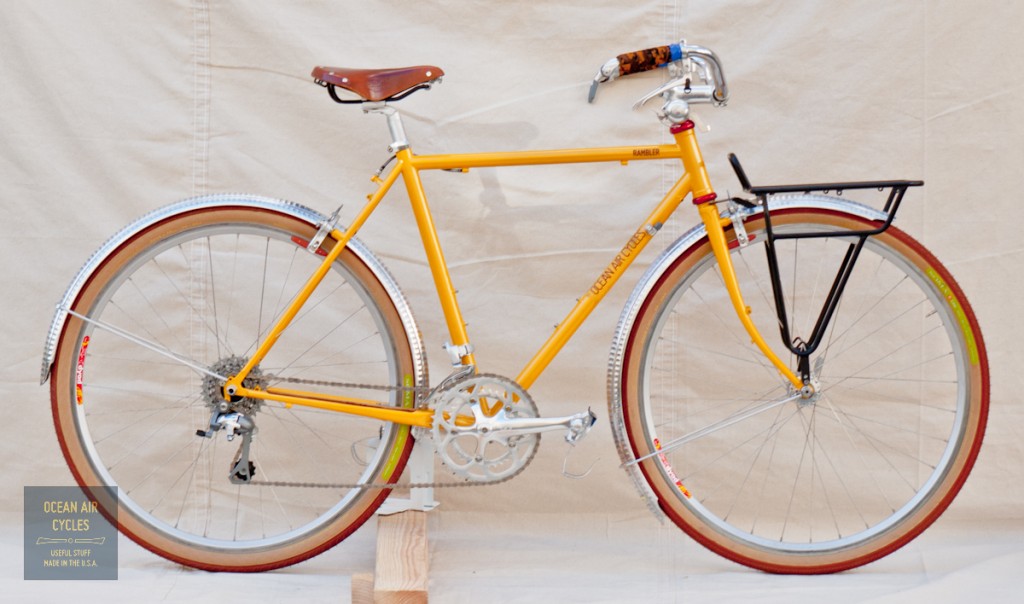

I know I should be working on my Kickstarter project, but it was just too darn nice out, I had some errands to get done (family has to eat) and a call from a local vendor who had wrapped up one of my projects. So, I made the obvious choice.....
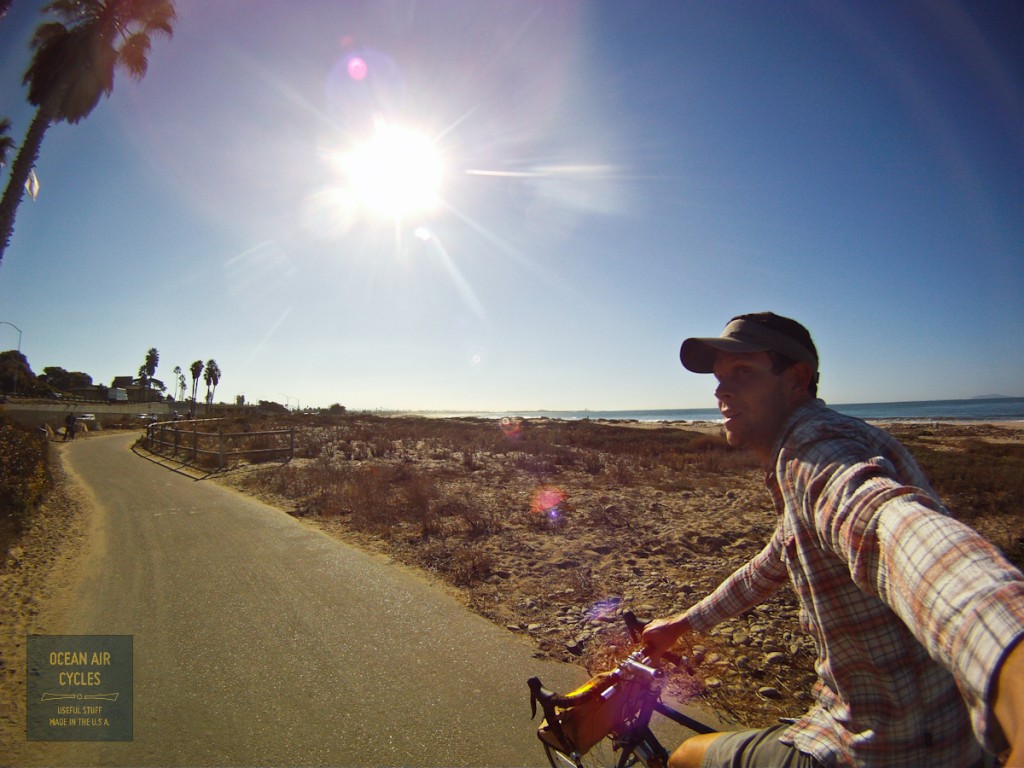
A quick roll along the coast and then through the farm fields to the other side of town..
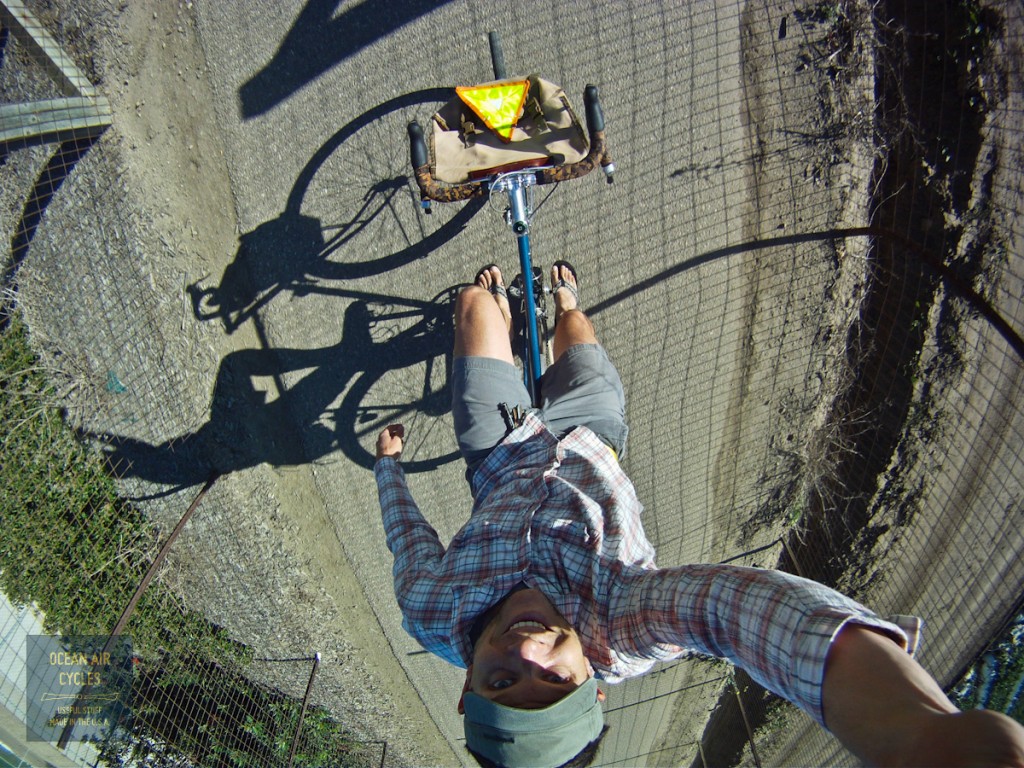
A quick stop into Silkworm, local printer, turns into an awesome chat about his giant pedal trike entry into the local kinetic sculpture contest, some vintage rides they have hanging in the back, and all the usual good stuff. I got what I was there for, over to pick up some food and then back down to the coast.

You may have noticed the bags switching around a bit. I had them all off for some pictures, then decided to throw the saddle bag up front. It was an easy way to contain a larger load and push the boundaries of the bike. Handling was generally good until I went past 15 lbs and added the sloshing jugs of juice, pushing the load up over 20 lbs. Everything was manageable, but 20 pounds off-balance and sloshing was at the upper end of that I would want to do often. In low-riders I have hauled twice as much with little if any effect on handling. Lessons learned, it was still a respectable load for a handlebar bag.
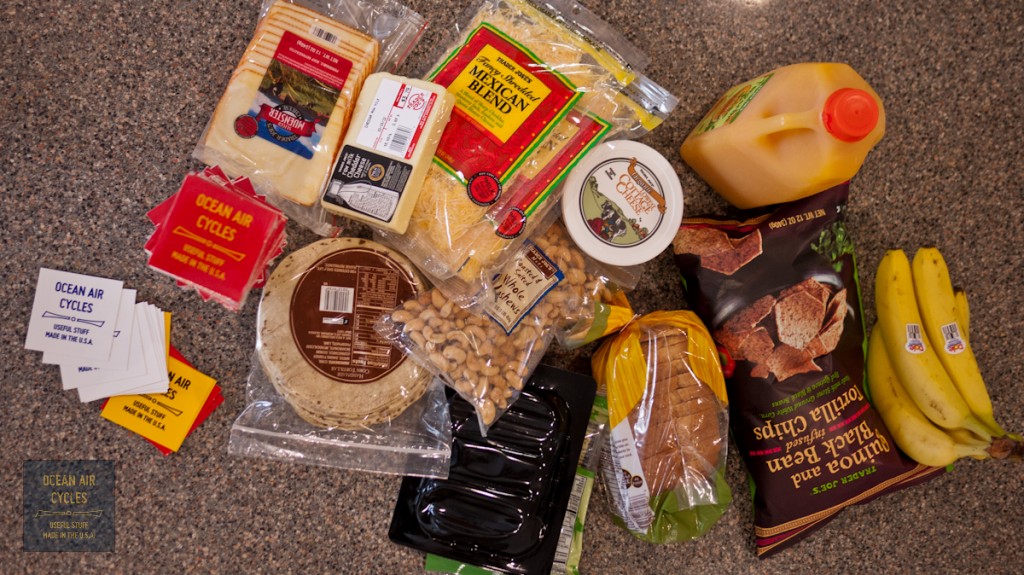
The stack of stickers is taller than the half gallon of juice, yes stickers.

These have been one of the languishing projects that was supposed to follow right behind the t-shirts, now a reality. I will have them ready to hand out at the SF expo in a couple of weeks. They will also be part of the Kickstarter rewards, I will have it up in less than two weeks (promise), and then after that they will be up on the store front.
Now it is time to pay the price for slacking disguised as product testing and marketing.
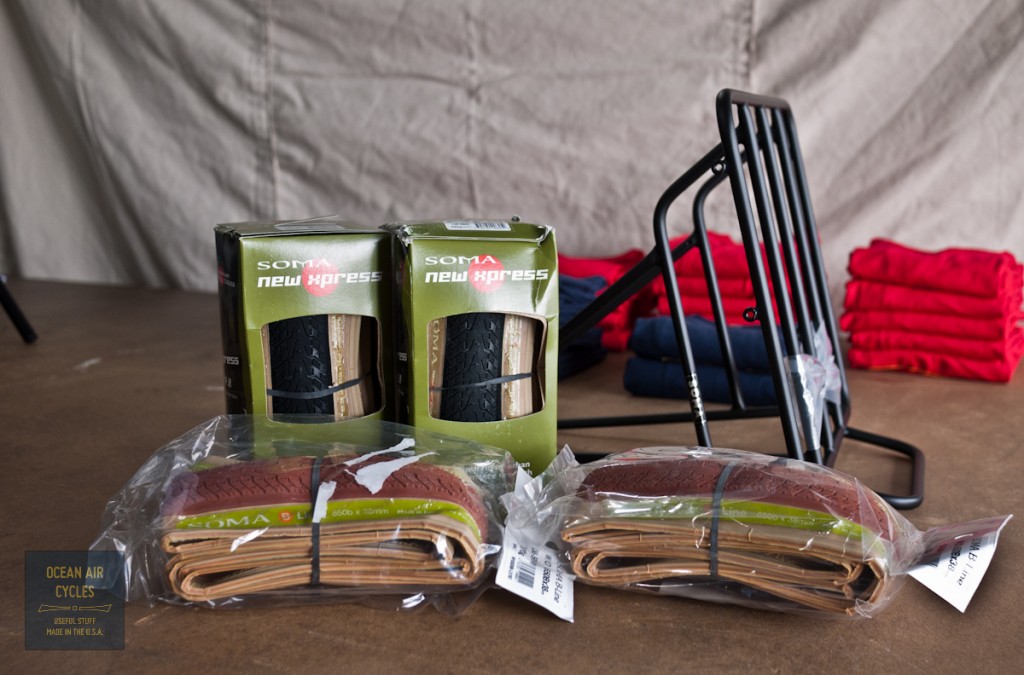
The SF expo is only 20 days away, time is burning off fast and there is a ton left to do. The fork that has been mismatched on the 57 is off at the local powder coater to get a new red finish. At least a week of waiting, and that is the bike that will be wired with lights. The yellow 51 is getting the porteur treatment. There will be new tires all around, and a thorough cleaning. The bits and pieces needed have been trickling in.
Somewhere in the creative part of my mind I have a fantasy of making some new bags too, we will see how that goes. Not to mention the stickers, cards, posters and other fun things that you likely need for a show.
I am still pushing the kickstarter thing closer to completion. This is Key as I intend to use it as the vehicle for delivery on the next round of Ramblers, and part of the pitch at the expo. If you have been thinking about getting one, this will be the time to do it.
It always seems like the mechanics have the beat up rides with all manner of maintenance put off, and a mish mash of parts keeping the bike on the road. I will admit I am no exception. Even with the Rambler it ends up a test bed for parts and ideas. I have been using the Nitto Mark's rack for a while with the Velo Orange fenders, and the two have been making all manner of noise, until this week,

Finally taking a few extra minutes to make a bracket, the added support for the front of the fender is a really big deal.
The catch? Now I can hear all the other noises coming from the bike. Most will be an easy fix, nothing that big, but I will put it off, in a couple of weeks the bike will be getting a serious cleaning for the SF bike expo anyway. Until then I get to enjoy the sounds of a bike that sees every day duty,
 You voted, right? I am sure you did.
 Then the hustle home to keep the prep for the SF Expo under way. I have had my idea and materials for the back drop on hand for a month now, but figured it would be a good thing to do a dry run before SF.
 I am pretty stoked with how it came out. The banner hangs ahead of the backdrop for a slight shadow box effect. the string disappears on the canvas. I need to make a couple of adjustments to keep it all tight, but I am happy with the plan.
Next up is cleaning up and re-cabling my blue Rambler. Decals will be coming in overnight, thursday is going to be a busy morning.


