New Secula Tail Light January 24 2014, 0 Comments
As part of the recent rebuild of my personal Rambler I included a new dynamo powered tail light. THe B&M Secula is looking to be one of the better options for 2014 and I wanted some first hand experience with set up and performance.
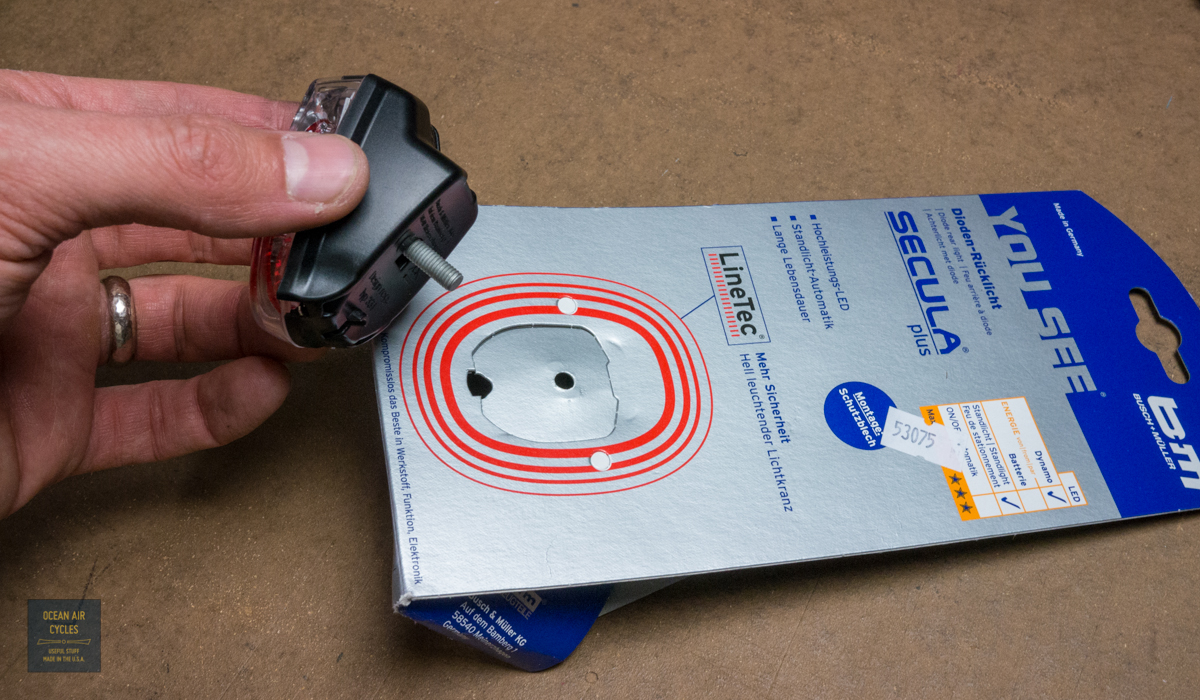
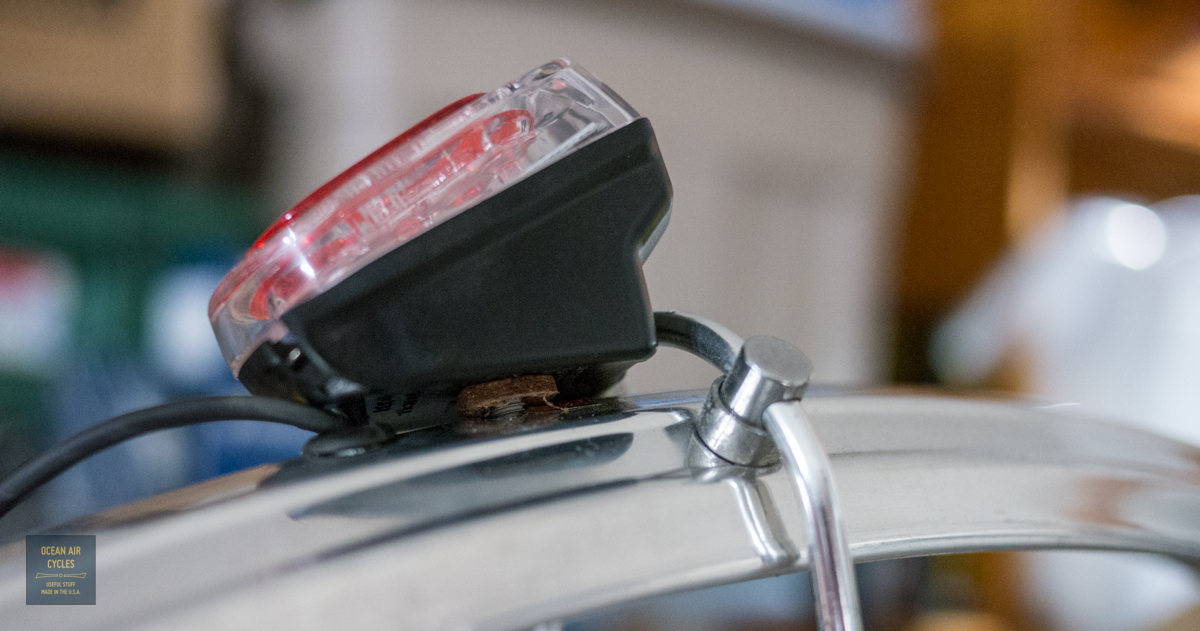
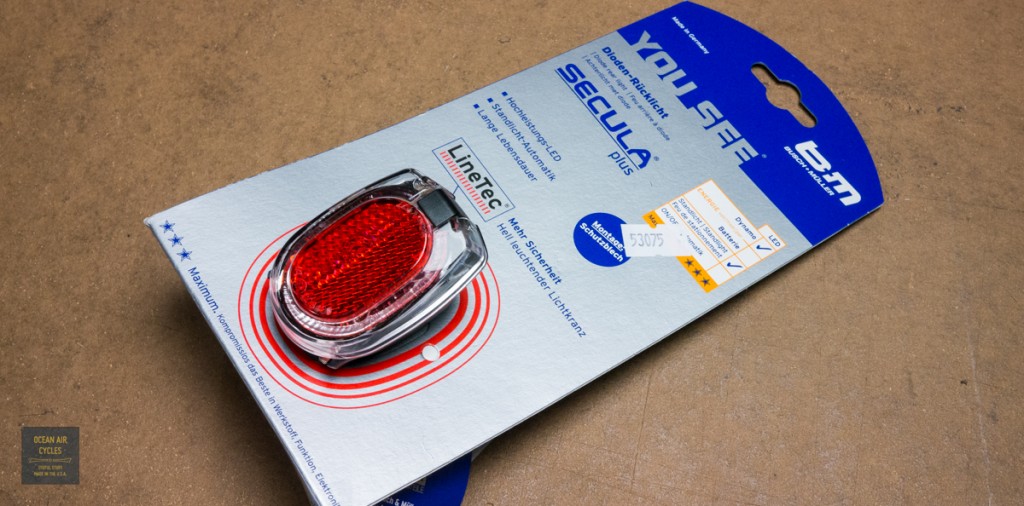 My previous go to light was the B&M Seculight, also a good performer and better than many battery powered lights on the Market. The Secula implements what B&M is calling LineTec. The LED shines into a thick prismatic lens distributing the light across a wider angle of view. Initial bench tests look quite promising, and I am looking forward to getting this out in the dark.
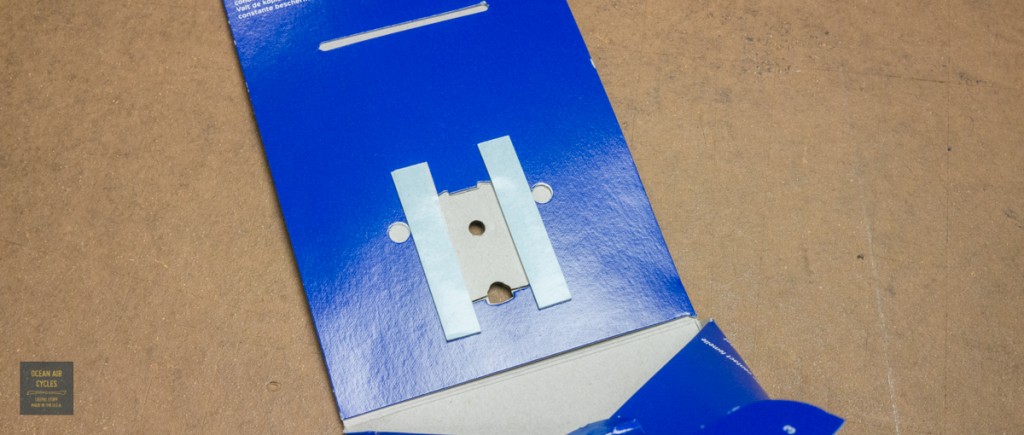
One thing I never noticed with the older B&M packaging was the direct intent to be used as a hole template for drilling the fender mounting location, this worked out nicely.
My previous go to light was the B&M Seculight, also a good performer and better than many battery powered lights on the Market. The Secula implements what B&M is calling LineTec. The LED shines into a thick prismatic lens distributing the light across a wider angle of view. Initial bench tests look quite promising, and I am looking forward to getting this out in the dark.
One thing I never noticed with the older B&M packaging was the direct intent to be used as a hole template for drilling the fender mounting location, this worked out nicely.

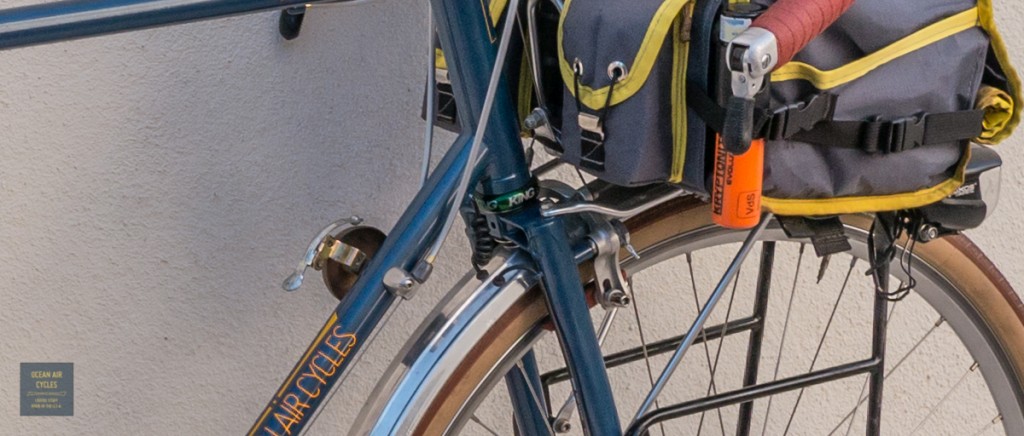
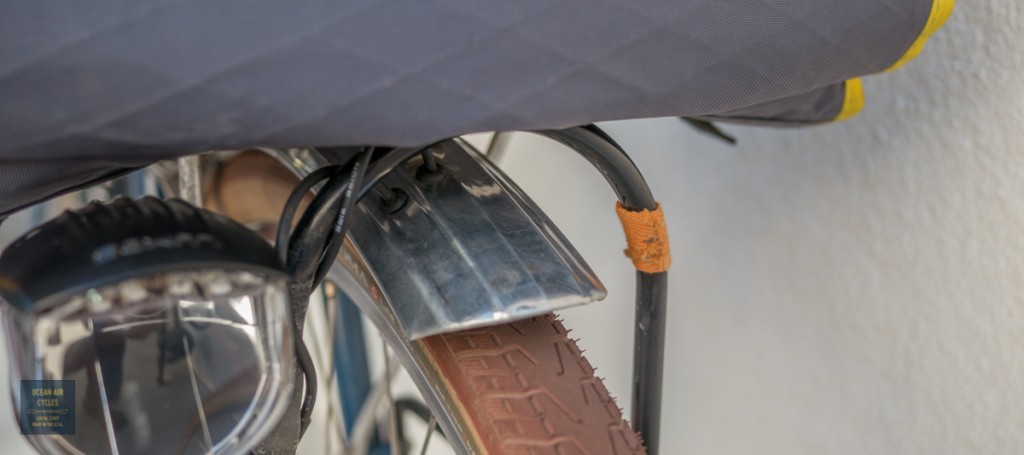
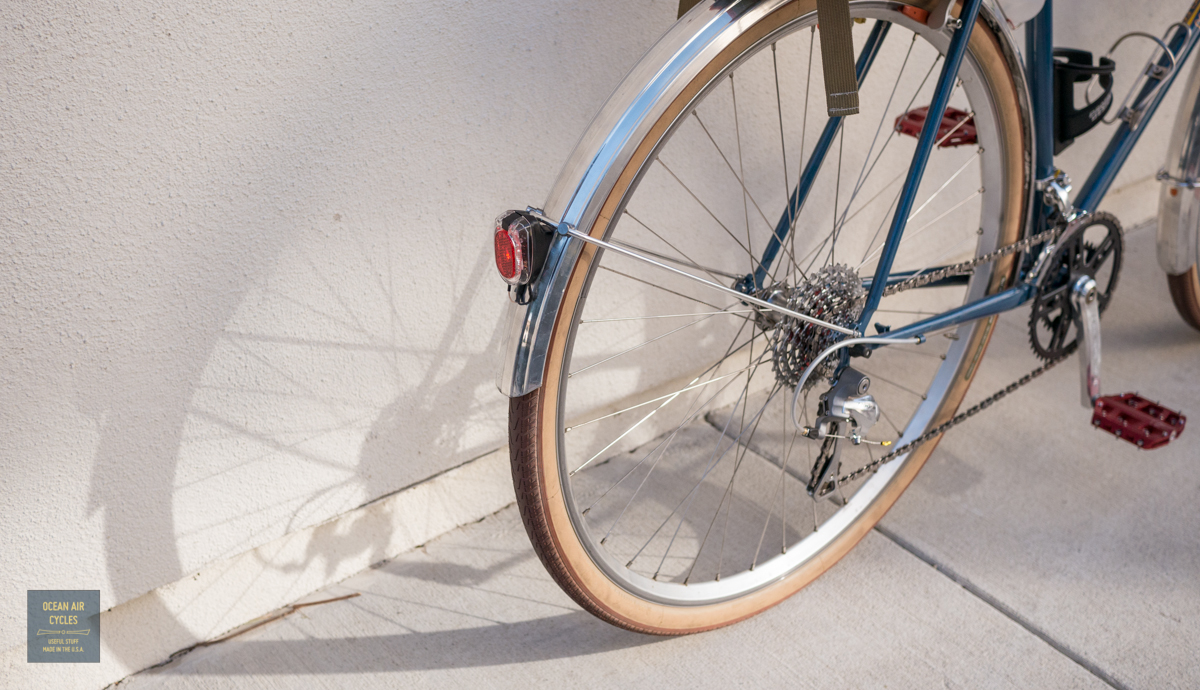
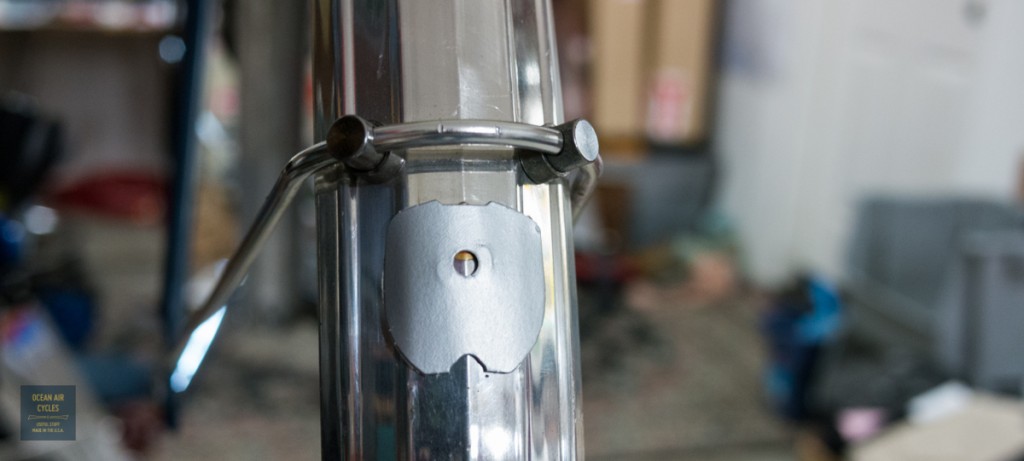 Everything went together well as a standard fender mounted tail light would. The only thing that bothered be a bit was the wire routing out of the fender to the bottom connection points. The design intent is to use a common hole for the alignment prong on the light base and the wire pass through the fender. As a rule I always use a relieve grommet on the holes to ensure the wire does not get cut over time. This led to a space conflict as well as the light base no longer following the curve of the fender. I resolved this by cutting a small section out of the relief grommet as well as shimming the mounting bolt with a round leather washer.
 It all pulled in flush and snug. I replaced the stock nut with a nylon lock nut and trimmed the bolt a few thready to maximize tire clearance. It all came together well.
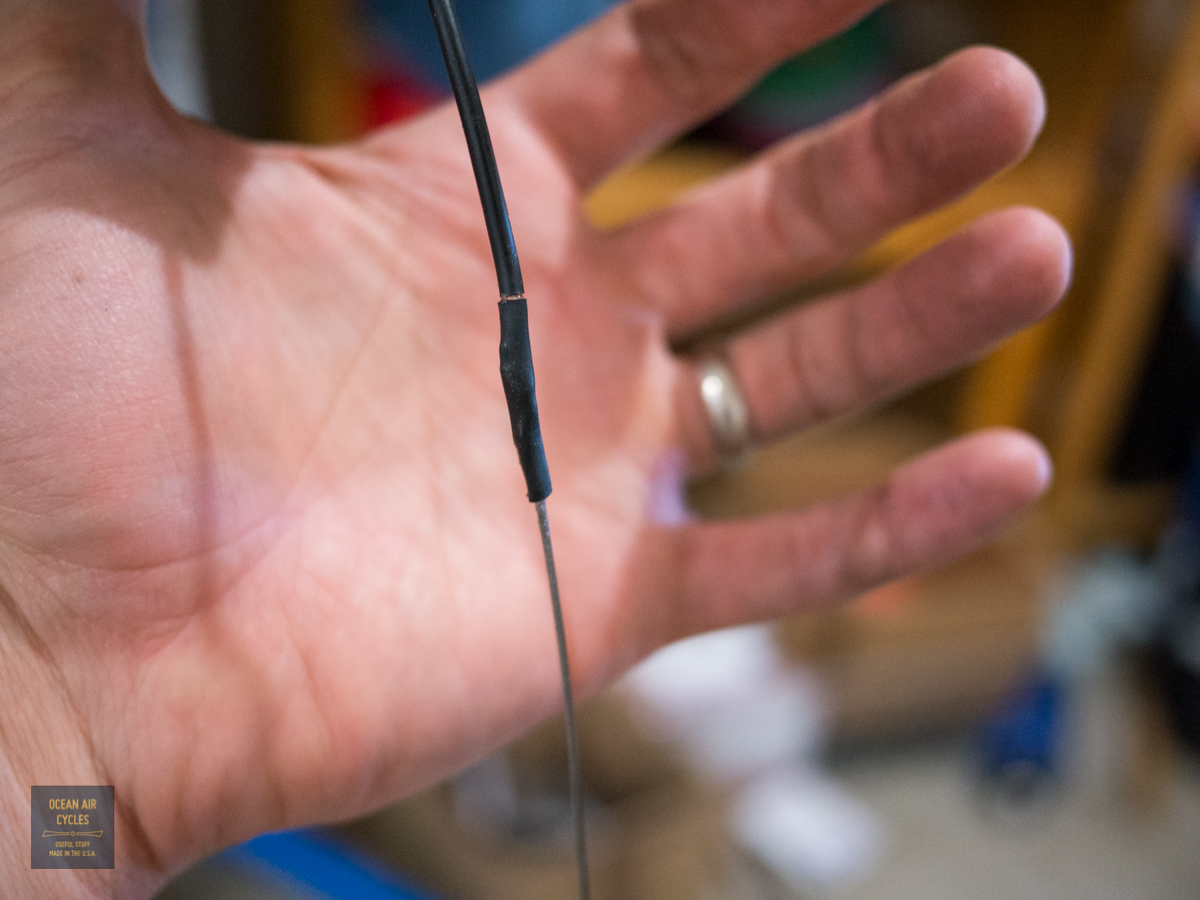
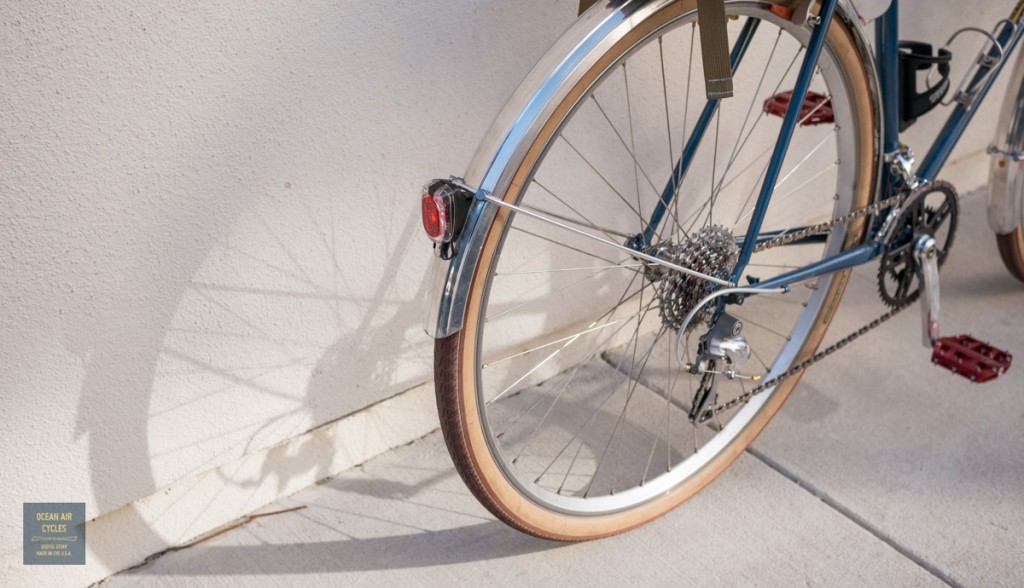 Through frame wiring was a breeze. I use an old derailer cable butt spliced to my dual conductor wire with the glue filled shrink wrap as a wire fish. All wire runs are through the frame or inside the fenders with the wires tucked into an edge. The exposed run from the seat tube to the rear fender is secured with a short piece of cloth tape. THe front fender had been previously drilled for a head light only. For this build I opted for a second set of holes. On new builds I generally use a larger hole and grommet to accommodate the two wires.

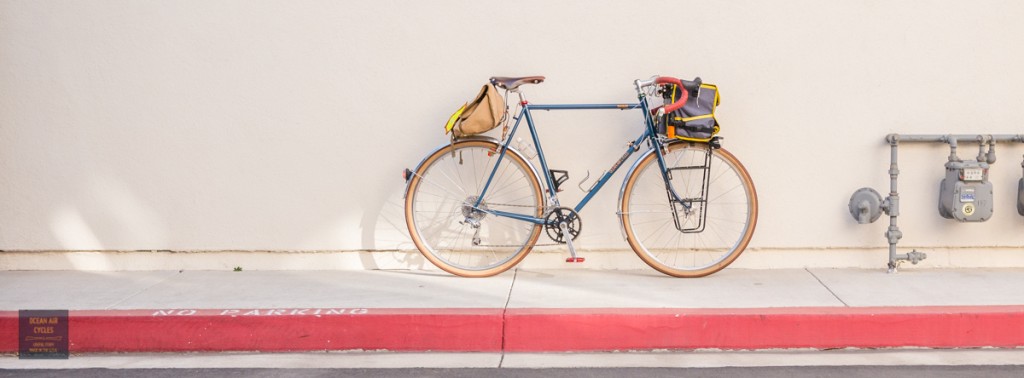
 My personal Rambler is finally reflecting the complete vision of what a Rambler is meant to be. There are a few details like the bottle cages to take care of still. My Rambler will also be the test bed for rack and bag projects, so matching there may never happen. Overall though I am thrilled with the way this build came together
 My previous go to light was the B&M Seculight, also a good performer and better than many battery powered lights on the Market. The Secula implements what B&M is calling LineTec. The LED shines into a thick prismatic lens distributing the light across a wider angle of view. Initial bench tests look quite promising, and I am looking forward to getting this out in the dark.
One thing I never noticed with the older B&M packaging was the direct intent to be used as a hole template for drilling the fender mounting location, this worked out nicely.
My previous go to light was the B&M Seculight, also a good performer and better than many battery powered lights on the Market. The Secula implements what B&M is calling LineTec. The LED shines into a thick prismatic lens distributing the light across a wider angle of view. Initial bench tests look quite promising, and I am looking forward to getting this out in the dark.
One thing I never noticed with the older B&M packaging was the direct intent to be used as a hole template for drilling the fender mounting location, this worked out nicely.

 Everything went together well as a standard fender mounted tail light would. The only thing that bothered be a bit was the wire routing out of the fender to the bottom connection points. The design intent is to use a common hole for the alignment prong on the light base and the wire pass through the fender. As a rule I always use a relieve grommet on the holes to ensure the wire does not get cut over time. This led to a space conflict as well as the light base no longer following the curve of the fender. I resolved this by cutting a small section out of the relief grommet as well as shimming the mounting bolt with a round leather washer.
 It all pulled in flush and snug. I replaced the stock nut with a nylon lock nut and trimmed the bolt a few thready to maximize tire clearance. It all came together well.
 Through frame wiring was a breeze. I use an old derailer cable butt spliced to my dual conductor wire with the glue filled shrink wrap as a wire fish. All wire runs are through the frame or inside the fenders with the wires tucked into an edge. The exposed run from the seat tube to the rear fender is secured with a short piece of cloth tape. THe front fender had been previously drilled for a head light only. For this build I opted for a second set of holes. On new builds I generally use a larger hole and grommet to accommodate the two wires.


 My personal Rambler is finally reflecting the complete vision of what a Rambler is meant to be. There are a few details like the bottle cages to take care of still. My Rambler will also be the test bed for rack and bag projects, so matching there may never happen. Overall though I am thrilled with the way this build came together
