I have had the Grab On Grips on the Roadeo for 3 months now and a follow-up review is due. The original review was favorable, and at this point I would still list them as a keepers.
They have been a nice touch of comfort on long cold descents. When underbiking, skinny tires on dirt, more time is spent on the brakes than would be comparable to a full suspension mountain bike. The little bit of added padding and grip eases the finger and hand fatigue on the multi thousand foot fire roads coming down from the mountains. Even with powerful brakes this can get tiring after 30 minutes or more of constant feathering of the brakes.
The durability is better than I expected for these simple thin foam rubber grips. Bumping into things, leaning against walls and a couple of minor lay downs in the dirt and no rips or tears yet. I still have my doubts that they will out live the bar tape, but for the couple of bucks they cost I would say it was money well spent.
I have enjoyed them through the cool winter, next follow-up will be after a few months of warm weather sweat.
There was a break in the weather we have been having on the coast, fog and mist, but rain is coming. Yesterday I hit the LBS and they had 45m wide Planet Bike fenders that would fit my Roadeo, kind of a shocker that anybody sells fenders here in SoCal, let alone wide ones. I wanted to get these to fit with my 33.333 wide Jack Brown tires, but that was not going to happen so I relented and swapped the 29mm Roughy Toughy tires onto the bike.
These went on super easy compared to both SKS and metal fenders I have put on in the past. The only modification required was bending the mounting tab in the front to clear the headset and filing the slot for the brake bridge a little deeper to improve tire clearance.
The limiting factors for clearance on this bike are the brake selection and the placement of the rear brake bridge. I went with the Shimano 57mm reach calipers for the improved stopping power of other brakes at this price point. I would love to have a set of the new Paul Racer M brakes, but they are out of budget for this year. That being said, I was still able to get a 45mm fender into the caliper with minimal fender squeeze. There is plenty of room for the 29mm tires. The shape of the brake caliper below the mounting bolt is where the space constraints start. The Shimano caliper is very meaty in this area and eats up almost 4mm of space. When this combines with the fixed arc of a plastic fender you lose tire clearance quick.
End of the story, they work and I will be out in the weather next week. Enjoying the sunshine for a day, and hoping it will last
I can not belive I waited this long to make one of these. It has exceeded my expectations and taught me what I would do to make some minor tweaks for a final product.
Bag Specifications: Frame bag with No.8 Canvas duck side panels, Jr Ballistic perimeter strip for abrasion resistance, multi point reinforced hook and loop connections, waterproof zipper with double pull and storm flap. Port for rear tail light battery wire.
Dimensions: 22" long x 6" high x 2" wide (56cm x 15cm x 5cm)
Volume: 264 in³ (4.333 L)
The inspiration for this bag came from a synergy of the designs used on Swiss Army bikes, the designs coming out of the ultralight bikepacking work, and the traditional designs of the french touring bags. While the volume is not particularly large, the design and placement make use of the previously empty space to carry things that might not fit as easily in traditional bags, e.g. hydration bladders, tripod or tent poles.
On this weekend's mixed terrain ride I carried a 2L Platypus water bag, Gorillapod mini tripod for the camera, wind breaker, knee warmers and a spare hat with room left over in the bag. The centralization of the load had little detrimental affect on handling. Both steep climbs and descents were not different from when riding with similar loads in larger bags at the front and rear, if any thing this was an improvement. The largest gain was in the increased capacity and ability to better arrange gear for access during the ride. The multiple attachment points kept the bag stable with no sway of the bag. The bulk of the load is supported by the canvas reinforced 2" hook and loop closure at the top tube:
The overall carrying capacity has even shocked me, as the water bag measured out at 7" wide and 3" thick when full, but was easily swallowed and zipped into the bag
Detail of the wiring port for my tail light battery pack.
Details like this can be customized to suit different lighting arrangements, ports for hydration hoses, etc. Likewise location and number of zippers or internal pockets and dividers could also be added.
I see these bags filling a niche for the self supported distance road rider, light weight touring, and transportational cyclists looking for that extra bit of space without having to resort to resort to full rack and panniers.
It is my intent to offer frame bags of a similar design for sale by custom order in the near future. If interested please contact me through the Contact page with the "Custom Frame Bag" in the subject line.
I finished it, the one in the middle, tonight in time for tomorrow's Dirt Mullholand ride, lets hope it holds together ;) just kidding
More detailed report and description to follow, but a big thank you to Ron at Acorn for pointers here and there, the guys at bikepacking,net and backpackinglight.com MYOG forums.
In Short for those who have never seen a bag like this, it is my take on the what the ultra light bikepacking guys are doing with a twist of Rivendell and Acorn. It just happens to match the front and rear Acorn bags near perfectly.
The seasonal head cold - flu ran through the house hard in the last 10 days, but there is now light at th end of the tunnel. I only made two rides up the stret 5 blocks to the post office in the last 10 days. Needless to say average productivity was pretty low. I made progress with my test patterns and prototyping.
The goal is to have a couple of things completed for the SoCal Rivendell Dirt Mull Holland Ride. Working the time in at the bench and in the saddle to get my legs back is going to be a squeeze.
I did get one big project completed though:
My daughter Anna's first Christmas is going to be awsome
I used to lug around a "lightweight" full size tripod. With creative use of bungee chords I could get it into a Caradice Nelson, but even then it was dicey on the trails. And then it hit me that I had the Gorillapod in the tool kit, why was I not using it more. One small bungee and I was in action.
I have the medium SLR sold as a kit by B&H with the small sunpak ballhead. It is quick, easy and light - I love it. While not as tall as the full size the added versatility is huge. There are somethings a regular tripod just cannot do.
Also, much like the smaller size of my Micro 4/3 camera kit, I use it more because it is easier to carry and therefore with me.
It was only a matter of time now that I bragged on the Quikchinger the other day. Today was the first day back on the bike after pushing the short version of the flu out the door. The Quikchainger just makes things so much easier, and it was pretty simple to figure out what caused the flat as I had rolled up to the stop sign.
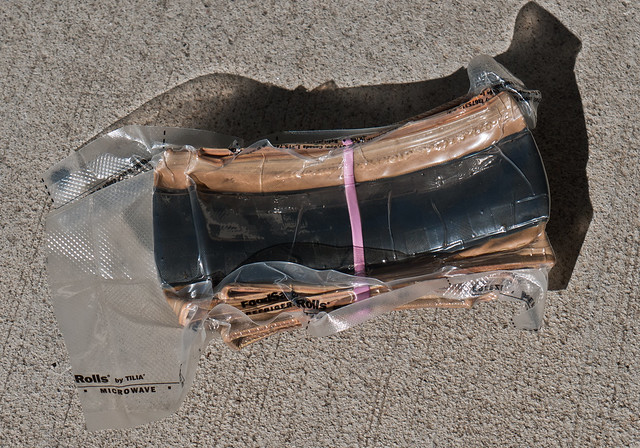
One of those Eurekea! moments when you are trying to figure out how to lug a bunch of stuff with just a little bag space, and one of the better things I have used the food vac for over the last decade, aside for food stuff of corse.
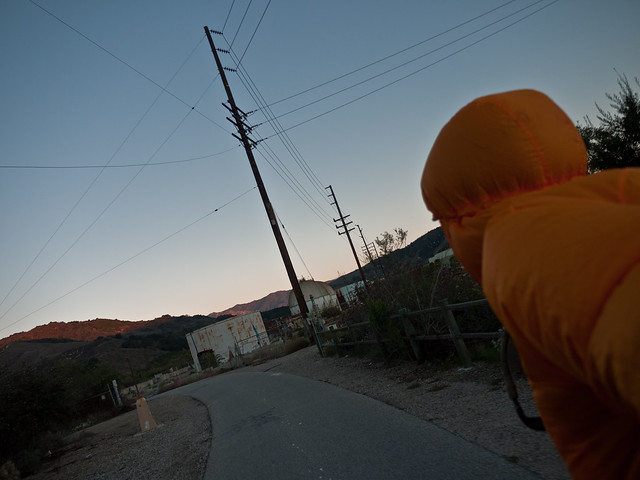
It has been the start of our cold weather this week, and some adjustments are still being made in the layering system. I love my Patagonia Houdini that my wife bought me for my birthday this year. It is the perfect super lightweight shell for knocking the edge off of the wind chill. The whole thing zips into its own pocket and ends up about the size of my fist, it weighs next to nothing and is almost always by or on my bike. The downside, as evidenced by this panda portrait on my way up into the hills, the thing is a parachute. The drawcord system keeps it pretty tight around the face, but looking at this picture I know why it felt like I had a parachute on, not just a side effect of the 43deg chill. I have been keeping the hood rolled up into a little ball in the back, but this morning my ears were freezing. The newest version has the hood zip into the collar, but in true patagonia fashion is now being offered in shades of dirt, not the best for playing in traffic.
I will continue to love and wear this jacket, but wear something warmer around my ears on mornings like this. I am curios if others have found a better cycling specific wind jacket that is super lightweight as well?
-3") They have been a nice touch of comfort on long cold descents. When underbiking, skinny tires on dirt, more time is spent on the brakes than would be comparable to a full suspension mountain bike. The little bit of added padding and grip eases the finger and hand fatigue on the multi thousand foot fire roads coming down from the mountains. Even with powerful brakes this can get tiring after 30 minutes or more of constant feathering of the brakes.
The durability is better than I expected for these simple thin foam rubber grips. Bumping into things, leaning against walls and a couple of minor lay downs in the dirt and no rips or tears yet. I still have my doubts that they will out live the bar tape, but for the couple of bucks they cost I would say it was money well spent.
I have enjoyed them through the cool winter, next follow-up will be after a few months of warm weather sweat.
They have been a nice touch of comfort on long cold descents. When underbiking, skinny tires on dirt, more time is spent on the brakes than would be comparable to a full suspension mountain bike. The little bit of added padding and grip eases the finger and hand fatigue on the multi thousand foot fire roads coming down from the mountains. Even with powerful brakes this can get tiring after 30 minutes or more of constant feathering of the brakes.
The durability is better than I expected for these simple thin foam rubber grips. Bumping into things, leaning against walls and a couple of minor lay downs in the dirt and no rips or tears yet. I still have my doubts that they will out live the bar tape, but for the couple of bucks they cost I would say it was money well spent.
I have enjoyed them through the cool winter, next follow-up will be after a few months of warm weather sweat.